It seems that every time I see any garment featured for spring, I see a bell shaped sleeve. The new thing I guess. The sleeve shape has been used throughout the ages, but I think it does look rather fresh and fun.
The sleeve pictured below is quite a large, but would be fun on a jacket or a floaty top.


The Bell Shaped Sleeve
The sleeve is quite easy to do.
Begin with your straight sleeve pattern.

Determine where you would like the bell shape to begin. In the pictures above, the bells begin approximately at the elbow.
Square a line across and be sure to add notches so that the bottom portion of the sleeve can easily be matched back to the upper portion of the sleeve once the bell shape has been drafted.

Cut the lower section away from the upper portion of the sleeve. More than likely, your sleeve will be tapered at the wrist. Square a line down to the wrist section from the elbow line.

Divide the lower portion of the sleeve into equal sections.
Be sure to number each section.

Cut from the wrist to the elbow line, but not through the elbow line.
Draw a guideline on your paper.
Determine how wide you would like your bell to be. For a fairly small bell, spread each section 1". Of course, the bigger the bell, the more you will spread each section.
Begin with the middle section and spread it equally on either side of the guideline. If you are spreading each section 1", you would spread 1/2" on either side of the guideline which will result in a 1" spread.
Now spread your determined amount between each section. For this exercise, each section should be spread equally. In another post, I will show you how to draft a more stylized bell shape where the sections will not be spread exactly the same all the way around the bell shape.

Connect between the sections with a smooth line to develop your final pattern. The guideline will become your grainline. Be sure to transfer the notches that were established before the original sleeve was cut apart.

And that's just how easy a bell shaped sleeve is.
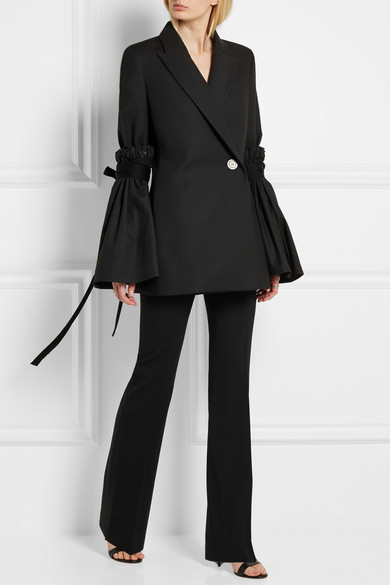
I found a couple of sleeves that are very stylized. I love how each looks. It would be easy to think that since each has an elastic top that they are just a rectangle. But I don't think so. I think that each of these sleeves use the same principle.


I love these bell sleeves so much! My only complaint is the fact that wearing a jacket over this type of sleeves is not always practical. There's the option of wearing a vest instead,... I may refer to this tutorial in the future since I like this style and I haven't found any commercial pattern in my stash featuring this type of sleeve.
ReplyDeleteThe other option would be to put the sleeves on a jacket and wear a regular sleeve underneath. Whatever you do will be gorgeous I'm sure :)
DeleteOr you could wear a cape . . . a shawl/stole might be TOO much drama!
DeleteBoth great options for spring!
DeleteWow, Rhonda, those sleeves are beautiful. Thank you so much for sharing this tutorial. I love these kind of sleeves and can't wait to give this a go. Xx
ReplyDeleteThis might be fun over one of the stage outfits that you do.
DeleteAs always, thank you for the tutorial. I love seeing these sleeves, but afraid they are so impractical for me. I'd be dipping them in everything from my soup to the dog water bowl! LOL
ReplyDeleteI'm rather famous for catching things on fire. Caught a menu on fire one night while holding it over a candle since I forgot my glasses. I'll have to keep this in mind when wearing this sleeve!!!!
DeleteBeautiful sleeves and a nice tutorial. But I'm just going to admire them. Love them on other people but they would have me hunting for rubber bands to confine the bells after just a few minutes.
DeleteRecently saw a beautiful black formal tuxedo jacket in a shop window with bell sleeves. Have to say they seemed to feminise the silhouette. Thanks for the tutorial ;)
ReplyDeleteI do love the romantic look of bell sleeves .... thank you for sharing this.
ReplyDeleteI love this post :-)
ReplyDeleteBeautyful sleeves :-)
Enjoy your Sunday :-)
I actually like this look, so retro.
ReplyDeleteLove it. So hip right now.
ReplyDeletespeaking of hips... Do you think bell sleeves add visual weight?
ReplyDeleteI am knitting a sweater now that calls for bell sleeves. I'm not sure about it. They do not bell as muck as what you show.
Whew, I think I would probably venture away from a bell sleeve in a knitted sweater for a couple of reasons. First of all, so much time goes into knitting the sweater and I'm afraid that you may lose interest in the sweater. Also, depending on the type of yearn, it could look a little heavy. But a thought tha just occurred to me is that if you don't like the bell shape, you can always add elastic which would also make for a very nice look. Would work too if you like the sleeve now and then grow tired of it. Maybe if you just knot one and see how you like it before knitting the other sleeve. Wish I was more help.
DeleteHi
ReplyDeleteThank you.
You saved me from messing about with a make shift compass.
Your method is easier and has got rid of some of my stress.
Thanks again.