f
Showing posts with label sleeves. Show all posts

Tuesday, March 9, 2021

Fun with Fashion/Just Letting It Happen

One of the best things about being able to sew is being able to create a truly unique garment. A few years ago, I went to the Lincoln Park Zoo Ball in Chicago. It is an absolutely spectacular event, and they raise huge amounts of money for the zoo. I think it's 1 of only 3 zoos in the United States that's still free. Anyway, I was shocked that evening as 4, yes 4!!! women had on the exact same gown. Talk about horror of horrors!!! Well, in the overall scope of things, if this is your worst horror, it really isn't all that bad ;), but I'm sure those ladies were not happy :/

I purchased the fun faces in the dark fabric that I used for the skirt below some time ago from Mood Fabrics. Once I had the fabric, I thought it would make a fun skirt. I can't remember how much I purchased, but it wasn't a lot, so I ended up piecing it a tiny bit on the side seam at the waist. Who's going to ever see that, right?!! The piecing ended up disappearing into the folds of the gathers, so no one will ever be the wiser...except you!!!  


Once I got the skirt together, it felt a little short, so I purchased the black cotton to make a border along the hem. I cut it on the bias and it worked out perfectly, except that it felt a little stark. What to do? As I looked at the fabric, what jumped out at me were the eyelashes on the faces. Hmmm...why not embroider eyelashes on the border? I decided to keep them somewhat free form, and form a scallop like design. I'm quite happy with the outcome :)


I felt that the skirt needed a lining, and in my quest to try and use what I have, I decided to use the animal print silk. I decided that if it wasn't the best, hey it's lining!!! But, once I got it together, I liked it so much that I decided to do a matching blouse.     


Since I used ALL of my fabric to make the skirt, and had nothing left for a waistband, I decided to just do a fold over elastic. 


For the blouse, I had this pattern, and I really liked the sleeves. It's a nice basic pattern.


I decided that I wanted a cummerbund type of a detail, so I cut 2 very long strips, and put a layer of fusi-knit inside to give the silk a little stability. The ends of the strips were cut on an angle and attached at the side seam so that they could wrap around the waist.


And here's the final result!


Here's a little video to give you an idea of how the outfit moves.


This outfit was definitely a piece that evolved. It was not planned out from the beginning, but I think that's part of the fun of creating, just let it happen :)

Wishing you a creatively wonderful day :)
 Rhonda


Share this PostPin ThisShare on TumblrShare on Google PlusEmail This

Wednesday, August 19, 2020

Sleeves On Saturdays Revisited/The Square Shoulder Sleeve

 An interesting comment was recently left on an Instagram post, you always look so happy. What's interesting is that some days, that is so very far from how I actually feel. I replied that a smile is always a good thing. 

A few years ago, I learned a valuable lesson. A dear friend of mine was going through a very difficult time. His brother had committed suicide, and his suicide cost my friend pretty much his entire life savings. He had leveraged everything in order to try and save his brother. Truly a heartbreaking story. But, what I found interesting is that even at his lowest moments, if he was asked how he was doing, his reply was, "wonderful, just wonderful." The saying of "time heals all wounds" is sadly just not true. I know that my friend still wrestles with the why of his brother's death. He always wears a Harley Davidson t-shirt that belonged to his brother under his shirt when he attends church. He told me that it's his way of taking his brother to church with him. 

Watching him go through this incredibly difficult time, and seeing how he chose to deal with it, taught me about speaking faith over my days, and the situations that some days hold. His way of speaking faith was to simply reply, wonderful, when life was anything but. When I am asked how I am doing, my reply has become, "I'm good." It's not grammatically correct(so what!), but it's my way of speaking faith over the things that I may be dealing with that make my heart ache.

_______________________________________________________

As I shared, my little 1 year challenge is going well. I have yet to miss a day of wearing a garment that I made, and posting pictures. I have recently started doing short videos as I think it enhances the garment. It's always nice to really see how a garment fits, and moves.

I originally posted the 2 tops that I am sharing today in 2014!!! Hard to believe that it's been 6 years ago. And I'm still wearing them! A little note about clothing care...I put very few things in the dryer. My laundry room usually looks like a yard sale with all of my things hanging to dry. But, the heat of the dryer can be very destructive to fibers. 

The pattern that I used for both tops is a free pattern from Deer And Doe, the Plantain T-Shirt. You can find it HERE.

The red striped top was the 3rd sleeve that I did in the squared shoulder sleeve series. With this one, I accented the seams in the sleeve with a strip of red fabric, and repeated the red fabric around the neckline, and the hemline of both the sleeves and the top. You can find my post on this top HERE 

I was out at the airport yesterday. Whenever I get the chance, I am going to pose on the stairs of a jet!!! 


The post on this sleeve can be found HERE. The difference with this sleeve and the 1 above is that the center panel on the red sleeve is rounded, and the center panel of the black is squared in the traditional manner of drafting the sleeve. With this top, to add a little extra interest, I cut the stripe on the bias and used that to bind the neckline and the hemline.   


Hope you enjoy the video :) 


By the way, you can always easily access my Sleeves On Saturdays by clicking on the tab at the top of the blog page.

I hope that regardless of what's happening in your life, you will be able to join me and say, "I'm good." You may not feel good in the moment, but you are making a declaration that good is coming. And, it is :)
Rhonda


Share this PostPin ThisShare on TumblrShare on Google PlusEmail This

Friday, April 27, 2018

Sleeves On Saturdays Hits The Road

Last Saturday I had the the opportunity to spend the day teaching a class on sleeve design. And guess what?!!!, I learned something too! Actually, as we were going through the drafting of a particular sleeve, I realized other design possibilities, and I can't wait to give it a try. But today, I wanted to share a few of the pieces I prepared for the class. You've seen them before, but I think it's always fun to see them in other fabrics and maybe with a little bit of a different twist. 

For all of the tops that I put together, I used Londa's Creative Threads Terrific T pattern. This pattern makes a wonderful block to use as a foundation for any design you might like to do in knits. There is a darted and non-darted version.


What I suggest is to make the top up and adjust the fitting. Once you are happy with the fit, remove all of the seam allowances, and then transfer the pattern to poster board. The reason for removing the seam allowances is that it can become quite confusing once you have done your design as to where seam allowance should be added, and where it should not. So if you remove the seams from your block, once you have made design changes, you'll know to add seam allowance to each seam. No confusion :)
  
This is going to be my go to top for the summer. I just love the design and the ease of wear. With this top, I did a boat neck neckline, front and back. 


This was the original top I did for the blog. You can find all of the instructions HERE. With the original top, I did a v-neck opening in the back. 


This is one of my favorites, the Draped Cowl Sleeve. In an upcoming post, I will show you how I drafted the neckline of this top. Once again, this is the Terrific T from Londa's Creative Threads.  


This is the original top that I drafted. Take note that although the neckline is a cowl, it is quite different from the one I did above. This one has an asymmetrical drape, and is much more fitted through the bodice. A bit more complicated to draft than the top above. You can find the original post and all of the instructions for drafting the sleeve HERE


The top below is not finished as I haven't quite decided what I want to do with the neckline. While I love the fabric I used, it wasn't quite the best for showing the design of the sleeve. The fabric is a washable merino wool that I purchased at Fabrications in Michigan. I am in love with washable merino wool! It feels like silk in your hand. So lovely. 
The front of the sleeve does not show the design.


All of the design takes place at the back of the arm.


This is a picture from the original sleeve that I did. Here you get a better idea. It's a lovely sleeve to wear, and such fun to draft. You can see the original post HERE with all the drafting instructions.


I began the class by telling everyone that I believe everything is easy, you just need to know how, and I was there to show them how :) What I loved most was at the end of the day, a number of the ladies came up and said, "Your right! It all looks so complicated, but it really is easy once you know how." A successful day! 

Tomorrow I will be attending the class on making leather sneakers at the Chicago School of  Shoemaking and Leather Arts. I'll give you a peek at my day in my next post. Always fun to learn something new :)
Rhonda


Share this PostPin ThisShare on TumblrShare on Google PlusEmail This

Wednesday, March 14, 2018

Sleeves, Sleeves, Sleeves...It's a Workshop

Getting "back on the horse" can apply to so many aspects of our lives. I went skiing on Monday. It was a gorgeous day. The mountain was jammed with people as it is spring break for many across the country. I was coming down an intermediate run, and in the distance I saw a ski instructor with a very large class traversing the hill from a beginner run. I slowed up to give them time to pass. Evidently, there were some stragglers who had not been paying attention and suddenly realized that the class had left them behind. With that, one of the members of the class made a sudden turn, right in front of me. In avoiding her, I went off of the trail and flew into the trees. I knew I was going to hit hard, but luckily for me, the snow was deep, I was caught just inches from my head slamming into the tree. As it was, I had to dig myself out of a hole that was over knee deep. I must have fallen 5 more times just trying to dig myself out. I'm heading out today to get back on that proverbial horse :/

SLEEVES, SLEEVES, SLEEVES!!!

I am so very excited about a class that I will be teaching in Chicago on Saturday, April 21, 2018. It will be an entire day of drafting sleeves!!! My favorite thing :)

Here's all of the information; 


As you can see, you do not need to be an American Sewing Guild member to join the class, but it's a great group of ladies, so why not join? :) 

Supplies needed for the class;

*1 roll of white paper
*18” clear ruler
*1 black pen
*1 red pen ( a Sharpie will be fine. It just needs to have a fine point)
*Paper scissors
*Front and back bodice from a t-shirt pattern
*Sleeve from a t-shirt pattern
*scotch tape
*pins

I purchase my paper from an office supply store. It's called banner paper and it comes in a 30" wide, by 52 ft. long roll. I am a big fan of drafting with white paper as it's easy to see through when layering 1 pattern piece over another. 

It's important that the t-shirt pattern be a basic pattern. You can find a great pattern at Londa's Creative Sewing. The pattern used for drafting should have the basic round neckline, and a straight sleeve. For the drafting exercises, the sleeve, as well as the front and back bodice patterns need to have all seam allowances removed, and the pattern transferred to poster board. Having a hard pattern to trace around makes all the difference in the world.  

If you are interested in taking the class, you can find all of the info as well as links to the registration form HERE

Hope to see you in Chicago!!!
Rhonda    


Share this PostPin ThisShare on TumblrShare on Google PlusEmail This

Wednesday, September 27, 2017

The Wednesday Showcase/Simply Spectacular Sleeves

I am a happy girl this morning, the heatwave has broken, the air conditioner is off, and my doors and windows have flung open!!! It's going to be a glorious day :) 

There was a commercial some time ago, I have no idea what it was for, so obviously, not a successful commercial. Anyway, the husband came to his wife and told her that he had seen everything there was to see on the internet. You know, now that I think about it, I think the commercial was for a high speed internet connection. Remember the days when it took FOREEEVER for anything to download...and we were actually excited when a picture would finally come through? ;) 

As we all know, the internet is bigger than any of us could ever exhaust. That's one of the reasons that I do enjoy putting together the Wednesday Showcase posts. I well remember the days that no one read my blog, and how frustrating it was. So all the more that I like to try and share a little internet joy with others and showcase what others are doing.

This morning the post is just a little different, as I have already showcased Cennetta of The Mahogany Stylist. I also did an interview with her as I thought you would enjoy hearing about her blogging journey. You can see it HERE

One of the many things I love about Cennetta is that she has a thirst for learning. She recently did a post about her upcoming plans which included this array of sleeves from my Sleeves On Saturdays series.


At this point. she has completed 2, the draped cowl sleeve and the shirred wrist sleeve. 

Her first endeavor was the sleeve below. You can see her post HERE. The velvet makes for an excellent choice of fabrics as it has such a lovely drape.
  

This was her second. Stunning!


Here she shows her drafting process. I had told her that she could get a deeper drape by spreading the sleeve more. If you look closely, she added to the sides of the cap. This will give more volume, but in order to get a deeper drape, the sleeve will need to be spread more.  


I think she did a wonderful job. I have not seen her tops yet, but hopefully I will soon. I have a feeling that her sister is going to try and nab them ;) It's a wonderful compliment when someone will actually beg for the clothes that you've made!!!

Cennetta has also made the shirred wrist sleeve. She has not posted it on her blog yet, but you can see it HERE and HERE on Instagram.   

If by chance you are coming to the Original Sewing and Quilting Expo in Schaumburg or Fredricksburg, I will be doing a sleeve lecture on Friday morning in Schaumburg and on Friday afternoon October 6, 2017 in Fredricksburg.  

In the meantime, pop over to Cennetta's blog, say hi and see all the wonderful things she is up to. 


Share this PostPin ThisShare on TumblrShare on Google PlusEmail This

Saturday, November 26, 2016

Sleeves On Saturdays/A Complete Directory

The Sleeves On Saturdays directory tab is complete!!! I finally sat down and finished the page. I'm so happy :) Now you can easily click on the Sleeves On Saturdays tab at the top of the blog, scroll through and find a sleeve along with the link to the blog post. If you would like, just click HERE as well :) 

In the directory, you'll find links to 36 sleeves drafting tutorials. 


Lots of fun styles to try :)


I would like to thank Bev of sdBev for giving me the nudge I needed to finally get the page finished. I would also like to thank Joy of Joyful Expressions who also nudged me by wishing she could help. So nice :) 

So....if you find a little time to spare, click on the link and look to your hearts content!


Share this PostPin ThisShare on TumblrShare on Google PlusEmail This

Saturday, April 30, 2016

Sleeves On Saturdays/Stylized Gathered Sleeve

I have had this sleeve in my file for quite some time. It's such a pretty sleeve and would look so nice on everything from a t-shirt to a dress. So, very versatile. I had found a full length picture of the dress, but for the life of me, I was unable to find it this morning. I'm only giving you the drafting instructions for the sleeve today. Next Saturday I'll be back with a sample of the sleeve along with a sample of the Bell Shaped Sleeve that I did HERE. Hopefully I will have found my picture of the entire gown by then!


I'm calling this sleeve;

The Stylized Gathered Sleeve

It's really quite easy to do, but it does have a number of steps. So here we go!

Begin with a straight sleeve pattern.


Determine the length of your sleeve.


Draw in the diagonal style lines. The lines radiate from the notch points on the front and back of the sleeve.


The gathering that goes across the sleeve begins approximately 1 1/2" from the top edge of the sleeve. The gathered area is approximately 4" wide. Place notches 1 1/2" down from the top of the sleeve and then 4" down from the top notch. Use a single notch on the front and double notches on the back. 


Cut the side sections away from the center section.
Divide the gathered area into 4 equal sections. Be sure to number each section of the sleeve.


Draw a guideline on a piece of paper. 
Cut each section apart and spread evenly matching the center grainline to the guideline.
The spread between each section should be approximately 1".


The pattern for the center gathered area has now been established. Be sure to transfer the notches so that you will be able to perfectly match the enter section to the side sections of the sleeve.


Now to establish the gathered cap. 
We do not want to gather the entire cap, only the center section.
Begin by squaring a line across from the top notches of the center section that will be gathered. 
From the center of the sleeve cap, measure over approximately 1 1/2" to 2" on either side of the cap. Draw a diagonal line down to the squared line that we have just established. 


Divide the center section into 3 sections on either side of the center of the cap. Be sure to number each section as you see below.


To spread the cap and establish the gathering, begin by cutting from the top of the cap on the center line to the squared line and then across to either side of the sleeve. When cutting to the side of the sleeve, be careful to cut to the edge but not through.
Now cut from the top of the cap to the squared line of each section. 
Draw a guideline line on a new piece of paper and match the grainline of the sleeve to the new guideline. 
Spread the sections of the sleeve as equally as you can. Notice that the sleeve cap rises at the squared line that was established.


The rise in the cap that happens when the cap is spread will cause the top of the cap to be higher. You may want to raise the cap a little more. Do this by adding 1" at the center of the cap and blending back to where the beginning of the spread began.


The final pattern for the sleeve.


Be sure to establish the notches on the cap of the sleeve. The notches that are on the top of the cap are for the gathering. As you can see below,  the notches should be where the gathering was established. 


Just follow the steps, and the sleeve should come together easily.
Have fun!
Rhonda


Share this PostPin ThisShare on TumblrShare on Google PlusEmail This

Saturday, April 2, 2016

Sleeves On Saturdays/Bell Shaped Sleeve

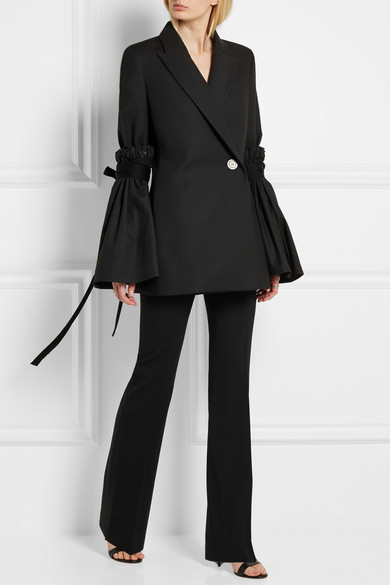
It seems that every time I see any garment featured for spring, I see a bell shaped sleeve. The new thing I guess. The sleeve shape has been used throughout the ages, but I think it does look rather fresh and fun.
The sleeve pictured below is quite a large, but would be fun on a jacket or a floaty top.  

I love how the one below was accented with a piece of lace at the intersection between the top of the sleeve and the bell, and then trimmed with the lace. Very pretty and feminine.


The Bell Shaped Sleeve

The sleeve is quite easy to do.
Begin with your straight sleeve pattern.


Determine where you would like the bell shape to begin. In the pictures above, the bells begin approximately at the elbow.
Square a line across and be sure to add notches so that the bottom portion of the sleeve can easily be matched back to the upper portion of the sleeve once the bell shape has been drafted.


Cut the lower section away from the upper portion of the sleeve. More than likely, your sleeve will be tapered at the wrist. Square a line down to the wrist section from the elbow line. 


Divide the  lower portion of the sleeve into equal sections. 
Be sure to number each section.


Cut from the wrist to the elbow line, but not through the elbow line. 
Draw a guideline on your paper.
Determine how wide you would like your bell to be. For a fairly small bell, spread each section 1".  Of course, the bigger the bell, the more you will spread each section. 
Begin with the middle section and spread it equally on either side of the guideline. If you are spreading each section 1", you would spread 1/2" on either side of the guideline which will result in a 1" spread.
Now spread your determined amount between each section. For this exercise, each section should be spread equally. In another post, I will show you how to draft a more stylized bell shape where the sections will not be spread exactly the same all the way around the bell shape. 


Connect between the sections with a smooth line to develop your final pattern. The guideline will become your grainline. Be sure to transfer the notches that were established before the original sleeve was cut apart. 


And that's just how easy a bell shaped sleeve is.

I found a couple of sleeves that are very stylized. I love how each looks. It would be easy to think that since each has an elastic top that they are just a rectangle. But I don't think so. I think that each of these sleeves use the same principle. 


Good luck with your bell shape sleeve drafting. I plan to have one made up for you next week. I really love the look and can't wait to have a garment with a bell shaped sleeve!


Share this PostPin ThisShare on TumblrShare on Google PlusEmail This

Saturday, March 12, 2016

Sleeves On Saturday/The Cold Shoulder Sleeve

You aren't seeing things, it really is a Saturday sleeve post!
I hope your Saturday is off to a great start. I'm on my 3rd cup of tea and listening to some great music. We have a wonderful radio station here in Chicago called WXRT. On Saturday mornings, they have a featured program called The Saturday Morning Flashback. Every Saturday morning, they flashback to a year gone by. Today is 1968. The music is fabulous. I was a little girl at the time, but I loved listening to my radio. I also loved everything about the fashion of that period. I wasn't allowed to wear much of what I liked...but I dreamed of a time when I could :-).
I received a message from a lovely lady who lives in England asking if I could help her with a cold shoulder sleeve. I thought it was a typo, maybe she meant a bold shoulder??? Nope, she meant cold shoulder. Since I had no idea what a cold shoulder sleeve would be, she sent along a picture. Once I saw the picture...ohhhh. 
This is a very easy sleeve to do. In order to get the fit that is in the picture above, the garment must be made in a knit fabric. Begin with a t-shirt pattern, or a knit dress pattern. 
Here's my sleeve. 
If you'll notice in the inspiration picture, the shoulder is cut away a little. In order to give a little hint of a cut away shoulder, but still be able to wear a normal bra with the top, I came in 1" from the shoulder edge and blended the line back to the notch. 
And I did the exact same thing to the front of the pattern. I did not cut the seam allowance off the armhole of the pattern. Once I drew in my new style line, the pattern was cut on the new line.There will be no need to add seam allowance.  
Now for the sleeve. 
Square a line across the top portion of the sleeve from the front notch to the back notch.
The front and back notches on the sleeve should be approximately at the point where the armpit hits the chest. I think the top line of the sleeve should be a bit higher, so I came up 1/2" from the notch line. 
You could come up a little higher if you wish. In the picture below, my ruler is sitting 1" above the notch line. I felt that this was a little too high, but you are the designer, so you get to decide what you like best :-) Remember, you can always cut away the excess, but adding it back can be a chore, or maybe impossible.
Once you have determined where the top of your sleeve should be, find the middle of the sleeve and place a mark at midpoint. From that point, measure down from the midpoint 1/8". Draw a slightly curved line back to the edge of the sleeve. 
Add 1/4" seam allowance to the new style line. 
Now cut away the top of the sleeve. 
There are a number of ways that the top of the sleeve could be finished. I opted to cut a 1" wide strip and sew it to the top of my sleeve prior to setting the sleeve into the top. 
This gave a small casing just in case I wanted to add a touch of elastic. It wasn't necessary, but it's nice to have the option.
 The neckline was finished in the same manner.
 I have not finished the shoulder edge, but I will be adding a strip to the edge of the shoulder as well. 
My almost finished top.
The sleeves on most t-shirt patterns have ease from the armpit to the wrist. Keep this in mind with your sleeve as you may want to taper the sleeve to achieve a more fitted look. 
As I said, the sleeve is quite easy to draft. It's rather fun to wear too. Think about maybe wearing it under a jacket. The of element surprise when you take your jacket off would be such fun!!!


Share this PostPin ThisShare on TumblrShare on Google PlusEmail This