f

Thursday, May 31, 2012

Weddings To Remember

I was up quite early this morning, just couldn't sleep. Too much in my mind. Another story for another day. So rather than just stay in the bed, I (and the dogs!) went down for a cup of hot tea and a bit of dog food. From there I made my way down to my studio to do a little cleaning(I need to do a LOT of cleaning) and I came across photos of some of the work I did when I was doing wedding gowns.What a treat, a little walk down Memory Lane. Such a nice lane to take a stroll down on an early morning. Amongst all the pictures were lovely cards that had been sent to me thanking me for the work I did and expressing just how lovely they felt on their special day. Funny, I remembered the dresses but not the cards. Each bride was so much more than a client to me, I felt that they belonged to me for that very special period of time while we worked on their gown. As it turned out, most of my brides insisted that I attend their wedding. For the most part, I loved every minute although there were a few bridesmaids that I would have loved to crown and not in a good way. 
I thought I would share a bit of my early morning walk with you today. 
This is a bustier in progress. The bride had the train from her mother's gown. The rest of the dress had been ruined by a friend who had borrowed it.  The bustier was cut from the train and all of the lace that was on the train was removed and then appliqued back on the bustier. All of the beads that you see were pieces that the bride had saved from her grandmothers. There were crystal buttons, pearl necklaces, crystal necklaces, just a bag full of things. She wanted the piece to be encrusted with all that was in the bag.
 She had wanted the boning to show. I usually would do what the bride wanted unless I felt that it just wouldn't work or that it just wouldn't look good. In this instance, I knew that the lace would pretty much cover up the boning.
 A view of the back.
 Me helping her dress on her wedding day.
This was a  very special bride. The dress that she is wearing was her mother's gown. The problem with the dress was that it was about four sizes smaller than the bride. She wanted so badly to wear the gown. So what I did was take off the original sleeves. They were the very tight early 1950's sleeves. The sleeves were lace. I was able to buy satin that matched the dress fairly well. I lifted the lace on the front of the dress, made new side panels and then took lace from the sleeves and appliqued it over the new side panels which camouflaged the new satin. For the sleeves, I bought English net, combined it with silk organza and then took the rest of the lace and did appliques on the sleeves. The bottom of the skirt had some issues. It had been stained along the hem. I bought new lace that I dyed with tea to match the original lace. I became an expert at knowing the different shades that different teas would give me. The lace was sewn on and beaded. When her mother saw the dress, she cried. She was so happy. Nice.   
I've included this picture because of the funny story that goes along with it. You see the young girl on the left. She was twelve at the time. The bride did not think that it was appropriate for her to wear a strapless dress, but the child had her heart set on looking like the rest of the girls. So I told her that we could add straps. She still wasn't very happy so I told her that we would add the straps now and then later, I meant when she was older, she could take the straps out of the dress. The bride told me that later that night at the reception she looked at the child and thought something did not look the same. She had taken the straps out of her dress!! The bride asked her where the straps were and the child replied, "Rhonda said that I could take the straps out later." At that point it didn't matter. I learned to be a little more careful with what I said.

 This was such a sweet story. The bride did not have a wedding the first time around, so for their twenty-fifth anniversary, they had a wedding. The fabric for her dress came from Ghana. There was enough for her gown, her daughter's dress and the vest, bow tie and hat for her husband. She said that having a wedding where her son and daughter were able to participate made it all the sweeter.
This was such a wonderful dress to create. The bodice is made from a silk that was embroidered with a silk cord and a very fine gold wire. Thankfully the bodice was small because there was a lot of re-applique that had to be done along the seams. The skirt is a matching silk with two layers of silk chiffon overlays.
 I loved the choice of fabric for her wedding party. With such varying ages, it worked so well.
On her way to the church. We did a velvet cape that was edged in a gold cord with a matching bag. She looked like a fairy princess. The church is on Michigan Ave. across from Water Tower Place. She told me that people were running across the street to tell her how lovely she looked.
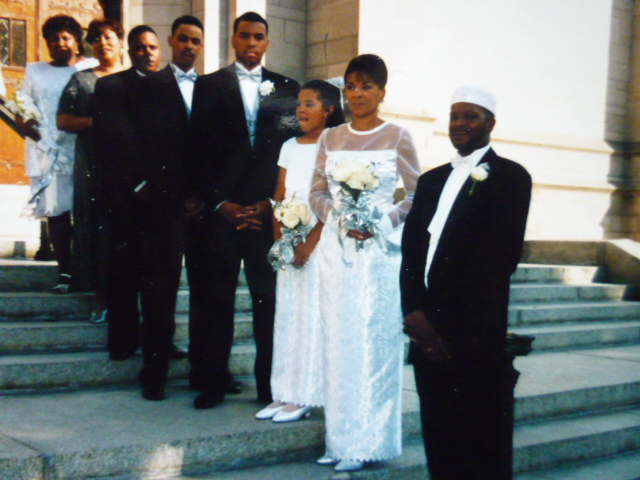
So a few of my brides. Believe it or not, I do hear from them every once in a while. A few of my brides have become good friends. I'm having dinner with one of my brides and her husband later this week. They will celebrate their 19th anniversary this year. Incredible.
Hopefully I haven't bored you with my little trip down Memory Lane.
Have a wonderful day.
Rhonda 


Share this PostPin ThisShare on TumblrShare on Google PlusEmail This

Wednesday, May 30, 2012

It's All About The Fit, Part Two


Just to refresh your memory, I began with this vintage pattern.  
 The muslin made straight off the pattern, a horrible sack that I would not want to wear.
 In yesterday's post, I took it to this point, but there were still issues in the bust area.
In order to get rid of the gap in the center front of my dress, I moved the shoulders over. On the right side of the above picture you see the neckline. Typically, I would add to the front neckline, but in this case I would like my neckline to be a little more open so I will not add to the front  and just cut the extra away from the back neckline.
In this picture I have marked in my back neckline and I have transferred the marks I made for the small back neckline dart that I would like to add.
 I transferred the marks for where I would like to take up the side seams, 
 as well as the front darts.
 You can see the underarm dart that I would like to move to the princess line that I have drawn in.
I cut my dart open.
Then I closed the underarm dart. You can see that the fabric does not want to lay flat.
 Slash to the apex of the dart.
 Now the fabric lays nice and flat and the fullness of the dart has been rotated to the princess line dart.
In order to make sure that my side seams will match, I laid my front pattern piece on top of my back pieces and cut them all together at once.
You can see the layers in this picture.The back of my dress had minimal alterations so I was able to reuse those pieces for my next muslin, but I did cut a new front muslin.
 In the above picture you can see that I have made further alterations to the left side and on the right you can see the fullness in the side panel that needs to be adjusted.
 In order to fix this issue, open up the seam and move the fullness into the seam.

 Now pin the seams back together.
 Now the front of my dress lays nice and flat.
 As you can see, the armhole needed to be remarked.
 So I began with a sack,
 and now I have a dress that fits nicely over my bust. You do see some puckering in the seams. This will disappear once I clip my seams.
 After I took the dress off, I marked in the lines of my new seams.
And now I have my final pattern. I will make the dress in the fabric below before I cut the dress out of the fabric I have intended for the embroidery. The embroidery is done before the dress is put together so just in case there are any other issues, I would like to fix them before the embroidery is completed.

Yesterday a comment was made about a book on fitting by Sarah Veblan and that she moves the shoulders just as I did in order to remove the gap in the front. I have not read her book, but I do know someone who took her class and seemed to be quite happy. For further fitting help, this may be a book that you would like to look into. 
I hope my little fitting guide has been of some help. As soon as I get the test dress finished, I'll do a final post.   


Share this PostPin ThisShare on TumblrShare on Google PlusEmail This

Tuesday, May 29, 2012

It's About The Fit, Part One

 A few weeks ago I showed you this pattern and fabric. Well, I've changed my mind about my fabric choice. I did a test run with the embroidery stamp and I can't see the stamp well enough to do the embroidery, so the search is on for another piece of fabric. Something much lighter that will take the stamp.

I did choose embroidery floss colors, but they may change as well. I do have a piece of pink cotton pique that I might use so if I do use that fabric, I will need to choose another set of colors for the flowers.

In the mean time, I am getting the muslin fitted and I thought I would share some of my fitting issues.
A few of my friends think that I have no issues, but I can assure you, I do.
So here is the raw muslin, no shape, rather icky.  Not a dress that I would want to wear.
I began by taking in the side seams and the front darts to give the dress some fit.
The bust darts are off, but this is not unusual for a vintage pattern. We just don't wear our bras in the same manor as we did even 40 years ago.
The typical problem I have with dresses is a gaping in the front. In the above photo, I have pinched in the extra fabric. 
To get rid of this issue, I open up my shoulder seams and smooth out the fabric. As you can see from the photo above, the front shoulder seams move over, but the back remains the same. I will need to remark my front armhole.
Now I have a new issue, extra fabric in my armhole. No problem.
In the above photo you can see that I have drawn in a line for my new bust seam. The underarm dart will be moved into this seam as well as the extra fabric. The darts that are on the front of the dress will remain the same except they will now extend into the armhole. In my next post, I will show you how I do this.
In the above photo I am showing you the back of the dress. I had just a small gap in the back neckline. This is probably caused from too many hours of bending over a sewing machine. Hey, I have to blame it on something, surely it isn't me!!
At this point, the dress looks better, it has some fit and I know what my next step will be. I'll be back with part two tomorrow and hopefully a decision on the fabric.  


Share this PostPin ThisShare on TumblrShare on Google PlusEmail This

Monday, May 28, 2012

Monday Morning Inspiration

It seems I am a little late in finding out about Marit Fujiwara. Hey, better late than never. I came across a picture on Pinterest, was intrigued and went searching for more. What I found took my breath away.
You may already know about this incredible designer/artist, but if you don't, get ready to be inspired or at least, blown away.
Taken from www.patternbank.com, "Marit Fujiwara graduated from Chelsea College of Art and Design in 2009 and then set up her company Tanana Takite. Specialising in mixed media and constructive textiles, she creates some really unique pieces that push the boundaries between Art, Craft and Design. She adopts an experimental attitude towards materials, combining traditional printing techniques with embroidery and fabric manipulation. As a keen illustrator, she bases her work on drawing, bringing fluidity to her garments and projecting the idea of movement and time."
What's amazing to me is that she is able to layer so many fabrics and yet her pieces still seem to have such a lightness to them.

In this photo you can see the stitching alongside the fabrics.
The skirt almost looks to be plastic.

In the photo below you can see just how many layers there are.


The fabrics seem to take on the look of the skeleton.

A close up of the leggings.

The fabrics and the stitching blend together in what seems to be an effortless manor.
A close up of the stitching.
Her art work.
The pictures below are from a collection called "Hair."


If you would like to see more of Marit Fujiwara's work, and I would highly recommend it, click here.
Wishing you all an incredible week.
Rhonda


Share this PostPin ThisShare on TumblrShare on Google PlusEmail This