I have a treat for you today, a guest blogger!! I met Elizabeth when I went to Puyallup, Washington to audition for the Sew It All Casting Call contest. She is very creative, has lots of energy(she is an accountant by day and teaches sewing classes by night, a little on the super hero side!!!). You can find her website at
http://elizabethchandlerdesigns.com/.
Elizabeth has done a wonderful tutorial on what she calls The Slouchy Tote. It is a wonderful bag, perfect for just about anything you are doing on a typical day, running to the gym, shopping, packing for a weekend trip and even a diaper bag!!
Enjoy!
The slouchy tote is the perfect bag! It's extremely versatile and I use it pretty much every day. The bag is large enough to use as a diaper bag, gym bag, or a weekender. It doesn't have batting or any other support so it can fold up flat in another bag for storage. Did I mention that it's super easy to sew as well! Perfect!
Materials:
3/4 yard cotton fabric for the top of the bag (striped fabric)
1 yard cotton fabric for the lining and front pocket (I like to use solid quilting fabric)
1/4 yard canvas fabric (contrasting solid) for the bottom
2 3/4 yards belting for the straps
Fabric Dimensions:
1. Cut 2 pieces of cotton lining fabric 20" x 22"
2. Cut 2 rectangles 7" x 22" from the canvas fabric
3. Cut 2 rectangles from the cotton fabric 13 1/2" x 22" for the top front and back.
4. Cut one piece of cotton lining fabric 8 1/2" x 7 1/2" for the pocket
5. Cut 2 pieces of belting 48 1/2" long.
Directions:
1. To make the pocket, fold down 1/4" (on 1 of the 8 1/2" sides), press, fold down 1/4" again and press. The pocket piece should now be 8 1/2" x 7". Top stitch along the folded top edge.
2. Place pocket piece on one of the striped pieces. Line up the bottom edges. Measure 6 3/4" on both sides of the pocket. Stitch each side with a 14" seam allowance.
3. To attach the straps, place 1 strap 6 1/2" from each side. Edge stitch both sides of the strap. End 2" below the top. The straps will hide the stitching on the sides of the pocket.
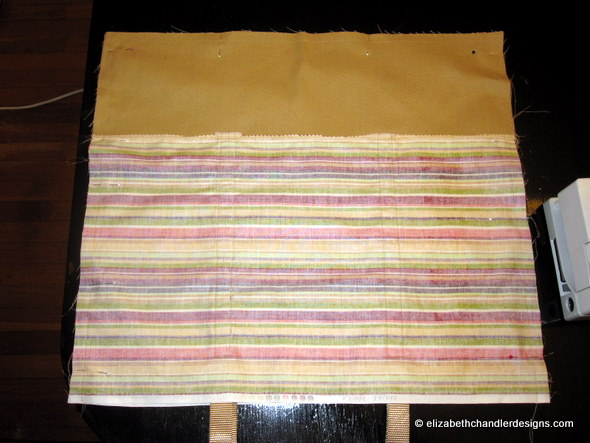
4. After the straps have been attached, sew the top piece to the bottom (solid canvas piece). With right sides together, stitch using 1/4" seam allowances.
5. Press seam toward bottom piece. Edge stitch on canvas to reinforce seam.
6. Repeat steps 3 through 5 for the back of the bag. My bag doesn't have a pocket on the back, but feel free to add one if you prefer a pocket on each side. Be sure to sew it on before the straps.
7. With right sides together, stitch both side seams and the bottom seam of the bag front. Use a 5/8" seam allowance.
8. With right sides together, stitch lining side seams and bottom seam using a 5/8" seam allowance. leave a 2 1/2" gap on 1 side seam. You will flip the bag right side out through this hole.
9.With the bag still inside out, open up 1 corner so that the bottom seam is aligned on top of the adjacent side seam. Basically, you want your side seam and bottom seam to line up on top of each other. A triangle is formed when they line up properly. Pin along the seam to keep the alignment in place. Mark a point 2 1/2" from the corner point, the draw a line perpendicular to the seam at that point. Machine stitch along the perpendicular line and then trim off the resulting corner with pinking shears. Repeat on the opposite corner and do the same thing with both of the lining corners.
10. Keep lining inside out and turn bag right side out. Place the bag inside the lining. yes, you read correctly! The bag needs to be inside the lining. With right sides facing, stitch top seams together using a 5/8" seam allowance.
11. Trim seam allowance to 1/4".
12. Turn bag right side out through gap in lining. Press. Top stitch along the top edge of the bag.
13. To add a decorative finish and provide additional support, stitch a square with an "X" in the middle of the straps at the top of the bag.
The finished bag.
Thanks so much for this great tutorial Elizabeth. It was great to have you! I will be doing this bag along with the bag that Kitty did
here. I think they will make the most wonderful companion bags for traveling.
If you are near the Greenville, South Carolina area, check out one of Elizabeth's classes. In the meantime, you can check out her website,
http://elizabethchandlerdesigns.com/ for lots of fun and inspiring projects.
Happy Friday Everyone!


Hi Rhonda,thanks so much for hosting me on your blog! I hope your readers enjoyed my tutorial! I can't wait to take a look at the bag you make. :)
ReplyDelete