f
Showing posts with label Bags. Show all posts

Tuesday, January 15, 2019

A Bag To Pop Over!

Last Friday and Saturday, I had the opportunity to take a class, and make the Poppins Bag by Auntie's Two Patterns. It was a lot of work, but so much fun! 


As with any project, the big question is, what fabric should I use? You may remember the watercolor I did last summer and had made into fabric on the Spoonflower site. 


I had a piece printed in a 2 yard piece of cotton, just to see how I would like it. The quality was fine for basic cotton, and I had thought that I would do a skirt, then I changed my mind and thought of a kimono jacket...and then...I did nothing with it. I am so happy that I didn't as it became the focus fabric for my bag. Below you see the front of the bag once the quilting had been completed. Look closely as there is a pocket in the center panel.  


The bag has made some progress below. Rather than put another pocket on the back of the bag, I elected to do a strap so that I can carry it on the handle of my rolling suitcase. 


My finished bag. There is a frame inside the top of the bag that folds in when the bag is zipped.


 And then pops out when the bag is unzipped.


Here you can see the inside of the bag. There are 2 pockets, and loads of room! I think I could pack my entire wardrobe into this bag. Not really, but it is quite roomy.


I used this super fun rainbow zipper. 


And I love the stars that were provided for the zipper pulls. 


I made the bag at the sweetest store in Granby, Colorado. Tina, the owner is just the best! If you would like to make a bag of your own, you can order the pattern from her. The frame for the top of the bag comes with the pattern. If you do decide to make the bag, I would also order all of the foam pieces that are needed for the structure of the bag. You can find her website HERE. Just tell her that Rhonda sent you :) Don't worry, I get no compensation for this, I just love to pass along great projects, and great people :) Tina also carries the rainbow zipper and the fun star zipper pulls. 

If you do decide to make the bag, just a little word of warning, it is labor intensive. It took 2 full days to complete the bag. But, in the end, it was so worth it!


Share this PostPin ThisShare on TumblrShare on Google PlusEmail This

Tuesday, November 29, 2016

Sewing For The Holidays/Christmas Gifts

I have never been one who enjoys fighting the crowds during the holidays. I'm fortunate enough to live in a neighborhood where there are quite a few shops within walking distance, so I can leisurely walk over and not be bothered by the crowds. But, I also enjoy making gifts for Christmas, and I am VERY blessed to have a husband who would rather one of my homemade shirts any day over a store bought shirt. I have 2 in the works for him, so he is going to be quite pleased this Christmas :)

For today's post, I thought I would just remind you of a few things that I have done for our Thrifty Thursday posts. The patterns are free, so a simple download. They have all been a blast to put together, and they are all things that if I didn't sew, I would be thrilled to receive. Even though I do sew, I would still be thrilled to receive any of these items :)

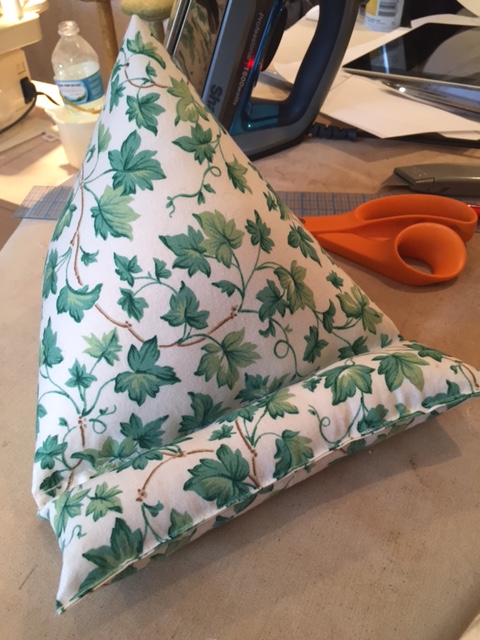
First up is one of my most used Thrifty Thursday makes. This little I-Pad holder has a permanent home in my studio. I love listening to podcasts while I'm working, and this holds my I-Pad beautifully. You can find my post and all the info HERE


I absolutely fell in love with Yuki, the designer of Waffle Patterns, while I was doing the Pepernoot Coat sew along for Sew News. Her patterns are well designed and go together easily. This Newsboy Hat is a free download and can be made as I did in cotton, or wool for winter. Great for guys and girls alike!


This faux fur collar will dress up a plain coat, and it also looks great over a sweater or jacket. 


I have 2 favorite evening bags, the Clam Shell Wristlet that I shared with you yesterday, and this fabulous little bag from Sew Vera Venus. I made the bag out of a piece of gold leather and it works with almost every evening garment that I have. You can find my post and a link to the pattern download HERE.


What a fun hat this was to make. It can be made out of a sweater knit, or a recycled sweater. You can find the info on this pattern, along with a link to the flower pattern HERE. I really liked the mitten pattern too. You can find the info on those HERE.


This bag is quick and easy to make and would work for just about any woman on your list. You can find the free downloadable pattern HERE.  You can find my post on the bag HERE.


I have not made these patterns up yet, but I feel safe in recommending them to you. 


The apron is from Sew4Home. I really like that the top is buttoned to the bottom. 
I really like the shape of the oven mitt. This pattern is from Skip To My Lou
The heart shaped potholder is adorable. You can find the pattern at A Spoonful Of Sugar
To round out the gift, a casserole carrier that conforms to a number of pan sizes. It's basically just a rectangle, so super easy to make. You can find all of the instructions at How Does She?

Another super simple hotpad gift idea would be a set of these egg shaped pot holders. They can easily be customized to whatever a friend might enjoy. 


Great for stocking stuffers, this is a gift that will help to ensure a great night's sleep. Something most all of us could use. You can find the pattern for the sleep masks HERE.


And finally, I love this pattern. Who wouldn't love a customized accessory pouch? 


With all of these ideas, your holiday sewing should be off to a great start!

Have fun!!!
Rhonda


Share this PostPin ThisShare on TumblrShare on Google PlusEmail This

Monday, November 28, 2016

Monday Morning Inspiration/Christmas Gifts

For those of you here in the U.S., and those of you who are not, but still celebrate Thanksgiving, I hope you had a wonderful holiday. We had a lovely day with friends, did our traditional Thanksgiving day hike. It was just the boost that my dog Gracie needed. She misses Little Bit so much, but I think that she is finally beginning to move on. 

I usually do a bit of the cooking for Thanksgiving. I did Roasted Cauliflower, recipe HERE(skip the wrap and just serve the cauliflower, it's delicious!), and I also roasted Brussel Sprouts. I always soak my brussel sprouts in salt water for a few hours before cooking, removes the bitter aspect. I then added the same ingredients as the I did for the cauliflower. A great touch for brussel sprouts is to add toasted walnuts and crumbled blue cheese. Give it a try, I think you might like it :) 

The day after Thanksgiving marks the official start of the Christmas season here in America. So many of us enjoy giving handmade gifts, I know I do :) So here are a few ideas that are quick to make.

If you look at the top bar of the blog, you'll see a tab for free patterns that make great gifts.

The Free Beret Pattern


You can find the instructions HERE, and the pattern HERE.

Free Slipper Pattern For The Family


You can find the patterns HERE, and HERE. The instructions can be found HERE.

Free Poinsettia Napkin Ring Pattern


Not only does this make a great accent for your holiday table, it's a fun and easy project to do with your children, or grandchildren. You can find the pattern HERE, and additional pictures HERE.

Make a pile of headbands with THIS tutorial.


From my Fabulous Free Pattern Friday series;

Kimono Bag


This bag is nothing more than 2 rectangles. You can find the instructions HERE.


Necktie Cummerbund 


Just combine 2 coordinating neckties and you have a fabulous belt! You can find the instructions HERE.

Fleece Ski/Winter Hat


This is my favorite winter hat. It's nothing more than a rectangle, so it goes together in minutes. You can find the instructions HERE.

Tote Bag


This bag is super easy to make, just purchase a panel at your local fabric store. It's large enough to carry everything! All the instructions can be found HERE

Pompom Collar


Super cute and will dress up jackets as well as sweaters. Find the instructions HERE.

High End Clutch Bag


The lovely Cennetta of The Mahogany Stylist did a guest tutorial for us on making THESE fabulous clutch bags. Just be careful if you do decide to give one as a gift, it might end up being a gift for yourself!!!

Clam Shell Wristlet 


You can find my pattern for the Clam Shell Wristlet along with the instructions HERE. Great for any holiday party. Great gift for upcoming proms and weddings too.

That should be a nice start to get your creative juices going :)

I'll be back tomorrow with a few more ideas.

Just remember....

 Happy Holiday Making!
Rhonda


Share this PostPin ThisShare on TumblrShare on Google PlusEmail This

Friday, October 28, 2016

Fabulous Free Pattern Friday/Toiletry and Lipstick Bag

The first of this month, I had the wonderful opportunity to teach a bag making class for the Peoria, IL American Sewing Guild chapter. It was a packed day, but everyone left with a finished tote bag. I named the large bag, The Parisian Travel and Market Bag. The companion bags are a toiletry bag and a lipstick bag. Now the smaller bag can be used for anything. It's especially great for small items...like lipstick, cotton pads, or anything that could possibly get lost in a larger bag. 


The toiletry bag has a front zippered pocket, great for combs, nail files, anything that's rather flat.


Both bags have a gusset that allows for plenty of storage room.


October is my official blogging anniversary. Now, truth be told, I did 1 blog post and then went months before I ever posted again. That was in 2009, so 7 years ago. Amazing!!! In reality, I've been blogging on a regular basis since 2012. But since October is the official anniversary, I thought I would do a little something special today and give you the patterns for the toiletry bag as well as the lipstick bag. Nice :) You can find the Lipstick Bag and Toiletry Bag patterns HERE.

In the true spirit of Fabulous Free Pattern Friday, I am going to make you draft the gusset for the toiletry bag. You will need to draw a rectangle that is 4" x 27 1/2".  

For the lipstick bag, you will need a 7" dress weight zipper.

For the toiletry bag, you will need a 9", and a 14" dress weight zipper.

The bags require 3 1/2 yards of piping. I like to make my piping from cording that can be purchased in the home dec section.

All exterior pieces of the bag are interfaced with a woven cotton interfacing, including the pocket pieces. The lining is not interfaced. I light to use a medium weight home dec fabric. Waverly fabrics are my favorites. 

Begin with the front toiletry bag pocket. Press in a 1/2" seam allowance on both straight edges of the top and bottom pocket. Align the 9" zipper so that there is 3/8" seam allowance on either end of the zipper.   


Edge stitch the zipper in place.


Baste the zippered pocket to the front of the bag.


Sew the exterior gusset to the lining gusset at either end with a 3/8" seam allowance.  
From this point on, all seam allowances will be 3/8". Turn the gusset the right side, press and edge stitch the ends. Baste the side seams together.


Make the piping. Cut 3 1/2 yards of piping strips 1 1/2" wide. Sew strips together as you see below.


Once sewn, wrap the fabric around the cording and stitch together with a zipper foot.


Sew the cording to the front and back pocket panels, beginning at the bottom of the panel. Leave approximately 2" free. 


Open up 1 end of the cording and reveal the cord. Lay the opposite cord next to the exposed cord and cut away so that the cording from the opposite end will lay inside the bias strip.Be sure to fold back the raw edge. Wrap the fabric around the cording and stitch down.


Transfer the small dot from the pattern onto the front and back. The zipper will be sewn from 1 dot to the other.


Fold back the seam allowance of the piping and align the end of the zipper with the dot at 1 end. The teeth of the zipper should be even with the edge of the piping. 


Fold back the end of the zipper tape prior to sewing.


Stitch the zipper to the bag by sewing from 1 dot to the other and stitching in the ditch between the bag and the piping.


As you can see, the zipper will be longer than the top edge of the bag.


Now install the gusset. Transfer the larger dot to the bag. The gusset will be sewn from large dot to large dot. 


To sew the lining to the bag, simply match the right sides together of first the front.Stitch the lining from small dot to small dot, leaving the top edge of the lining open. Once sewn, turn right side out. Repeat for the back side of the bag.


Hand stitch the top of the lining to the zipper. 


In order to have the gusset fold into the bag when the bag is closed, the gusset will need to be stitched. 


Simply fold the gusset with right sides together and stitch down from the top edge 2 1/2".


To finish off the end of the zipper, sew a square tab to the end. The end of the zipper can be left outside the bag, or tucked inside.


The lipstick bag is sewn together the same as the toiletry bag, minus the exterior zippered pocket. When stitching down the gusset, stitch it down 1" rather than the 2 1/2" as was down with the toiletry bag. 


The bags are finished and ready for an adventure!


The companion bag will be available for purchase in a few weeks. It features a top zipper as well as an interior zippered pocket. What I especially like about the bag is the zippered slip pocket. The pocket slides over the handle of a rolling suitcase. With the zipper at the top, you have a safe and secure place to stash your ticket as well as your I.D.


Hope you enjoy making the small bags!

Let's see what the next 7 years bring :) 
Rhonda


Share this PostPin ThisShare on TumblrShare on Google PlusEmail This