f
Showing posts with label home dec fabric. Show all posts

Friday, January 20, 2017

Decorating Fun!

Before I share my project, I would just like to thank all of you for the lovely, and warm welcome you gave to this week's Wednesday Showcase ladies. You are truly the best!!! 

On another note, Diane of Remembering Oz wrote a post this morning that broke my heart. It seems that someone actually had the audacity to say that her garments look like clown clothes and then go on to attack her personally. When I was in Houston back in November, I had the honor of having lunch with Diane. She is by far one of the loveliest ladies I have ever met. She is not only gracious, but kind, forgiving, and has a wonderful sense of style. If you have a moment, I'm sure she would appreciate a note. Sometimes we all need a hug, even if it's a cyber hug :)

Now, on to my fun project. As I said a few days ago, a friend asked me to help decorate a guest bedroom. She had the purchased quilt below that she wanted to use, a very woodsy theme. The room has a vaulted ceiling, so the quilt could easily be hung on the wall.
  

The bed, which I'll show you once the room is all pulled together, is a pine log bed. For the duvet cover and pillowcases, I chose the flannel pieces below.  


The dust ruffle fabric is below. I like how it pulls together the green and gold of the duvet cover fabrics.


This piece is my favorite! It has a wonderful watercolor aspect to the print. And if you look closely, you can see the Aspen trees. This will be used for the curtains. 


All of the fabrics together.


I found this fun lamp with a painted parchment shade from Wayfair. There will be one on either side of the bed.
  

We ordered new bedside tables and a new dresser which should arrive next week, so it will all come together soon. I can't wait! Decorating is so much fun!!! 

Have a wonderful day. Hope you have time to do a little something fun :)
Rhonda


Share this PostPin ThisShare on TumblrShare on Google PlusEmail This

Wednesday, November 16, 2016

My Favorite Vacation Momento

One of my favorite things to do whenever I travel is to shop for fabric. I love coming home with a new treasure, and once the piece has been made into something new, I get to wear the memory of my trip.

Believe it or not, antique stores can be a great resource for fabric. There's a little shop in Galveston called Somewhere In Time where I typically find a new treasure...or 2 ;) The shop owner has an eye for vintage fabrics, trims, sewing notions, as well as quilt blocks. 

On this trip, I found this fabulous gold and black piece for $5.00. It's an upholstery remnant. Those of you who have followed the blog for sometime know that I LOVE the Home Dec department. You can find the most interesting pieces, so make it a part of your shopping experience. The black areas of the fabric are chenille like, but I think it will pair beautifully with black velvet. 


Not exciting, but a great bargain, 4 yards of chambray for $8.00. I initially thought of doing a shirt for my husband, and I still may. 


But the piece below that I saw while in Galveston has me so inspired, so I may just decide to stretch at least some of the fabric and do a little painting. Hey, at $2.00 a yard, a little creative endeavor is worth it.


A must stop on any trip to Houston is High Fashion Fabrics. On this trip, I had the luxury of spending all the time I wanted as no one was waiting for me. I saw lots of beautiful pieces, but I ended up buying just this piece of metallic knit. Our Haute Couture Club will be viewing the Mainbocher Exhibit at the Chicago History Museum for our annual holiday party. Our workshop chairman wants us to make up the Ginger Jeans from Closet Case Files and wear them to the event. I'm making a pair of black jeans and I wanted to dress them up a bit, so I thought this piece would do the trick. 


I met a friend for lunch on Saturday. Another restaurant that I especially enjoy is called Shade and it's in what was at one time the downtown area of The Heights until it was incorporated into Houston. The area has retained it's charm with antique stores and vintage shops. My friend walked in with a bag, but I assumed she had been shopping. After she sat down, she said that she had been going through her fabric and had decided that there were pieces that she would never use. She went on to tell me that she thought 2 pieces were something I would enjoy, so presents!!!!

The first piece is a gorgeous piece of cobalt blue silk with  copper flowers and vines. 


While I was at High Fashion Fabrics, I took the time to shop around for fabric colors that I would like to line the piece with and I just may do a jacket with a copper lining. If you look below, the centers of the flowers are calling, at least to me ;), for beads, so this may end up being a beading project as well.


The second piece is another piece of silk. 
  

I love the geometric aspect of the embroidery. I have no idea of what I would like to do with this piece, so I think I will let it sit on my dress form and see if it speaks to me. You know, fabric can talk!!! If you have any ideas, I'm up for suggestions too!


Another friend gifted me 2 fabulous pieces of plaid that make my Celtic heart sing! There's enough of the red plaid for a ballgown, but I think I will keep it simple. I'm loving all the plaid pieces that everyone is showing for the fall/winter season. 


This piece has really grown on me. It has a mustard gold back ground with red, black and white in the plaid. This piece may end up not being used in a traditional manner. 


So this picture is looking a little more realistic of what I looked like on my way home!!! If it were, can you imagine the baggage fees?!!!


Have a wonderful day and I hope you get a little time to sew :) 


Share this PostPin ThisShare on TumblrShare on Google PlusEmail This

Friday, October 28, 2016

Fabulous Free Pattern Friday/Toiletry and Lipstick Bag

The first of this month, I had the wonderful opportunity to teach a bag making class for the Peoria, IL American Sewing Guild chapter. It was a packed day, but everyone left with a finished tote bag. I named the large bag, The Parisian Travel and Market Bag. The companion bags are a toiletry bag and a lipstick bag. Now the smaller bag can be used for anything. It's especially great for small items...like lipstick, cotton pads, or anything that could possibly get lost in a larger bag. 


The toiletry bag has a front zippered pocket, great for combs, nail files, anything that's rather flat.


Both bags have a gusset that allows for plenty of storage room.


October is my official blogging anniversary. Now, truth be told, I did 1 blog post and then went months before I ever posted again. That was in 2009, so 7 years ago. Amazing!!! In reality, I've been blogging on a regular basis since 2012. But since October is the official anniversary, I thought I would do a little something special today and give you the patterns for the toiletry bag as well as the lipstick bag. Nice :) You can find the Lipstick Bag and Toiletry Bag patterns HERE.

In the true spirit of Fabulous Free Pattern Friday, I am going to make you draft the gusset for the toiletry bag. You will need to draw a rectangle that is 4" x 27 1/2".  

For the lipstick bag, you will need a 7" dress weight zipper.

For the toiletry bag, you will need a 9", and a 14" dress weight zipper.

The bags require 3 1/2 yards of piping. I like to make my piping from cording that can be purchased in the home dec section.

All exterior pieces of the bag are interfaced with a woven cotton interfacing, including the pocket pieces. The lining is not interfaced. I light to use a medium weight home dec fabric. Waverly fabrics are my favorites. 

Begin with the front toiletry bag pocket. Press in a 1/2" seam allowance on both straight edges of the top and bottom pocket. Align the 9" zipper so that there is 3/8" seam allowance on either end of the zipper.   


Edge stitch the zipper in place.


Baste the zippered pocket to the front of the bag.


Sew the exterior gusset to the lining gusset at either end with a 3/8" seam allowance.  
From this point on, all seam allowances will be 3/8". Turn the gusset the right side, press and edge stitch the ends. Baste the side seams together.


Make the piping. Cut 3 1/2 yards of piping strips 1 1/2" wide. Sew strips together as you see below.


Once sewn, wrap the fabric around the cording and stitch together with a zipper foot.


Sew the cording to the front and back pocket panels, beginning at the bottom of the panel. Leave approximately 2" free. 


Open up 1 end of the cording and reveal the cord. Lay the opposite cord next to the exposed cord and cut away so that the cording from the opposite end will lay inside the bias strip.Be sure to fold back the raw edge. Wrap the fabric around the cording and stitch down.


Transfer the small dot from the pattern onto the front and back. The zipper will be sewn from 1 dot to the other.


Fold back the seam allowance of the piping and align the end of the zipper with the dot at 1 end. The teeth of the zipper should be even with the edge of the piping. 


Fold back the end of the zipper tape prior to sewing.


Stitch the zipper to the bag by sewing from 1 dot to the other and stitching in the ditch between the bag and the piping.


As you can see, the zipper will be longer than the top edge of the bag.


Now install the gusset. Transfer the larger dot to the bag. The gusset will be sewn from large dot to large dot. 


To sew the lining to the bag, simply match the right sides together of first the front.Stitch the lining from small dot to small dot, leaving the top edge of the lining open. Once sewn, turn right side out. Repeat for the back side of the bag.


Hand stitch the top of the lining to the zipper. 


In order to have the gusset fold into the bag when the bag is closed, the gusset will need to be stitched. 


Simply fold the gusset with right sides together and stitch down from the top edge 2 1/2".


To finish off the end of the zipper, sew a square tab to the end. The end of the zipper can be left outside the bag, or tucked inside.


The lipstick bag is sewn together the same as the toiletry bag, minus the exterior zippered pocket. When stitching down the gusset, stitch it down 1" rather than the 2 1/2" as was down with the toiletry bag. 


The bags are finished and ready for an adventure!


The companion bag will be available for purchase in a few weeks. It features a top zipper as well as an interior zippered pocket. What I especially like about the bag is the zippered slip pocket. The pocket slides over the handle of a rolling suitcase. With the zipper at the top, you have a safe and secure place to stash your ticket as well as your I.D.


Hope you enjoy making the small bags!

Let's see what the next 7 years bring :) 
Rhonda


Share this PostPin ThisShare on TumblrShare on Google PlusEmail This

Friday, April 1, 2016

The Fabulous Free Pattern Friday Simple Tote Makes Sewists Happy

"Do you ever have days that you just feel low? Nothing's happened, everything is the same as it was yesterday, you aren't sick...you just feel low. That's how I'm feeling this morning. A few years back, I read The Magic of Thinking Big. A very motivational book. I recently checked out the audio version as I thought my husband would also enjoy it. We were going to be traveling, so an audio book is always a welcome diversion. In the book he suggests saying out loud in a big voice, "I FEEL GREAT!!!" He also suggests that you smile just as big as you can, a great big goofy smile, showing lots of teeth. It is amazing how those 2 simple things can change how you feel. As soon as I'm off the computer I plan to shout out the mantra and smile a great big goofy grin. I'm smiling now at the thought of it and I'm already feeling a bit better :)

Back in early December I shared the bag below with you as a Fabulous Free Pattern Friday item. I am just about to wear out my bag as I grab it for everything, and...it makes the best shopping bag too. I called it a Simple Tote as it is so easy to make. You can find the original post HERE. I used panels that I purchased at Joann Fabrics, a fabric chain store here in America. I made one as a grab bag gift, one for myself and one for my mother. I recently saw the lady who won the grab bag gift. I was surprised when I saw that she had the bag with her. She told me that she too uses it for everything. and she loves the size and the versatility. Nice that it was such a hit :) 


I recently received a message from a lady I met a while back when I was in Novi for the American Sewing Expo. She is an instructor and also sells Viking sewing machines in Indianapolis, Indiana. She loved the tote and asked if I would mind her using my instructions for a class. She made up the sample below.


 And here are her proud students.


They used Home Dec remnants, added embroidered initials, and made the bags their own. I just love those beautiful smiling faces!


Chris, the instructor told me that a couple of the ladies are new to sewing, and they were so pleased with their bags. Ahhh, I love it when a new sewist is born :) She also told me that a few of the ladies added a zippered pocket. Great idea. I completely forgot about adding a pocket to the bag I made for my self and I REALLY miss having one. So keep that in mind if you decide to make a tote for yourself.

For those of you who may teach summer sewing camps, keep this bag in mind. The size is great for books and can easily be slung over the shoulder. Made in a fun fabric, I think most teenagers would enjoy having a bag like this for school.

Have a wonderful day, and smile big!   
Rhonda


Share this PostPin ThisShare on TumblrShare on Google PlusEmail This

Friday, December 4, 2015

Fabulous Free Pattern Friday/A Simple Tote That's Fashionable

Living in a city like Chicago, I see a lot of people carrying bags for an extra pair of shoes, shopping purposes, or for whatever it is that they need the extra room that a bag will provide. I've seen people carrying everything from plastic bags, to shopping bags that are hardly stylish. So why not look put together? And for those of us who sew, it's really so very simple.
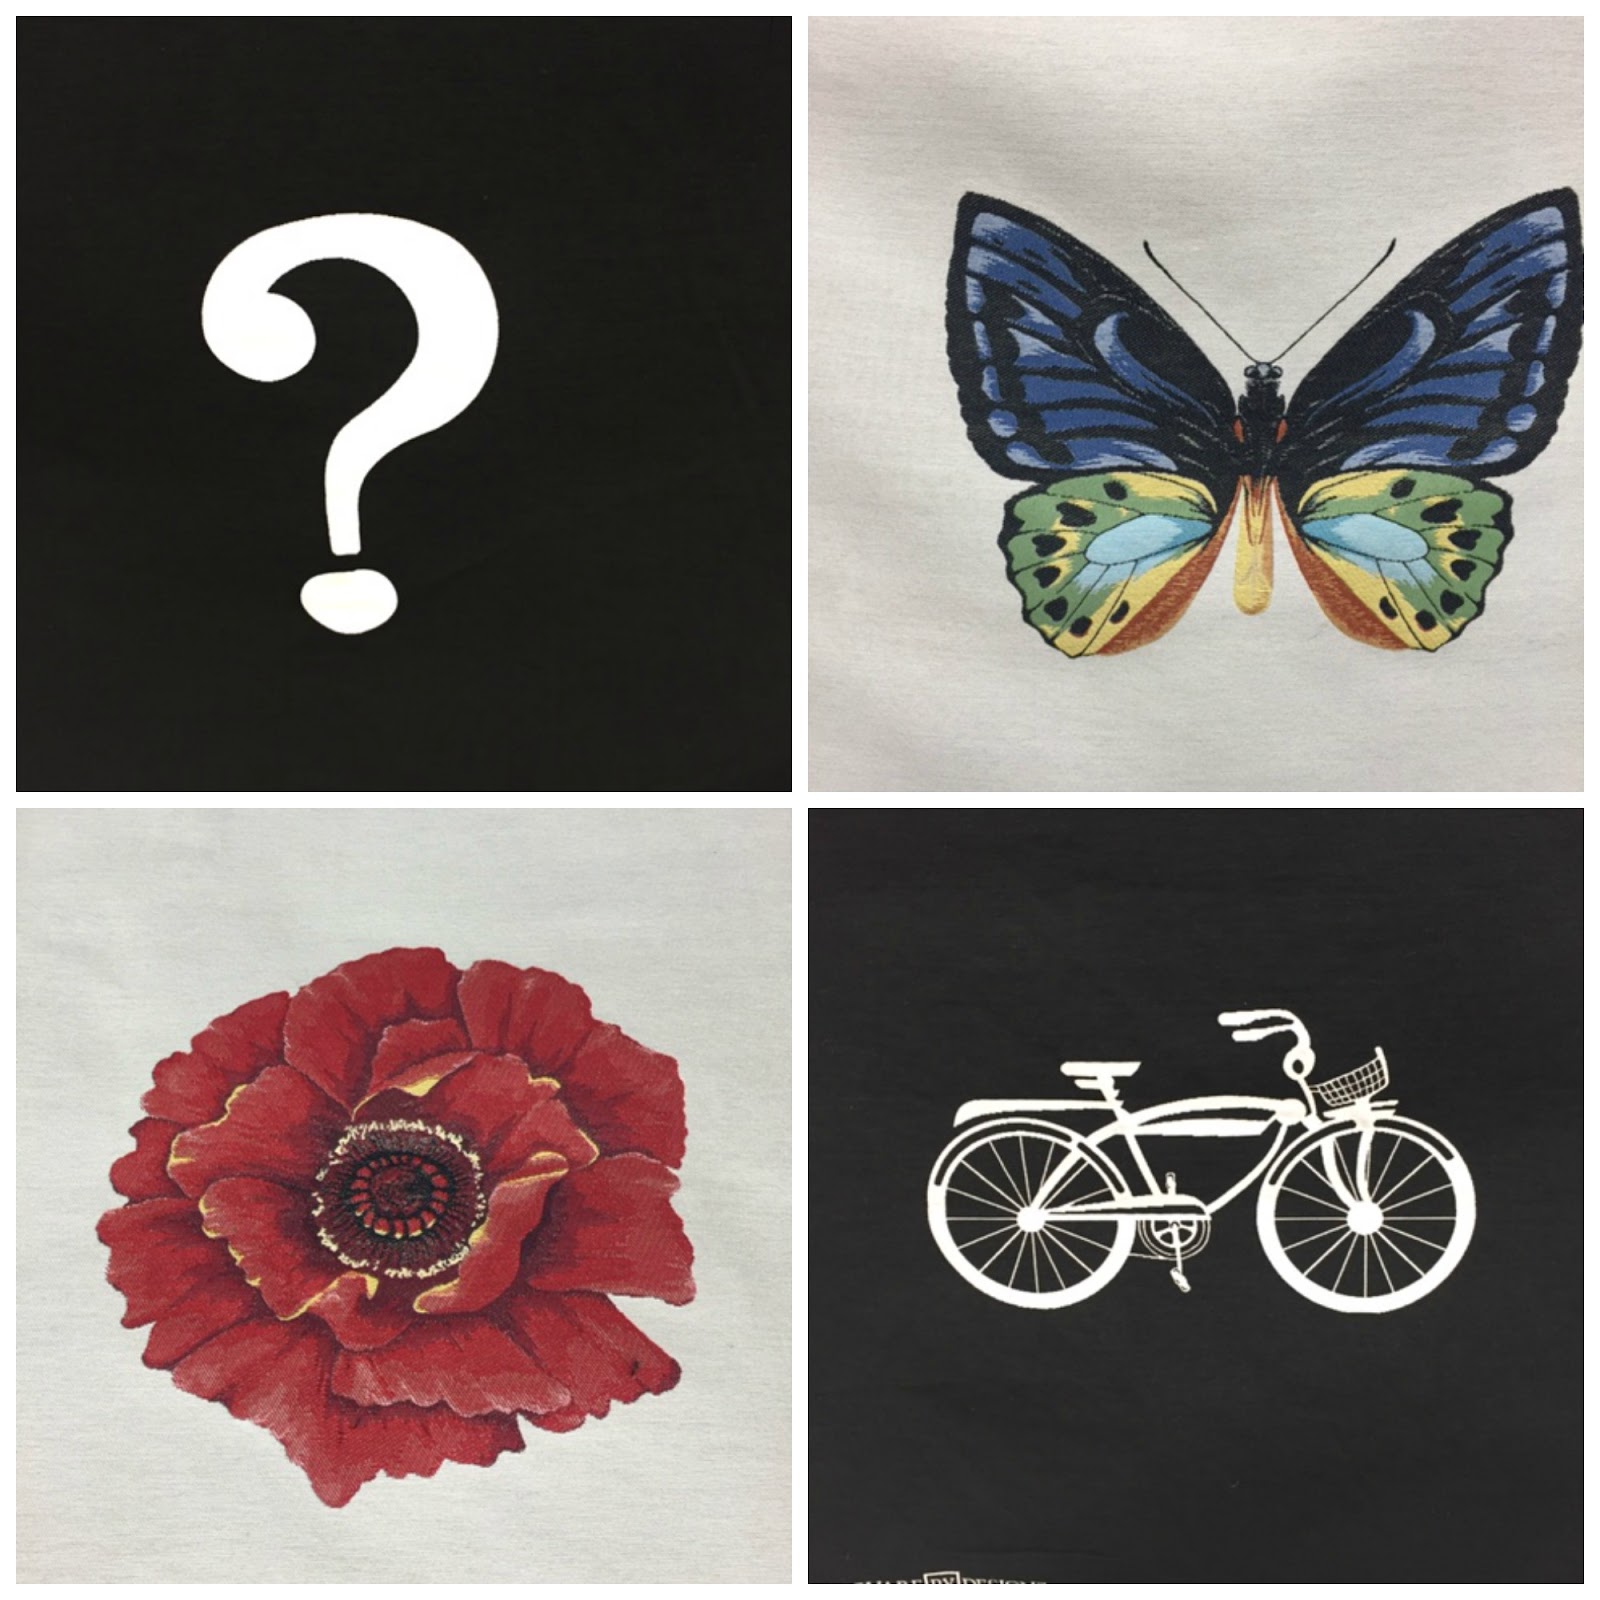
For those of you who live in America and live near a Joann's Fabric store, I was recently in the store and in my favorite section, the Home Dec department, when I came across these wonderful panels. The one that initially caught my eye had the simple treble cleft in the center.
 Here's a sample of some of the other designs that they have.
The panels measure 26 1/2" high x 25 1/2" wide, so they are fairly large. They are a home dec weight fabric.
When I saw the treble cleft, I immediately knew I wanted to make a tote bag.

To make the bag, you will need;
1 panel for the front
1 coordinating piece of fabric for the back, I recommend using another piece of home dec fabric.
Lining Fabric, I used quilting cotton
Fusible Fleece
1 set of handles
1 sew of purse feet
Chip board to create a hard bottom for the bag

I decided to cut down the panel as I felt that it was just a little too large for a tote bag. A better size is 18 1/2" wide x 20 1/2" long. This measurement includes seam allowance.
I simply folded the panel in half to insure that I kept the design in the middle of the panel. 
Once the front panel is the desired size, use it to cut the back panel and the lining. You will need 2 lining pieces.
Fuse the fusible fleece to the lining pieces and sew the side seams together. Press open.
 Now sew the bottom seam with a 1/4" seam allowance, leaving an opening for turning.
 Clip the corners.
 Pinch the side seam and the bottom seam together. From the point, 
measure in 2" and mark with a pin.
Sew across the pinched in points. 
 Clip the points down to a 1/4" seam allowance.
Sew the side seams and the bottom seams of the panel and back fabric together just as you did the lining. The panel and back fabric will not be backed with fusible fleece and you will not leave an opening in the bottom for turning. Pinch in the corners and clip them just as you did the lining.
Everything I used for this bag came from my local chain fabric store, Joann's Fabrics. I found a great set of ready made handles that were just perfect.
To attach the handles to the bag, I cut 4 rectangles, 2 1/2" wide x 3 1/2" long. I used the fabric from the sides of my panels to create the rectangles.
I simply folded the rectangles in half,pressed, and then used the pressed line as a guideline. I then opened the rectangle and then folded each side to the middle.
Then I folded the 2 sides in on each other. At this point, edge stitch each side of the tabs.  
Thread the tabs through the rings of the handles and then baste to the bag. My tabs are approximately 4" from either side of the bag. Set the bag aside.
 For a little added security, I like to add a magnetic snap. Find the center of the lining and measure down 2" from the top. Use the backing to mark the placement of the snap. As you can see, I am marking the snap placement on the backside of the lining.
Snip the marks that were made and push the magnetic snap through. Push the prongs apart to secure. 
The snaps are in place and we are ready to attach the lining to the bag.
Place the outer bag inside the lining, right sides together, and sew around the top with a 1/2" seam allowance.
Once the top seam is sewn, pull the outer bag through the opening in the bottom of the lining. Once the bag has been turned, push the lining inside the bag and stitch the bottom seam together.
To give the bag a more polished look, I decided to add purse feet. 
Below, you can see inside my bag and see that the feet have been anchored through the outside fabric as well as the lining.
To cover the hardware for the feet and give the bottom of the bag a hard bottom, I cut a rectangle of chip board. Chip board can be found at an artist's supply store. Be sure to get the heaviest weight.
Once I had my chip board cut, I them made a sleeve from my lining fabric and slid the chip board into the sleeve and hand stitched the opening closed.
With the chip board panel in place, the inside has a finished look.
I'm all set to go!
And the bag looks just as lovely from the front as it does from the back. Much better than carrying a plastic bag ;)
Once I finished the bag, I realized that I forgot to add an interior pocket. It isn't necessary, but nice to have. If you would like to have a pocket, simply cut a square the size you would like the pocket to be and stitch it to the lining.
I can't wait to use my new bag! 
A note to my family....
THIS ONE IS MINE!!!!


Share this PostPin ThisShare on TumblrShare on Google PlusEmail This