I saw a plea for help on Facebook yesterday accompanied by this picture. She wanted to make a knock off of this dress for her daughter but was stumped on the peg aspect of the skirt. The dress is really cute and once you know how to draft the skirt, it's really easy. So I told her that I would post a tutorial this morning on how to do this skirt as I thought some of you might also like to do something like this.
Begin with a straight skirt pattern.
The first pleat line looks to be 2" away from center front. Draw in a vertical line perpendicular to center front.
The second pleat line meets the first pleat line and angles to the hipline.
Cut the first pleat line to the hem but not through the hem and spread it 3". Notice below that the dart has been cut out of the skirt. We will be rotating the fullness of the dart into the second pleat line.
To rotate the fullness of the dart into the second pleat line, begin by closing the dart as you see below.
Now spread the second pleat line 3". The 3" is measured from the point where the pleat line was cut to the point of the closed dart.
Now we need to fold in the pleats. Crease on the first pleat line that was drawn in and then fold over.
Crease on the angled pleat line and fold it towards the closed dart. As you can see below, the pattern piece now has the bow of a peg.
Cut off the excess paper at the waistline.
Unfold the pattern.
You will want to mark notches where the pleats are to be folded as you see below. I have the original piece on top and the final pattern on the bottom.
A closer shot.
My final pattern picture is a little fuzzy, but I think you can see how it will look.
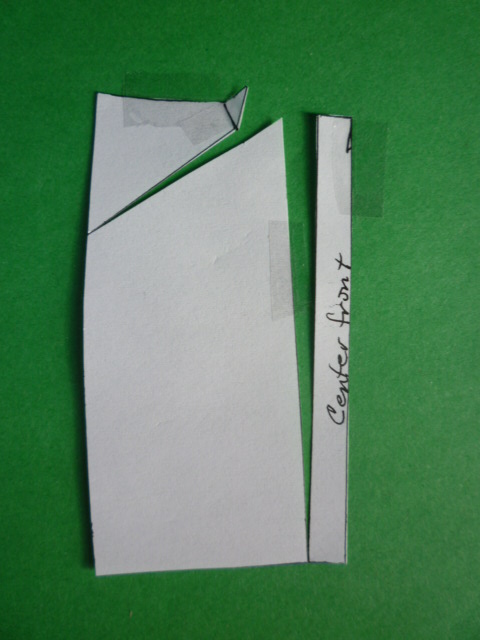
The center front of the skirt will be cut on the fold. The back skirt will be cut as a basic straight skirt.
So, very simple to do. Good luck with your dress project Kathleen. I hope your daughter loves her dress. Let us see pictures!


Loved this tutorial. I voted for you and spreading the word. Fingers crossed
ReplyDeleteThanks for the vote! Do keep your fingers crossed for me. I sure would like to win:)
DeleteYou make it so easy!
ReplyDeleteI think the key is just knowing how it's done and then it is easy:)
DeleteGreat tutorial :)
ReplyDeleteThanks Ann. BTW, get back to your blog!! I want to see more posts from you:)
DeleteClever! You are so talented.
ReplyDeleteAnd you are so kind:)
DeleteAnd I thought your pattern was normal sized till I saw your thumb! Brilliant and cute, too!
ReplyDeleteI do all the tutorial pieces with my little mini me's!! Goes back to my days of teaching flat pattern. The weekly assignments that I gave out were to be done in 1/4 scale. Takes up less paper. I always loved playing with paper dolls. Paid off:)
DeleteI'd love to get inside of your brain. You are amazing and I wish I lived in Chicago.
ReplyDeleteCome for a sew day!!
Deletegreat tutorial, which I was young and slim enough to wear that love it.
ReplyDeleteOnce again, I am delighted to have the opportunity to reap the benefits of your knowledge. And I want a sew day, for sure!!
ReplyDeleteI think I need to arrange something, maybe a retreat?
DeleteAwesome tutorial, thank ou!
ReplyDelete