f
Showing posts with label Peg Skirt. Show all posts

Wednesday, September 17, 2014

Wednesday Morning Hello

Happy Wednesday Everyone!!! I am in the throws of getting ready for the American Sewing Expo and I still have a lot to do, so no Wednesday Showcase today. The next pant drafting post will be up later today.
I thought I would show you the third ribbon weaving project that we'll do in the Ribbon Weaving Class (page 7 of the brochure) at the expo. This one makes you think a bit, so it's a good exercise for the brain ;)
The piece is backed with a piece of velvet. It will become a skirt. There will be beads sewn into the intersections of the red ribbon. I am super excited about this piece!
Although I am not doing a Wednesday Showcase post today, I would still like to give a shout out to Mel of http://mel-allwrappedup.blogspot.com.au/ She just sent me the loveliest note to let me know that she had used my tutorial for drafting a peg skirt. Here's her note,

"HI Rhonda, can't thank you enough for putting together this tutorial, love the yellow dress in part 1, and the step by step drafting help with the mini paper pattern pieces. I was very happy with the way my skirt turned out following your tutorial, I've posted it here http://mel-allwrappedup.blogspot.com.au/2014/09/self-drafted-peg-skirt.html and linked to your blog a couple of times. Can't wait to give the dress a go."

And here's her beautiful creation,
with and without a belt. Didn't she do an amazing job?!!!
Be sure to hop over and check out her blog. If you would like to find the peg skirt tutorial, you can find it here and here. It thrills my heart to know that I've helped someone grow a little in their skills. Thanks so much for giving the peg skirt a try Mel!!
May we all have a wonderful and productive day!
Rhonda


Share this PostPin ThisShare on TumblrShare on Google PlusEmail This

Saturday, March 23, 2013

A Peg Skirt Tutorial

I saw a plea for help on Facebook yesterday accompanied by this picture. She wanted to make a knock off of this dress for her daughter but was stumped on the peg aspect of the skirt. The dress is really cute and once you know how to draft the skirt, it's really easy. So I told her that I would post a tutorial this morning on how to do this skirt as I thought some of you might also like to do something like this.
Begin with a straight skirt pattern.
The first pleat line looks to be 2" away from center front. Draw in a vertical line perpendicular to center front.
The second pleat line meets the first pleat line and angles to the hipline.
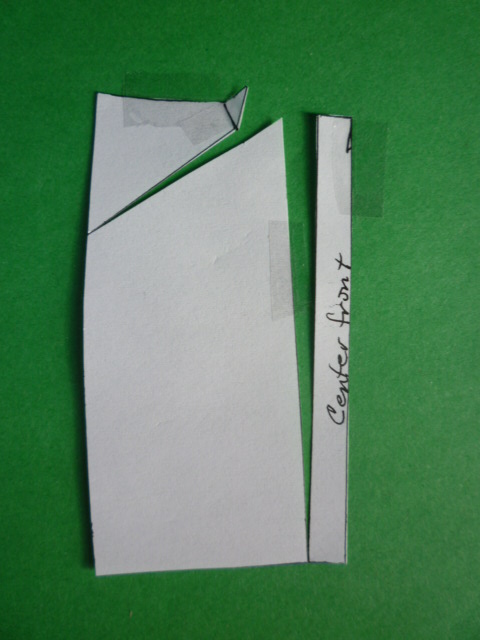
Cut the first pleat line to the hem but not through the hem and spread it 3". Notice below that the dart has been cut out of the skirt. We will be rotating the fullness of the dart into the second pleat line.
 To rotate the fullness of the dart into the second pleat line, begin by closing the dart as you see below.
Now spread the second pleat line 3". The 3" is measured from the point where the pleat line was cut to the point of the closed dart.
 Now we need to fold in the pleats. Crease on the first pleat line that was drawn in and then fold over.
Crease on the angled pleat line and fold it towards the closed dart. As you can see below, the pattern piece now has the bow of a peg.
 Cut off the excess paper at the waistline.
 Unfold the pattern.
You will want to mark notches where the pleats are to be folded as you see below. I have the original piece on top and the final pattern on the bottom.
 A closer shot.
 My final pattern picture is a little fuzzy, but I think you can see how it will look.
The center front of the skirt will be cut on the fold. The back skirt will be cut as a basic straight skirt.
So, very simple to do. Good luck with your dress project Kathleen. I hope your daughter loves her dress. Let us see pictures!


Share this PostPin ThisShare on TumblrShare on Google PlusEmail This

Thursday, April 5, 2012

The Peg Skirt Tutorial Part 2

A few weeks ago I showed you this fabric when I did the post on the Prada Spring collection.
I finished up my new blouse today and I love it. Move over Prada!!
It's a great little blouse, very comfortable, easy to wear and a nice bit of sexiness to boot.
I also finished the peg skirt as promised. 
My skirt is made from a wonderful piece of wool I purchased from Helen Haughy. She carries beautiful European fabrics. If there is something special that you are looking for, she is more than happy to find swatches of possible fabrics.
You can see the first post here, but just to refresh your memory, we began with a simple straight skirt pattern.
The second step was to draw in the line for the yoke. The back will not have any style lines, but will remain a simple straight skirt pattern. All the work is done to the front skirt on this pattern.
The next step was to draw in the vertical lines for our pleats.
Then we drew in the lines for the pocket.
Now to remove all the pieces and create our final pattern pieces. First begin by cutting the yoke away from the skirt. We don't want darts in our yoke, so cut out the darts and close them.
The pocket facing has retained the shape of the original skirt and is what will hold the skirt close to the body as you see in the picture below.
The final pattern for the pocket insert. Be sure to add the grainline before you remove this piece from the original pattern. The grainline will be the same as is in the original skirt,.
Now for the pocket facing. The pocket facing will have the extension that we drew in. The extension is what will hold the pocket out away from the body as you see in the picture below. My pocket facing was cut out of the same fabric as the top.

The final pattern for the pocket facing.
Now for the skirt. The skirt also has the extension as did the pocket facing. In the picture below, you also see the vertical lines that were drawn in for the pleats.
 Cut on these lines to the hem, but not through the hem and spread this area apart 2" as you see below.
Be sure to draw in your grainline. The center front is on the straight of grain. Also mark with notches where the pleats will be folded.
In the picture below you see the how the skirt and the pocket facing are the same and the insert is close to the body.
So there you have it. A peg skirt is so easy to draft. There are lots of style variations, so you can experiment to your hearts desire.

I plan on wearing my new skirt on Easter Sunday. I'll be sure to take pictures and post them next week.
As always, if you have any questions about the drafting of the skirt, please feel free to email me and I will do my best to help.


Share this PostPin ThisShare on TumblrShare on Google PlusEmail This

Thursday, March 29, 2012

How To Draft A Peg Skirt, Part One

The peg skirt is back!
Everywhere I look, I keep running into peg skirts.


They are rather unmistakable, small at the waist, flared out at the hips and then narrow at the hem line.A peg skirt is quite easy to draft.
This will be the first of a two part post. Today I will show you how to start the draft of a peg skirt. Next Tuesday I will finish the draft and show you my finished skirt as well. The skirt that we will draft will have a yoke, pleats and a side pocket. The finished skirt will be similar to the skirt pictured above.
Begin with a basic straight skirt pattern.
Next, draw in the yoke line. At the side seam the yoke line is 3" below the waist and at center front the yoke line is 4 1/2" below the waistline.
Now we will draw in our pleat lines. The first line is 2 1/2" away from center front. The second line is 1 1/2" away from the first pleat line.
 
Now we will start to have some fun and draw in our pocket lines. The pocket is actually going to stand away from the skirt.
Measure 9" down from the waistline. At this point come out 1 1/2" as you see in the picture above. The depth of the pocket should be 5 1/2". The line closest to the side seam is 2 1/2" away from the side seam. The second line is 1 1/2" away from the first line. Connect the lines as you see above and round off the edge of the pocket.
In the next post, I will show you how to take all the pieces apart and make the final patterns. It may look a little complicated at this point, but once the pieces are pulled apart, I think you will be able to see just how easy this actually is. This really makes a great little skirt, perfect for light weight summer fabrics as well as heavier winter fabrics.


Share this PostPin ThisShare on TumblrShare on Google PlusEmail This