f
Showing posts with label free pattern drafting tutorials. Show all posts

Friday, February 12, 2021

Fabulous Free Pattern Friday/The As You Choose Top, Wrap, Skirt

I can't remember the last time I did a Fabulous Free Pattern Friday post!!! At any rate, it's been quite some time, that's for sure :)

This is not a new post. I actually did this skirt 9 years ago :/ Wow, how could it be that long ago?!! I wore the skirt just a few days ago, posted it on Instagram, and a number of people commented on the shape, and loved it. So, I thought I would do a reminder post of the skirt. It is nothing more than a rectangle. It needs to be made in a knit. The end result is a piece that is quite versatile, and packs like a dream. And too, it's quite easy to wear.

Here's the picture I posted on Instagram. Since I originally made the skirt, I wear it with the drape on the side.   


Me 9 years ago ;) As you can see, I am wearing it with the drape in the back. 


I really like that I started doing videos to go along with my Instagram posts as it gives you a better idea of how the garment looks on the body, and how it moves.


And here's the magic of it all. It's just 2 rectangles with 2 ties. It cannot get any easier!!!


If by chance you would like to make 1 of your own, you can find my original post HERE.

Over this upcoming year, I am going to revisit a number of the pieces that I did for the Fabulous Free Pattern Friday series. It's been brought to my attention that they can be a bit difficult to find. In the event that you would like to take a look at some of the pieces I've done, you can find most of them HERE on my Pinterest page.  

What I love about this series is that it shows that fashion does not need to be complicated. Of course, complicated can be fun, but easy and fashionable is always a win, win situation in my book :)

Enjoy!

Rhonda



Share this PostPin ThisShare on TumblrShare on Google PlusEmail This

Tuesday, September 8, 2020

Fabulous Free Pattern Friday/A Recap

When I was growing up, and would visit my grandmother who had NO air conditioning, there were nights that I thought I would literally melt. I would complain. She would answer my complaint with, "just lay still, you'll cool off." Oh yea, right!!!(Note the sarcasm ;) A number of years ago, before we installed central air in our home, my husband had been out of town, and the temps were ungodly. We had yet to put the window units, and I wasn't going to do it alone. My husband arrived home late that night, came upstairs where I had the ceiling fan as well as floor fans going. But, when it's so hot, they are just whipping around hot air. He got ready for bed laid down and complained about how hot is was. I said, "just lay still, you'll cool off." :) With that, he got up, went to the basement and came up with an air conditioner. I'll admit, I was grateful.  

A few days ago, a delivery truck came down our back alley and tore out our cable line, leaving us without a television. Well, a television with cable anyway. I told my husband that it would be fine. We have a television in our bedroom that doesn't have cable. I usually only turn it on for the news. With that, he went down to my studio and got my little television, along with the antenna, and mounted it up on top of our television cabinet. It's really quite the funny sight :) But, I have admit that even I miss the cable. The repairman is coming today! Hallelujah!!! 

_______________________________________________________

Last Sunday, my outfit of the day was this Shibori dyed skirt and top. A friend gave me the fabric. You may not believe this, but this was the first piece of fabric that I have ever been apprehensive about cutting into. It just felt so special.  


I originally posted the skirt in 2012 :/ Wow, 8 years ago!!! You can find all of the instructions on how to create it HERE. It's really quite simple, 2 rectangles in the front, and 2 rectangles in the back.


In the video, you can see how the rectangular extensions on the top panel causes a drape.  


My top was made with the scraps I had leftover. Fortunately, I had pieces that I was actually able to match the pattern, and look like it was always meant to be.

You can see with the top laying flat that it is literally 2 rectangles in the front, and 2 in the back. So super easy to do. 

I just ordered a devise that will make making videos so much easier. As soon as it arrives...look out!!! I have a lot of tutorials that I have been wanting to do. A number of you asked me to do a tutorial on the asymmetrical knit dress that I recently posted. I know the top pictured above is very basic, but I think it would be a good tutorial to do as it's a confidence builder.

A number of you have sent notes telling me that I have inspired you with my daily outfits. That brings me so much joy. Believe it or not, I get up each morning actually looking forward to what I am going to wear, whether I have some place to go or not. This is the first time in my life that I feel I am really enjoying my wardrobe. Who would have thought that a virus named COVID would make that happen!

Have a wonderful day, and pull on something that you've made :)

 Rhonda      


Share this PostPin ThisShare on TumblrShare on Google PlusEmail This

Friday, November 9, 2018

Free For All, Free Patterns For You and Others!

We are getting our very first snow here in Chicago. Nothing to write home about, just a wet, rain like snow. But, what's in the air is so very pretty. Winter is definitely here!

A few days ago, one of the trees that is out in front of my house lost all of its leaves in what seemed like a few hours. Once the leaves were on the ground, the tree revealed a little secret it had been hiding, a lovely hornet's nest. Call me crazy, but I have always wanted a hornet's nest. To me, they are an amazing piece of artwork.

So, my husband helped me pull out a ladder, and I climbed up and snipped my little prize out of the tree. 


I think it is just amazing!


While I can be crazy, I'm not stupid(well, sometimes). I put the nest inside a plastic garbage bag, tied the top, and it is out in the garage awaiting our first hard freeze before I bring it indoors. Hopefully, all will be fine and I won't end up with a very angry hornet in my house ;)

Thanks so much to all of you who purchased my design from Spoonflower. I am so very honored:) I also purchased a few for gifts, and mine arrived yesterday. So excited!!! Something I never would have dreamed I would be able to do.


With the holidays coming up, I thought I would share a few of the free patterns that I've found that would be fun to wear, or would make great gifts.

I really love this caftan pattern from Sew Daily. It is a graded pattern, so a number of sizes are available. You will need to register on the site to download the pattern. You can find the pattern HERE. It can be made without the tie for a looser fit. 


If you are looking for something lovely to give to a sewing friend, or yourself :), this pattern for a sewing machine and serger cover from Closet Case Patterns is free and fabulous. You can download it HERE.


Jumpsuits are all the rage! While this is a sleeveless jumpsuit, it would pair so easily with a t-shirt, or turtleneck and move right on into winter. This free pattern from In The Folds can be found HERE


Pattern Union gives you all the directions you will need to draft out this super cute, and easy to make dress. It's free with the code MAISIE. You can find it HERE. To draft out the pattern, you will only need 2 measurements, hip and skirt length. So, this is a great opportunity to make something for an out of town friend or family member. The only hard part is getting them to give you their hip measurement!!!


Another fun and very versatile piece from Pattern Union is the Phoebe Jumpsuit. It's free with code PhoebeFreebie, and you can find the pattern HERE. Pop over to the Pattern Union Instagram site to see all the fun hacks they have done with the pattern. With 1 hack, rather than making it a halter, they cut 2 backs and did shoulder ties. Again, that hack takes it from summer to winter paired with a t-shirt or turtleneck.  


A little clutch always makes a lovely gift. The pleated clutch below is from I Think Sew's book, Bags-The Modern Classics. You can find the free, downloadable pattern HERE.   


And last but not least, I love this free turtleneck pattern from Tessuti Fabrics. You can find their Monroe Turtleneck pattern HERE


All of the patterns are quite easy to make, and should go together quickly. Now, if I could just give you a link for some free time!!! ;)) 
Rhonda


Share this PostPin ThisShare on TumblrShare on Google PlusEmail This

Thursday, May 10, 2018

T-Shirt Tango/Cowl Neck Tee

Thanks so much to all of you who sent such supportive messages on my post about my extremely out of control studio. Stay tuned for next week's video. The cleanup will not be completed, but progress will be made. Some of you asked questions. I will answer those questions when I do the next video. 

The beginning of the T-Shirt Tango posts! Always fun to start something new :)

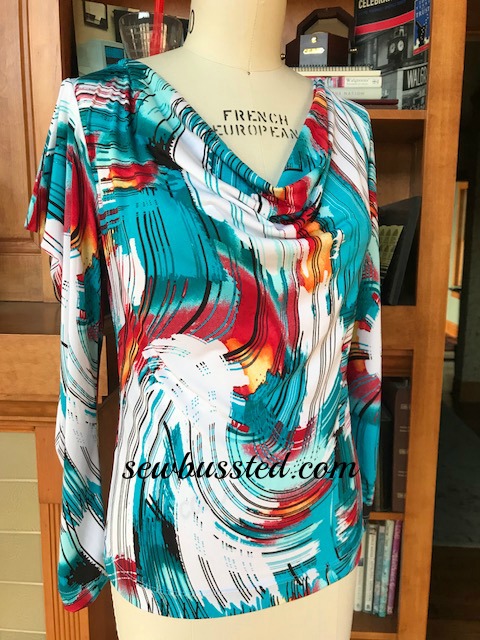
We'll begin with the Cowl Neck Tee. As you'll see, it's very easy to do.


I'm using Londa's Creative Threads Terrific T pattern. If by chance you missed yesterday's post, I am sponsoring a giveaway of the pattern, so be sure to visit THIS post and leave a message for a chance to win.


I like this pattern as it's truly a basic pattern. I am using the round neckline that sits just at the base of the neck. Her pattern offers a straight side seam which gives a relaxed fit, or a tapered side seam for a little more fit through the waistline. 

I took the basic pattern and created a sloper. To do this, I removed the seam allowances and then transferred the pattern to a piece of poster board. By removing the seam allowances, I will never be confused once I begin manipulating the pattern as to where I need to add seam allowance and where the seam allowance was left on the pattern. I know that I need to add seam allowance to each and every seam.    


Now that I have a basic sloper, I can trace around it to begin my design. 

I did not want my cowl neckline to fall too far below my bust area, so I measured down 3" below my armhole and squared a line across the front bodice pattern. 


Cut on the line from center front to the side seam, being careful not to cut through the edge.
I spread my cutline open 3 1/2". For a less dramatic drape, 2 1/2" will be fine.


Rather than cut the entire pattern all over again, I simply taped the piece I had cut onto another piece of paper to develop my cowl. 
The center front edge of the pattern was extended up.
I did not want the neckline to be close to my neck, so I marked the shoulder 2" from the shoulder edge. From that point I developed my cowl facing. 


In the picture below, you can see that my ruler is resting along side the center front line that was extended from the original pattern. From the neckline to the top of the cowl facing, measure up 7". From the 7" mark, round a line back to the mark that was made to establish a 2" wide shoulder seam.  


The final pattern. You do not need to cut the pattern as  a full front as I did. The pattern can be placed on the fold of your fabric. 


Remember to reduce the shoulder seam on the back pattern to 2" as you did the front. 

If you would like construction instructions, let me know and I will be happy to do a video and walk you through it.

Cowl neck tees are wonderful to have in your pattern collection. This tee can be worn with jeans, and paired with a skirt. The pattern can also be extended into a dress, so it is extremely versatile.

Enjoy!
Rhonda


Share this PostPin ThisShare on TumblrShare on Google PlusEmail This

Saturday, November 26, 2016

Sleeves On Saturdays/A Complete Directory

The Sleeves On Saturdays directory tab is complete!!! I finally sat down and finished the page. I'm so happy :) Now you can easily click on the Sleeves On Saturdays tab at the top of the blog, scroll through and find a sleeve along with the link to the blog post. If you would like, just click HERE as well :) 

In the directory, you'll find links to 36 sleeves drafting tutorials. 


Lots of fun styles to try :)


I would like to thank Bev of sdBev for giving me the nudge I needed to finally get the page finished. I would also like to thank Joy of Joyful Expressions who also nudged me by wishing she could help. So nice :) 

So....if you find a little time to spare, click on the link and look to your hearts content!


Share this PostPin ThisShare on TumblrShare on Google PlusEmail This

Tuesday, June 7, 2016

Creative Swimsuit Cover-ups/Soma Swimsuit Sew Along Begins

My first sew along post for the Soma Swimsuit from Papercut Patterns is up on the Sew News blog and you can find it HERE. I took a few liberties with the pattern, but it all worked out great in the end. So if you are thinking that you might like to make a suit this summer, be sure to check out the posts.

Have you ever found yourself at a hotel wanting to go to the pool and yet you have nothing to throw over your suit? I have! Even as a child, I was uncomfortable walking to the pool in nothing but my suit. I've borrowed a t-shirt from my husband, wrapped a towel around me, used the bathrobe provided by the hotel. They all do the job, but none provide the lovely, well put together look that I strive for. So since we are talking swimsuits over the next few weeks with the Soma Swimsuit sew along, I thought we would also talk about some fun cover-ups. 

I've done a number of Fabulous Free Pattern Friday pieces that are perfect for cover-ups.

The Magic Jacket
This piece is nothing but a big rectangle, and the pattern works well with border prints. You can find the instructions HERE.


The Flutter Top
This is made with 2 simple rectangles. The tie adds a little interest around the waistline and gives it a little more shape. Make it a little longer and it will take you from the pool to drinks at the bar, or a casual dinner. You can find the instructions HERE


The Easy Breezy Top
If you have a fun border print that would coordinate with your suit, this piece would be fun. The open sleeves help keep you cool and add interest. You can find the instructions HERE


Caught In A Wave
Wear it with or without a belt, either way you'll look super cute. You can find the tutorial HERE.


The Magic Rectangle Dress
Whether you take it a step further and do the ruching on the shoulders, or just leave it plain, the Magic Rectangle Dress is easy to slip on and will always look cute over any suit. See the tutorial HERE.


Hope that helps to get your creative ideas flowing!
Rhonda


Share this PostPin ThisShare on TumblrShare on Google PlusEmail This