f
Showing posts with label sew news sew along. Show all posts

Monday, January 6, 2020

A 2019 Look Back

A belated
Happy New Year!

This past year has was a little quiet, blog wise anyway. Last February, I broke my arm in 2 places just above my wrist, and that kinda set the tone for a quiet year. But, all in all, it really was a great year. I found a cousin that I had no idea that I had through Ancestry. She is such a lovely person, and someone that I am very proud to call a cousin. I also reconnected with a family member after 30 years. This brought home to me that no matter how bleak something may appear, never lose hope. 

I've posted more on Instagram than I have on the blog. Not that I am moving exclusively to Instagram, it's just a platform that's been quick and easy. So, to close out 2019, I thought I would share my most liked Instagram posts.

My cargo pants, they have been a favorite. This was a challenge that Cennetta of The Mahogany Stylist and I did. Berkley and I do a lot of hiking, and cargo pants have become my favorite go to pant as I can carry my phone, money, credit cards, and I am still completely hands free.      


I took my first ever weaving class at Chicago Weaving School. Loved it! I don't know that it will become something that I will invest a lot of time doing, but I would like to learn and explore more about the craft.


This is an old make,but I posted it as an outfit of the day. The jacket is one that I made from a Kantha quilt that I ordered from India. When I initially made it, I went back and forth about cutting down the collar. I finally elected to just leave it alone. The jacket is a free pattern from Sew News. You can read more about it HERE. My jeans are the Ginger Jeans from Closet Case Patterns. I don't think I will ever purchase another pair of jeans as this pattern is absolutely fabulous.   


This dress was a favorite go to dress this past fall. I began with a t-shirt pattern and then added the rectangle drape. So easy to make. It's from my Fabulous Free Pattern Friday collection. You can find the original post HERE.  


Another favorite. I wore this jacket throughout the holiday season. You can see my post on the making of this jacket HERE


Another Closet Case Patterns favorite, the Ebony T-Shirt and Dress pattern. I have worn the dress with heels, flats, and even tennis shoes! Fun and easy to wear.    


This is one of my favorite outfits for summer. In the top picture on the right, you can see that I am actually wearing 2 layers. The top layer is sheer. I can take off the sheer layer and just wear the underneath layer. The sheer layer can then become a wrap. Perfect combo for traveling. 


A favorite go to pattern for pants is the Barb Pant from Style Arc. I think I may have 4 or 5 pairs of these pants. The t-shirt is another that I have made more times than I can count. It's the Molly Tee from Pattern Union.  


The top that I am wearing was made from vintage tea towels. The pants are linen, and I added a drawstring casing to the side seam for a little added interest. Wore these all summer long. 


The dress below was one that I did for Sew News. It's the Magic Bias Dress from Fashion In Harmony. This is another dress that's easy to throw on. Love it!  


Another Magic Bias Dress. It's also a summer favorite. I didn't shorten this version. It's amazing how different the dress looks in another fabric.


Yet another Closet Case pattern, the Amy Jumpsuit. I had a few fitting issues with the pattern, but all in all, I like it and plan to make it again.


And finally, my favorite make of 2019. Thankfully, I took the class prior to breaking my arm. I used my own watercolor painting that I had printed at Spoonflower for the center panels. The bag pattern is the Poppins Bag from Annie's Two Patterns. You can find all the info HERE.  


I love to laugh. After all, it's good for the soul. I saw this on Facebook and just had to share it! I think that most of us can relate :)


Here's to a fabulous new decade. May it be our best yet!
Rhonda



Share this PostPin ThisShare on TumblrShare on Google PlusEmail This

Wednesday, October 30, 2019

Outfit of the Day...I Wish!!!

The change of seasons, be it from winter to spring, or fall to winter never seem to come easily in Chicago. Winter is trying with all its might to make its fury known with cold rain that will ultimately turn into snow later today. 

Poor Mr. Berkley, he absolutely hates getting wet. He doesn't mind the cold, rather seems to enjoy it, but not the rain :/ We had a rather ugly, rainy day last Saturday. As Berkley and I were walking, I felt that he was having a flashback to when he was left out in the elements. Broke my heart. But, the good news for him is that there is no more being left outside, and as miserable as it is for him to walk in the rain, he gets to come into a nice warm house :) 

On days like these, the idea of staying in my pajamas all day long is quite tempting. It might would happen if I didn't have obligations...oh well. 

This is a pretty boring little post, but I thought I would go ahead and share it with you. I recently made a new pair of pajamas, and I absolutely LOVE them! They're really nothing special, just a t-shirt and a pair of leggings.  


I bought the fabric from Oak Fabrics. Sadly, at least for me, the owner decided to close her brick and mortar shop and just be an entirely online business. That's the end of my impulse buying! Anyway, the fabric that I used for the leggings is fabulous. It's the Ticino Organic Jersey Knit, made in Germany. Oak Fabrics carries 6 colorways and patterns that you can find HERE.    


A few months ago, Sew News had a free sew along for the Loveland Leggings. As far as leggings go, it's as basic as basic can be, 1 pattern piece, and that's it. No crotch gusset, no extra waistband. The pattern is no longer free, but it's still quite reasonable, only $4.99, and you can find it HERE. If you are new to making leggings, and would like a little guidance, you can find the sew along HERE.    


I used the Molly Tee from Pattern Union  for my top. It's just a great basic t-shirt pattern. You can find the pattern HERE


I love the combo t-shirt and leggings as pajamas so much that I'm making a second pair. 
A little secret, rather than change my clothes to walk Berkley in the morning, I just pull a pair of cargo pants on over the leggings. Then, when I come home, I pull off the pants, and I am still in my pajamas!!! 
Happy Sewing!  
Rhonda


Share this PostPin ThisShare on TumblrShare on Google PlusEmail This

Thursday, August 31, 2017

Can a Jacket Cry?

I won't include everyone, as I would like to believe that there's someone out there who finishes every project that they begin. But, I think there are many of us that for whatever reason, have garments that languish unfinished, in a drawer, hanging in the closet, or folded up on our work table. They need buttons, maybe a hem, usually just some little something that never seems to get accomplished. While truth be told, I have many, there's one in particular that has almost seemed to cry out, "PA-LEEASE finish me!" 

If you've followed the blog for a while, you may remember the Pepernoot Sew Along I did on the Sew News blog. Cute, cute coat from Waffle Patterns.  


The jacket on the left, I made for the Sew News magazine. The coat on the right was made during the sew along. I absolutely love those great big hippy flowers :)


During the sew along, I mentioned that the coat could easily be made without the hood. Some one asked it I would elaborate, so I decided to make up a spring/fall version without the hood. Coat/lining cut and ready to go.


The last time I left you, I am very ashamed to say, was May 20, 2016. I truly hold my head in shame :( 
The coat was basically finished, I wanted to adjust the tabs. The pockets needed to be added, and the hems finished. 


The zipper and lining were both in, so just little finishing jobs left.

   
Here, on August 31, 2017, I am very happy to say that the coat is FINALLY finished! 


I decided to try a different application for the pockets. Rather than inserting the zippers, I lined and top stitched around the pockets .


Placed them on the jacket and then top stitched them in place.


An opening was left to insert the hand.


And I made a bar tack at the lower edge of the opening to reinforce the pocket.


The hems are in, and I am all set! Finally!!!


I recently came across this fun little piece of fabric. Love the whimsical planes, trains, and boats. I'm making a little pencil skirt to wear with my jacket. 


The lining I used for the jacket was found at an antique store. Believe it or not, an antique store can be a great fabric resource. If I'm not mistaken, there were about 5 yards and it looks like there will be enough to line a skirt and make a little blouse. I am going to be one patriotic looking sight ;)


While our languishing projects can't actually cry, we can, like all the times I have gone to get dressed and said, "if only I had that coat finished." Well, now it's finished and I can't wait for the temps to fall just enough to begin pulling it on.

Hope I've inspired you to grab an old project and get it done!  


Share this PostPin ThisShare on TumblrShare on Google PlusEmail This

Friday, March 10, 2017

Sew News and A Winner!

A BIG, BIG thank you to everyone who watched...or listened :) to the last episode of Sewbussted's Material Witness with Ellen March, editor of Sew News. I hope that many of you will take advantage of submitting article ideas. Remember, they are looking for ideas for both Sew News as well as Creative Machine Embroidery. You can find the info about submission HERE

Ellen very generously offered a FREE subscription to Sew News, so without further adieu...

The winner is;


Congratulations Carolyn F.!!!

Please email me at sewbussted@yahoo.com with your mailing info so I can pass it along to Ellen. 

The new April/May issue of Sew News is out and in it you'll find LOTS of great info.


There's a new Master Class series. This month, the featured article is all about set-in sleeves.  


For anyone who is a little timid about sewing with knits, you'll find a very informative article that should build your confidence.


Detailed instructions will help you draft this fun bag.


Having your own custom labels makes for a fun addition to any garment. Included in the article is a discount code for 15% off from Dutch Label Shop, so your subscription begins to pay for itself! 


If you enjoy sew alongs, beginning March 14th, you'll be able to join Kimberly Payne of Straight Stitch Designs as she walks you through her Ravenna Top. It will all be on the Sew News blog.


You may remember The Clara Dress sew along that I did for Sew News. You can find links to the sew alongs I did HERE.

Today, March 10, 2017, and today only, you may purchase the pattern for 20% off! Just click HERE.


It's an easy dress to make and wear. I've made 3, and they are a summer staple in my wardrobe.

During the sew along, I showed you how to customize the pattern by adding a gathered ruffle to the collar, sleeves, and hem. I also showed you how to easily line the dress.


If you would like to purchase a subscription to Sew News, just click HERE!

Happy Sewing!
Rhonda


Share this PostPin ThisShare on TumblrShare on Google PlusEmail This

Tuesday, January 10, 2017

If Only Little Red Riding Hood Had Made Cape Super Express

If only Little Red Riding Hood had used the Cape Super Express pattern, she would have finished her cape in record time, and the wolf would have missed her!!! 

The final post for the Islander Sewing Systems Cape Super Express is up on the Sew News blog and you can find it HERE. If you look at the tab section at the top of this blog, you will see a page with links to all of the sew alongs that I've done for Sew News. The Cape Super Express has been updated, so if at any point you decide that you would like to give the cape a try, you can easily refer back to the posts. Remember, the posts remain on the Sew News blog, so no expiration!

I thought that you might like to see me in the capes that I made. 
First up is the denim cape that I made for the sew along. 


You can see how nicely the hood lays on the back.


And it's perfect for when you need a little extra protection from the elements.


And finally, a flash of the lining.


Now the faux fur and velvet cape. This cape was made for the magazine. It's actually lighter in weight than the denim cape. But, for an evening out, it's perfect for throwing over your shoulders and looks great with a pair of opera length gloves.


Due to the nature of the faux fur, the hood has a little more drape to it which I really like.


A little flash of my lining. For the lining I used a wonderful piece of silk that has dragons embroidered throughout. If by chance you would like to give the pattern a try, you can find it HERE.


I have had so much fun doing the sew alongs, and I am very grateful to Sew News for giving me the opportunity to sew with all of you. 

In the February/March issue of Sew News, you'll find 2 sew alongs, the Clare Coat from Closet Case Files, and the Appleton Dress from Cashmerette. Both sew alongs will be conducted by the designers of the pattern. So be sure to check out the patterns and the sew alongs. I'm sure they'll be fun and informative.  

And I can't sign off without saying a great big thank you to all of you who have followed along and made the patterns over the past 3 years. Thank You, Thank You, Thank You!!!!!!!    


Share this PostPin ThisShare on TumblrShare on Google PlusEmail This

Thursday, December 22, 2016

The Islander Sewing Systems Cape Super Express Sew Along

Due to the holidays, and days away from work, the final post for the Cape Super Express may not get published on the Sew News blog for a week or so. So, rather than make you wait, I thought I would go ahead and post the final addition here. Once it's up on the Sew News blog, I will add the post link to the the Sew News Sew Along Links tab at the top of the blog so that you can easily find it whenever you might like to refer back to the sew along.

For the sew along, I chose to make my cape out of denim. A few of you have asked about wearing a denim cape in Chicago during the winter. It won't happen!!! I would freeze to death! The first cape I made for the magazine is really an evening cape. Although it is made out of faux fur and velvet, it is still rather light weight. But, when going out for the evening, I basically go from the house to the car, and the car to wherever I happen to be going, so I am not walking around in the cold. The denim cape will be worn in the spring and fall months when I need something, but nothing too heavy. So, I am all set for once the weather changes. But, if you are anything like me, the bad thing about making a garment that can't be worn now is the fact that I have to wait. I don't like to wait ;) I'm one of those make it and wear it kinda gals! 

The Sew News Islander Sewing Systems
Cape Super Express Sew Along
Week 3/Finishing


This will be the final post for the Islander Super Express Cape sew along. The name says it all, super express, and yes, it's a fast piece to make! So no reason to stretch the sew along out to 4 weeks.

One detail that I failed to mention in the last post is the shaped seams at the hem of the cape. This has been done on purpose and is a wonderful aide in hemming the garment as it reduces bulk in the hem. So when sewing the lower portion of the seam, be sure to clip the seam and continue sewing to the end of the seam with a 5/8" seam allowance. You will love how easy the garment is to hem with the reduced bulk.


Now that the outer shell of the cape is together, it's time to finish the arm slots. If you look at the instruction booklet, there are a number of steps to finish off the arm slot on the cape and then on the lining. It's a wonderful method, but I like to simplify things if I can, so I will show you my method for finishing the arm slots. With both methods available, you can then you can choose which method you would like to use.


Begin by interfacing the arm slot opening on the cape with a 1" wide piece of fusible interfacing.


Sew only the front lining pieces together. Lay the front lining on top of the cape with wrong sides facing. 


Fold back the top of the lining as you see above. 


Stitch the lining to the cape along from notch to notch of the arm slot opening. Be very precise in your stitching and only stitch from notch to notch. Be sure to back stitch at each end.


Repeat with the lower portion of the front lining.


Press the arm slot opening. 


The arm slots are beautifully finished on the outside and the inside of the garment. If you are a little concerned about ripping the seam, you may do a bar tack at either end of the arm slot opening. You may also top stitch around the opening.


Now sew the back of the lining to the front along the side seams with a 5/8" seam allowance. Press seams open.


Before attaching the facings, the hem of the lining should be finished. 


Simply turn up the hem allowance and stitch in place on the machine. 


Now attach the facings to the lining. I like to edge stitch my facing to the lining once the seam has been sewn. It helps to hold the seam allowance in place and looks lovely. The facing is stitched to the lining with a 1/4" seam allowance.
   

Attach the hood to the neckline. Sew the facing to the cape at the neckline. The seam allowance is 1/4".
   

Due to the method I used to attach the lining to the cape at the arm slot openings, you will need to sew the facing to the front of the cape along one side, and then sew the opposite side. You will not be able to sew the facing around the cape in 1 continuous seam.
  

Once the facing has been attached to the cape, we can hem the cape. Fold back the facing as you see below. Fold back the seam edge and stitch across the facing at the hemline.


Clip the corner of the facing, and then trim down the facing, leaving the hem of the cape intact. 


Press the hem of the cape. If you would like, the cape can be top stitched along the front edge and along the hem. 


To attach the lining to the hem of the cape, sew thread chains at the seams and then 3 more along the back between side seams.


The final step in finishing the cape will be the front closure. There are so many options. If you would rather not sew in buttonholes, you can sew on snaps as I did with the faux fur/velvet cape. On the outside I added buttons which gives the appearance of a buttonhole without the worry.  


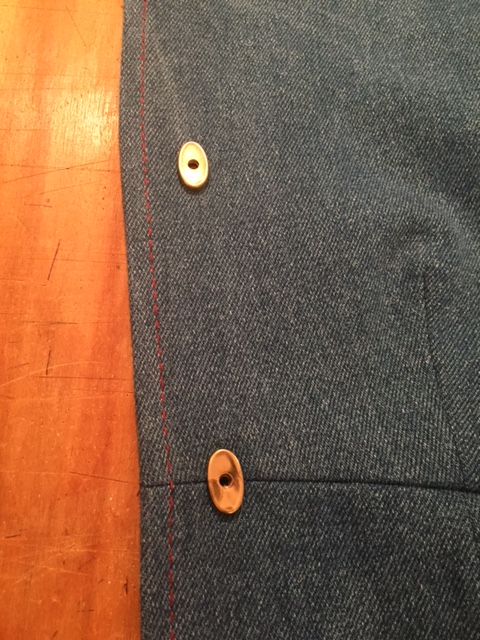
For my denim cape, I decide to use some vintage purse claps. Sadly, these are no longer available, but I hope that this will encourage you to think outside the box. Due to the heavy nature of outerwear garments, there are so many possible options for closures, including purse hardware.


This clasp simply folds over the edge.


And has a corresponding piece for the opposite side. Consider using a magnetic closure. If you do, then any button can be sewn to the front of the garment, and once again, you have not had to worry about buttonholes not turning out as you had hoped.


My finished cape. It really has such a lovely shape.


Due to the closure that I decided to use, I did not top stitch the front waist seam.


But the side seams have been top stitched as well as the hood.


Although the hood was a 'make it work" situation due to my lack of fabric, I was pleased with how it turned out.


The back of the cape.


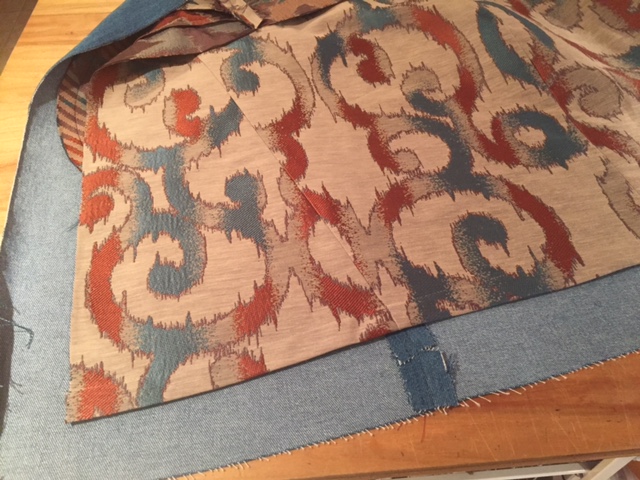
And finally, the fun interior lining.


Now you can see how very versatile the Cape Super Express pattern is. It's a great cape for throwing on to run errands, and it makes for a lovely evening piece to add to your wardrobe. 


If you have not purchased a pattern, but would like to, you can find it HERE at Shop Sew It All.

It has truly been an honor and a pleasure to sew along with you on the Sew News blog for the past 3 years. Along the way, I hope that I have been an inspiration. Remember, all of the sew alongs are always available on the Sew News blog. You can easily find links to all of them HERE.

Remember to always,
Sew On!!!
Rhonda Buss


Share this PostPin ThisShare on TumblrShare on Google PlusEmail This