f
Showing posts with label free t-shirt patterns. Show all posts

Wednesday, May 1, 2019

A Little of This, and a Little of That Makes a Jacket

This morning it was raining and quite dreary out. As I sat down to do my morning writing, I heard a cardinal singing his heart out. It made me smile. Regardless of his circumstances, he was going to sing and find joy in the day. A great lesson :)

What a joy it is to be sewing again! Last week, I drafted out a pattern for a new jacket, and....

HERE IT IS!!!  
 

I am so very pleased with how it turned out. The embossed fabric is actually sheer. I backed it with a piece of navy blue cotton velvet. The cotton velvet was a lucky resale shop find. 


The front of the jacket hangs straight, while the back drapes and hangs away from the body. I added a hood, just because I felt like it ;)


The jacket is lined in this fun pop of burnt orange.


Last summer, Becky of Trial Balloons sent me this beautiful piece of embroidered silk that included a bit of cutwork. Peeking through the cutwork was the burnt orange silk. I had just enough to do cuffs, and so the inspiration for the lining.   


I actually wore this dress last Christmas. I love the fabric, a lovely stretch velvet that glistens with an undertone of the burnt orange when I move. 


I just love how the dress and the jacket look together!


A little secret on the drafting of the jacket pattern...
I actually began with the free Chelsea Raglan Tee from fabrics-store.com. If you are interested, I can do a post on how I drafted the jacket.

I was asked about the zipper. I actually bought it at Joann's Fabrics. It's a navy blue zipper with navy blue metal teeth. They also had the fun zipper pull, sold separately. I could not have been more pleased! Sometimes Joann's pulls through for us when we are in a pinch!!!

Have a wonderful day, and may you find something that will make you sing :)
 Rhonda


Share this PostPin ThisShare on TumblrShare on Google PlusEmail This

Tuesday, August 28, 2018

A Month of Woven Tees/Week 4

What a lovely month it has been, except for the incredibly hot temperatures we have had in Chicago! As a child, I lived without air conditioning. For the past few weeks, every night as I crawl into bed, one of the last things I say is, "thank you Lord for air conditioning!" Complaining aside, I have so enjoyed the push that Becky of Trial Balloons gave me. Had it not been for her, I would not have ended up with all the new pieces in my wardrobe. 

THANK YOU BECKY!!! 

Now, this is just the best!!! You may remember the piece I painted and then had made into fabric. Well, I sent a piece to Becky and look at the AMAZING top she made!


Oh my, I am beyond flattered. The panel that I sent to her was unfinished, which I felt a bit bad about, as I thought she might just turn the edges and use it in a bread basket. What she did with it is a masterpiece. Be sure to pop over to her blog and see the back, as well as all the other lovely pieces that she made...and the poor woman has had pneumonia!  You can see all her work HERE.  

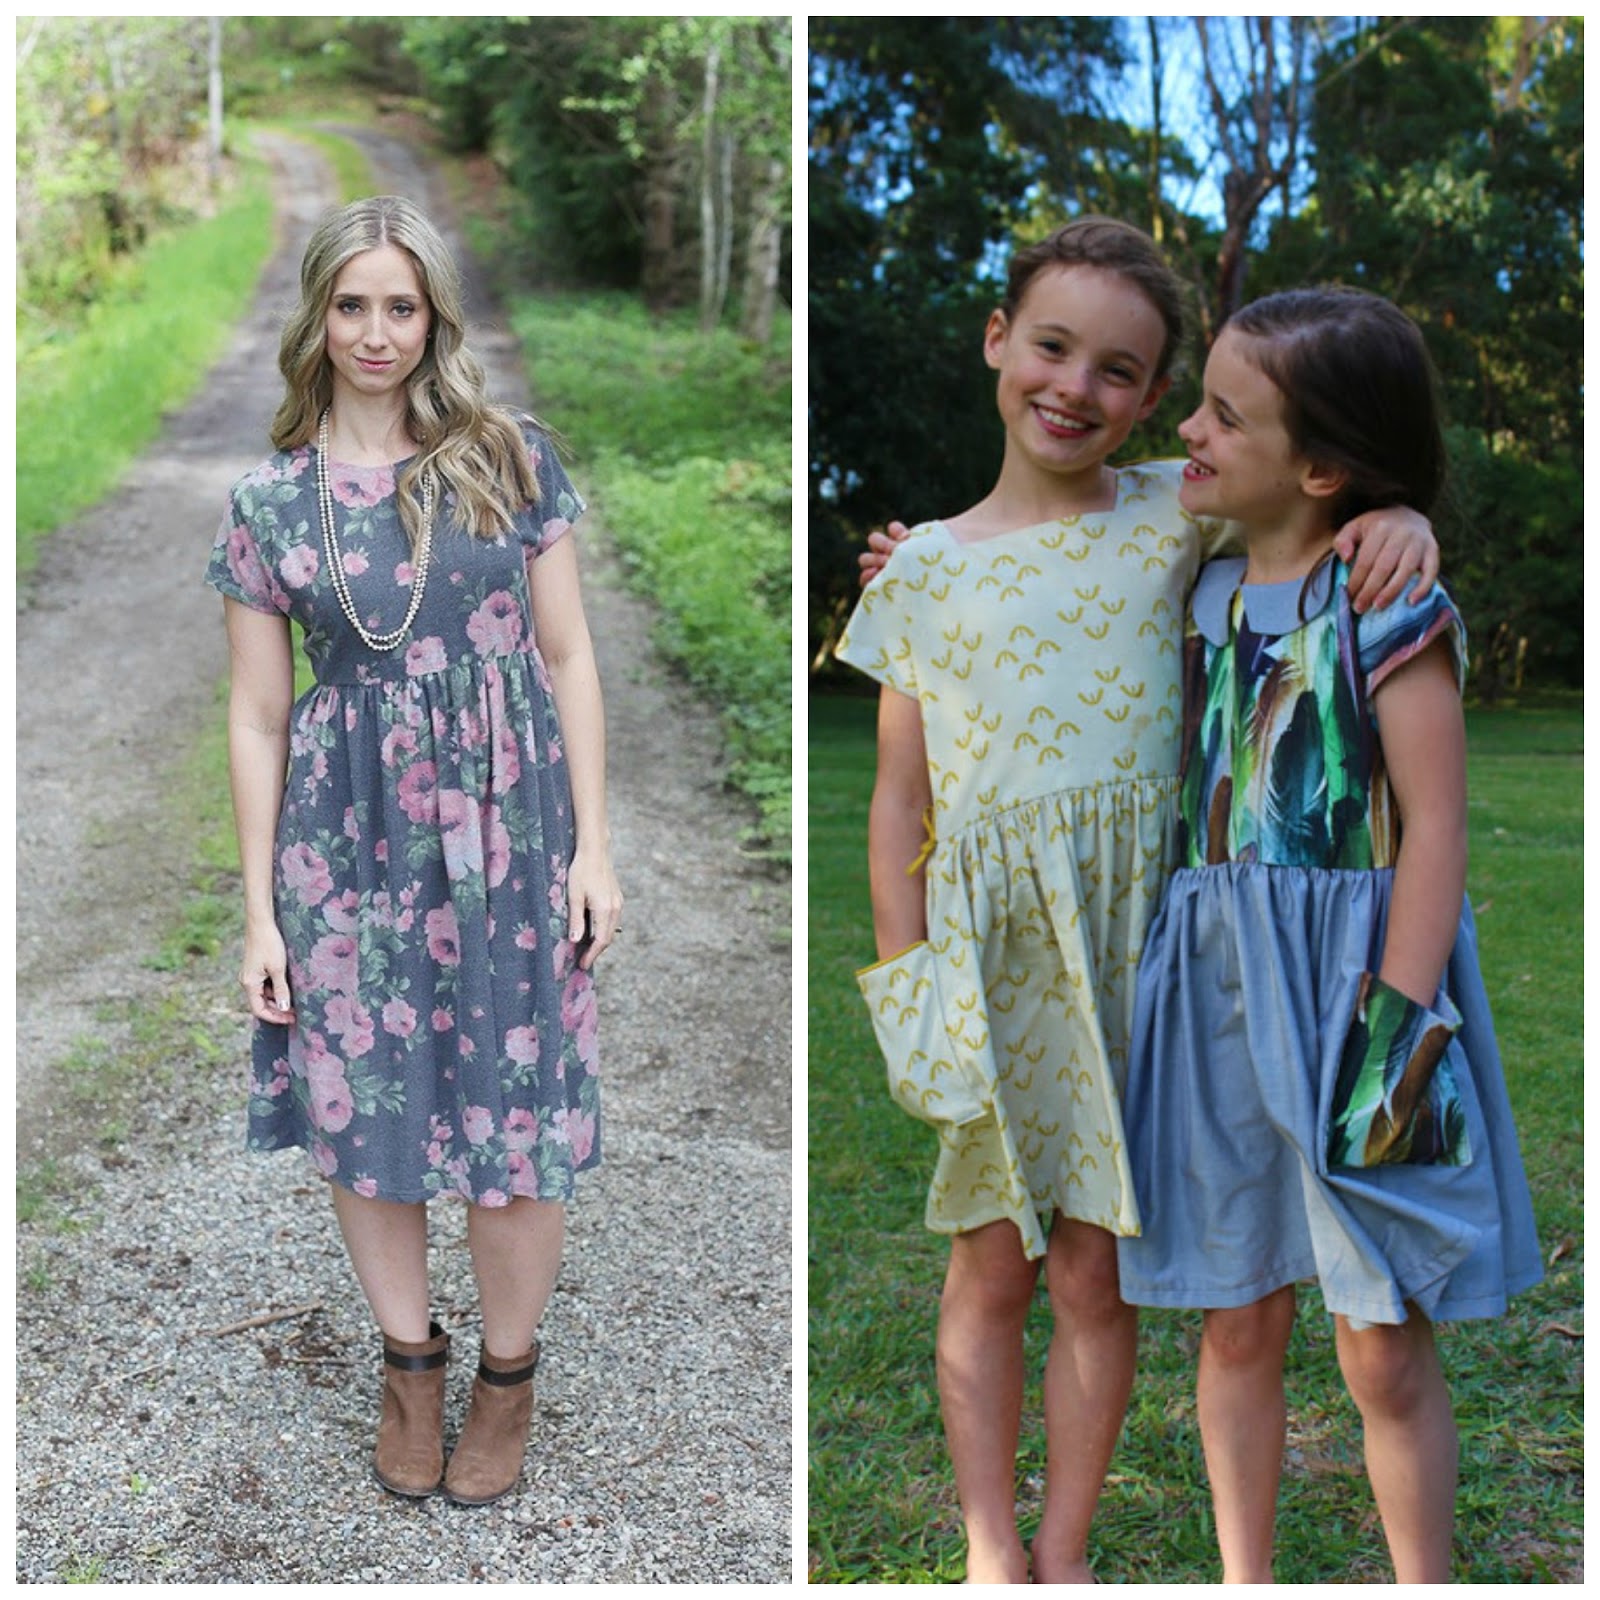
When Becky asked if I would like to participate in a month of woven tees, she said that she would put a Pinterest page together for us. The top below is one that she found and pinned to the page. I thought it was rather nice, so I used it as my inspiration for my tee, which is really a dress. To be honest, I wear more dresses than anything else in the summer, so a new, pop over the head dress is always up my alley. 


Once again, I used the free raglan tee pattern from fabric-store.com You can find the pattern HERE

Rather than dividing the sleeve, I decided to just start my design line from the underarm intersection. 


I did do a funnel neckline, which I really like. Super easy to do BTW.


If you look closely, you can see that I tapered the side seams just a bit, but not so much so that I can't get the dress over my head. I also added a pocket.


I think you can see the lines of the pocket better in the picture below. The seam line begins at the style line of the bodice and comes down to the pocket, but not all the way to the hem of the dress.


It makes the pocket area a little trickier to sew, but not that much. The reason that I did not want the seam down to the hemline was because of the shirttail hem that I wanted to do. Having the seam line to the hem wouldn't have made that much of a difference, but I just didn't want the extra bulk in the hem.


To balance the dress, I used the white for the bias binding along the hem. It should give the eye of anyone who bothers to look, something to notice


If by chance you would like a tutorial on how to make the funnel neckline, or how to draft the pocket, just let me know. They are both fun to do, and you can see that they can easily be added to a basic pattern such as this.

I do have a fun tea inspired recipe to share with you, but it is going to have to wait a few days as it has just been much to hot to bake. I hold my head in shame, especially when Becky has had pneumonia, and managed to get sooooo much accomplished :( 

I hope you have enjoyed the month of woven tees, and I hope that it has inspired you to maybe venture out and do something a little different :)


Share this PostPin ThisShare on TumblrShare on Google PlusEmail This

Thursday, June 28, 2018

Thrifty Thursday/Free Raglan Tee

A nice easy tee that can be made out of a woven fabric...sounds like a great idea to me!

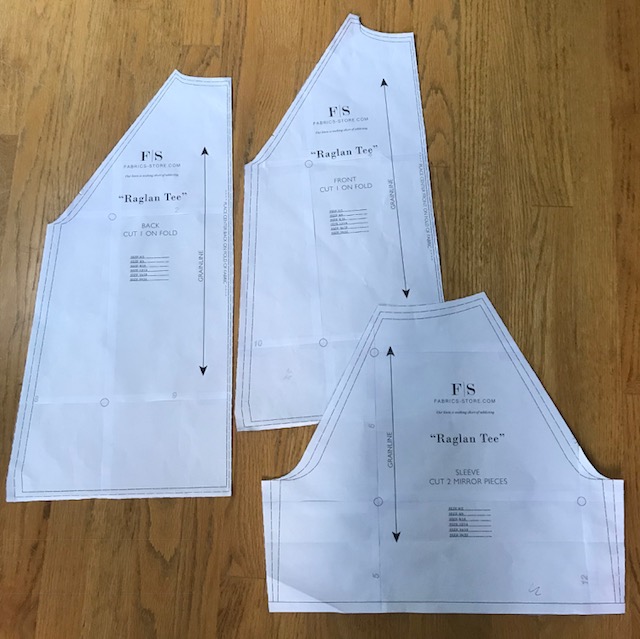
A few weeks back, Fabric-Store.com posted the raglan tee below. It's a nice clean design, so I thought I would give it a try.


I had just a couple of issues with the pattern. There are no sizes marked, and there are no notches, which can be confusing when it comes to attaching the sleeve to the front and back. Prior to cutting, I put my own notches on the raglan seams to mark front and back. Easy enough to do. As for the sizing, just measure across the lower portion of the pattern and then decide based on your hip measurement which line to cut on. 

One other issue is that in the instructions, there is no seam allowance specified. I used 5/8". Other than those 3 issues, the pattern went together easily.
  

I decided to give it a whirl with some fabric that I found as I was cleaning up the studio, a calico print that I had completely forgotten about. Thought it would make a nice pair of summer pajamas.

The instructions call for 2 small tucks on either side of center in the front and back. When I made up the tee, the tucks were not needed. Look closely at the picture below and you can see that a small dart is needed on the shoulder.


Once the dart was added on the shoulder, the garment laid flat and there was no need for front and back tucks.


My finished pajamas. I had to cut the tee with a seam down the center of the back and front. I had the crocheted trim, so I threaded a piece of ribbon through, sewed it down the center and covered up the center front seam. I had another piece of crocheted trim that I added to the sleeves and the hem of the pants. The center picture on the right below shows how I mark the back of my pants. Great use of bits of ribbon.

And me in the pajamas :)


I had a small piece of silk that was just enough for another top. This time I had enough to do the cuffs. 


I once again added a dart on the shoulder.


I really like how the top wears, so I decided to lengthen it and make a t-shirt dress.


With this fabric, I did not need to add the shoulder darts as the neckline laid flat without them. 


I added a shirt tail hem. To finish the hem, I cut a 2" wide piece of bias. I made the back a little longer than the front.  


And finally, I added a small front pocket. It looks so cute on. I'll post pictures of me in the dress soon.


The pajama pants as well as the striped pants are from a free pattern, the Martha Stewart pajama pant that I posted HERE. I find the pattern to be a great basic elastic waist pant. 

You can find the Raglan Tee pattern HERE

Happy Sewing!
Rhonda


Share this PostPin ThisShare on TumblrShare on Google PlusEmail This

Wednesday, May 31, 2017

The Wednesday Showcase/Table Turned

Gifts come in all sorts of ways! 

Last summer I injured my back and I have suffered with it since. I initially went to a rehab facility that combines chiropractic work with exercise. Rather than get better, it got worse! My doctor suggested that I concentrate on acupuncture and massage and allow the area time to heal, which I did, but of course I skied and hiked throughout the winter. The acupuncture and massage have helped, but the pain is persistent. Some days are fairly good, and some days rather terrible, but either way, the pain is never completely gone. So I decided to see an orthopedic doctor who specializes in back pain. As it turns out, it's caused from an old injury to my spine. I fell down the stairs about 10 years ago and really hurt my back. It healed though and I thought nothing of it until the doctor told me that the pain is caused from an old injury. He feels that the correct type of rehab exercises will help to strengthen the muscles around the area and I will once again be pain free. Fingers crossed :)  

I had a rotten headache yesterday, the kind that just won't go away, and of course, I had a rehab appointment. Off I went, feeling a bit sorry for myself. While waiting for my therapist, I opened my mail, and there was a little gift.

Just a few days ago, I needed to quickly throw on something that looked halfway decent, so I pulled out this little dress that I did for a Fabulous Free Pattern Friday post, The Magic Rectangle Dress.


As I pulled it on, the thought came to me that I should make another and revisit the post as I really enjoy wearing this dress. Perfect for summer. 

The message I received was from Maria Geer of Stitch and Sew. She loves to sew and her blog is all about sharing sewing tips, new products, and continuing to build this wonderful sewing community that we all love. 

Her most recent blog post is entitled, My Top 100 Free Sewing Patterns, and low and behold...my little Magic Rectangle Dress made it as one of her 100 favorite patterns!!!! Wow, now talk about telepathy ;)

I have gone through her list and it's wonderful. There are patterns for holidays, cute pieces to make for children, toys, quilts, bags, clothing for women, just so much!

Here are a few of my favorites;

Love this super cute whale. Great for a baby shower.


Such a fun hat for summer or winter.


Summer perfect dresses for big girls and little girls.


A fun faux fur vest for when cooler temps roll around once again.


A great carry-all bag with a secure closure. 


We can never have enough cute tees for summer.


Now this is just a small sample of the patterns that Maria has shared, so pop over, check out her POST. I think you'll find lots of fun ideas.

And a special thank you to Maria for featuring one of my pieces. Such a wonderful surprise!!!


Share this PostPin ThisShare on TumblrShare on Google PlusEmail This

Saturday, February 20, 2016

Thrifty Thursday/Tites Mains Japanese Inspired Twisted T-Shirt

Yep, it's Saturday, and yep, I'm behind, but I wanted to share a new pattern that's super easy to make and lots of fun to wear.
A while back, I introduced you to Tites Mains, a talented young woman who lives in France. She posted a brand new pattern this week. I love asymmetrical tops that drape, so I decided to download the free pattern and give it a try.
Here's a picture of her in her top. 
Other than the fact that I like draped, asymmetrical tops, I also liked the fact that it was designed to be made out of a woven fabric. The top goes together in a snap as there are only 3 seams. 
Below is the taped together PDF pattern. 
I made a couple of changes to the pattern. If you'll notice, there's a V-neck, I rounded mine,
Also notice that there is a point at the top of the pattern. You can see a line running from the point to the hem. This is a fold line and becomes the side of the top once the piece is folded. 
The point will be under the arm once the arm has been put through the opening that will basically be the sleeve. The problem with the point is that it is difficult to turn and finish. 
I simply folded the fabric in half on the fold line and then trimmed the point away. Now the edge will be easy to finish. 
Here's the top folded on the fold line prior to be sewn together. You can see that there is only 1 side seam and 2 shoulder seams. One side has more of a traditional sleeve and the other side has notches that indicate where the stitching should stop for the arm opening.  
Since the pattern was designed for a woven fabric, I decided to use a suede cloth. I wish there was touch-o-vision as this is the most wonderful to touch fabric. It can be steamed, but not pressed, so I topstitched the seams in place.  
The shoulder seam was topstitched and then I ran the stitching into the and around the armhole opening. 
 My finished top.
The back.
Rather than turn and stitch the neckline as she suggested, I did a bias binding. I think it makes a nicer finish.
And because we all like to look on the inside :)
The pattern is labeled as a medium to large. I feel that it is more of a small to medium. If you make it out of a knit fabric, then it could fit a large. So PLEASE measure the pattern prior to cutting to determine if the pattern as it is will fit you.
You can find the pattern for free HERE on the Craftsy website. I will be making more as it's super easy to make and easy to wear. 


Share this PostPin ThisShare on TumblrShare on Google PlusEmail This

Saturday, April 11, 2015

Thrifty Thursday on Saturday/Free T-Shirt Pattern

Over the past couple of years, I have been absolutely amazed by so many of you who have taken on the challenge of not purchasing any ready made clothing. I have not jumped in as there are pieces that I buy from time to time, especially for skiing, that I would rather not make. It's not that I can't, it has more to do with the fabric that's used. I get cold so very easily and I have found pieces that keep me warm like nothing else can. But, with all of that said, I really do make most of my clothes. It has become a very rare situation that I purchase something and I think that's a good thing.
I have a t-shirt pattern that I drafted some time ago that I use to make lots of tops with, but since I haven't gotten to the point that I can make that available to you, I thought I would look around for a very basic t-shirt pattern that was not only a great pattern, but free!! And I found one. The pattern line, Skinny Bitch Curvy Chick was designed for the petite woman, so typically, someone who is 5'4" tall or less, and has a shorter torso, legs and arms. There is a free t-shirt pattern offered on the site, so I thought that although I am not a petite person, I would give it a try and the result is that I REALLY like this pattern. The pictures below are from the SBCC website.
Not only does she offer 1 free t-shirt pattern, she offers 2! Even better. The first version is a basic long sleeved t-shirt. You can find the pattern HERE.
The second is a basic short sleeved t-shirt. You can find the pattern HERE. The pattern is basically the same as the long sleeved version, it just takes the guesswork out of determining how long the short sleeve should be.
I included the line drawing for you.
The pattern is very easy to download and especially easy to tape together. The taping will take less than 30 minutes. Here's a schematic of the pattern once it has been taped together. Take note that she has also included a neckband pattern. I just love it when all the pieces are included!!!
I still need to hem my top, but other than the hems, it's finished and as I said, I really like it.
 The neckline is quite nice, not too high and not too low.
If you decide to download the pattern, a few things to keep in mind.
The sleeves were perfect for me, but I have short arms, so you will most likely want to lengthen the sleeves. I took mine in just a little at the waistline. I do not have a short torso, in fact, I will quite often spread my patterns at the waist if the pattern has a defined waist. I did not have an issue with the waist of this pattern being too short. If you are very long waisted, you may want to slash the pattern at the waist and lengthen it an inch or so.
One thing that I like about the pattern is the length of the front and back. They are long enough that you can scrunch your top along the hips when wearing jeans, and since there is a little extra length, you won't feel that your top is going to ride up when you move.
This is a great basic pattern that can be used for all you t-shirt making needs. Make a bunch in different colors and you can even layer them, one of my favorite things to do. So although this pattern  is intended for a petite frame, don't shy away from it if you are not.
Pictures of me in the top will hopefully come in just a few days :)
Happy t-shirt making!!!


Share this PostPin ThisShare on TumblrShare on Google PlusEmail This