While looking for some webbing at my local chain fabric store today, I just happened to notice this free pattern tutorial. This was meant as a promotional to sell the faux fur strip that was used to make the collar. I thought it was rather cute and something that I could use, so I tore off a sheet.
I made this coat quite a while ago. It's perfect with skirts, pants and even an evening gown, but the problem is that my neck gets very cold. I could wear a scarf with the jacket and I have, but a scarf is just not quite right.
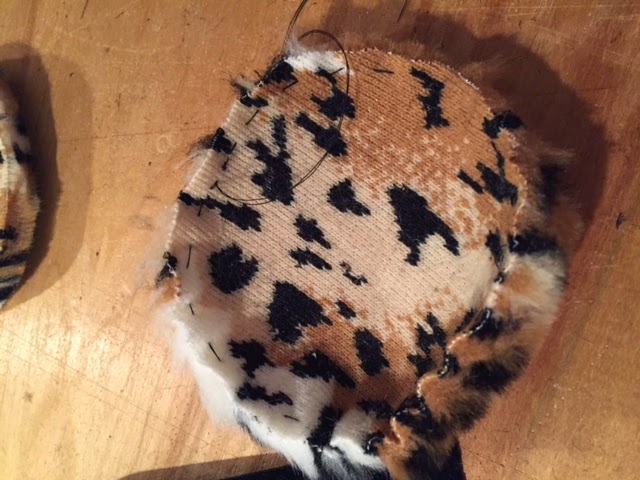
The back has a lovely swing.
When I arrived home, I immediately began working on the collar and I am so pleased with the outcome. It's just perfect for the jacket. As I said, the tutorial was created to sell a 4" wide strip of faux fur. I made a few changes to the tutorial, quite a few actually, so I will walk you through what I did.
Supplies;
54" long strip of 4" wide piece of faux fur
1 yard of 1" wide ribbon
A small amount of fiber fill for the pom poms
Most people will cut their fur with a pair of scissors. You should not cut fur with scissors. It cuts the hair and makes a mess. Use a razor blade to cut the fur. The blade will cut the backing fabric, but not the hair..
Begin by cutting 2, 4"squares from the end of the fur strip. Set the 2 squares aside for now. Cut the remainder of the strip down to 3"wide. Fold in half and cut into 2 pieces. Take 1 piece and hold it up to your neck to check the circumference. If the strip is too long, cut it down at this point.
Lay the 2 pieces together. Push the fur inside and sew along the edge with a zigzag stitch. Fur should not have a seam allowance.
By sewing the seam with a zigzag stitch, and pushing the fur fibers inside the seam, the fur will cover the seam and look lovely from the outside.
On the other side, leave an opening for turning.
Cut the ribbon in half. I used a velvet ribbon for my ties. Thread the ribbon into the collar and pull it out the end. Zigzag the edge. Be sure to go back and sew a straight stitch across the ribbon to help secure it in the seam. Turn the collar to the right side.
For the pompoms, round off the edges of the 4" squares, and create circles.
With needle and thread, do a running stitch around the edge of the circle.
Pull the stitches up. Prior to closing the circle, stuff the pompom with a little fiber fill.
Insert the end of the ribbon into the pompom and securely stitch the ribbon into the pompom.
Stitch the side opening closed by hand.
Tie a nice bow and wear the collar with pride.
The collar goes together quickly, in less than an hour. It's just 2 rectangles and 2 circles. Girls of all ages would love this collar, so they would make great gifts. I know this girl is going to enjoy wearing hers ;)


BOTH pieces are adorable!
ReplyDeleteHappy weekend,
Kelley~
Thanks Kelley :)
DeleteI love this collar and it looks like such a quick make. It is very vintage looking too. Really lovely. Xx
ReplyDeleteit is super quick to make, less than an hour actually. I was so happy with how it turned out. Can't wait to wear it!
DeleteYour scarf looks fabulous with that gorgeous jacket. Can I put my name down for them if you get tired of them please? 😉
ReplyDeleteYou will be first on my list ;)
DeleteI love this -- thank you for sharing your process. A lot of great tips for working with faux fur!
ReplyDeleteI had a wonderful teacher when I was in school who really taught us how to properly work with fur. It ended up with me winning a number of awards for my fur designs. I really love working with fur, although these days, I pretty much stick to faux fur.
DeleteYes, they are both lovely. I had a scarf, hat and muff in elementary school that this reminds me of (not animal print, but very cuddly and girly). Even though I was a tomboy, I loved wearing them.
ReplyDeleteThis comment has been removed by the author.
DeleteI know the set you are talking about! How cute!!
Deletethat is TOO CUTE!! i'm planning on sewing for spring this weekend, but i think you just threw a wrench in my plans...
ReplyDeleteAs cold as it still is, you'll get plenty of use out of it, and it will only take a short amount of time out of your plans. I know you will really rock it ;)
DeleteJust perfect for that coat!!!!
ReplyDeleteYou know, it was one of those, can't see the forest for the trees kind of a thing. When I saw this, it immediately clicked and cold neck problem solved. I'll wear the coat a lot more now.
DeleteSo pretty! My favorite part is the ball ends. Thanks for showing how you made them.
ReplyDeleteI agree, the balls are what makes it really cute :)
DeleteQué bonito para hacer un regalo! Y en muy poco tiempo! Gracias por el tutorial. Lo voy a compartir en mi fan page Facebook con tu permiso. Un saludo.
ReplyDeleteGracias Sara :) Sí, tienes mi permiso
DeleteI love it! So elegant, it's perfect for a touch of elegance to winter, dear Rhonda. You are so generous always, thanks for taking the time to share these beautiful things.
ReplyDeleteI would love to see it ON YOU, Rhonda. It is so nice. Not ever that cold around here.
ReplyDeleteHugs, Joy
I picked up the same free pattern, and have been looking for the perfect fabric. Love yours and thanks for the tutorial!
ReplyDeleteHow fabulous. A great and stylish solution. Love it.
ReplyDeleteI love it Rhonda what a great solution . Fun and stylish :)
ReplyDeleteThanks Sue! I don't know why I didn't come up with the idea on my own, but at least I have finally found a solution :)
DeleteSo nice, Rhonda! I have real fur from vintage coats that I can use to make some. In Winnipeg, the thrift shops regularly have fur coats and goodness knows its cold enough still for faux or real. Tnx for the tute!
ReplyDeleteI also enjoy buying old fur coats and re-purposing them.
DeleteAlso, is the coat your design? Its excellent!
ReplyDeleteThanks, yes, it is my design.
Deletebello0
ReplyDeleteOMG, so cute!
ReplyDeleteFor such a simple little thing, I get so many compliments when I wear this.
ReplyDelete