f
Showing posts with label handbag sewing tutorials. Show all posts

Saturday, December 19, 2015

The Studio Kat Cosmo Convertible Bag Sew Along Week 3

I apologize!!!! I failed to let you know that the new post is up on the Sew News blog for the Studio Kat Cosmo Convertible bag. So sorry.
This week we are sewing the bag together and inserting the zipper in the top of the bag. 
Developing the bottom of the bag seems just a bit tricky, but it's really quite simple. There are 3 notches on the side of the front and the back that must be marked. 
Notch A is folded up to meet notch B. Then with the 2 notches held together, they are then folded up to meet notch C. A little fidgety, but it works, and that's the most important thing :)
Once the notches have been folded together, they form a pleat across the bottom of the bag. This will make more sense once we attach the tabs for the straps.
The next step is to insert the top zipper. The zipper is added before the side tabs for the straps are attached. Look closely below and you will see that the zipper does not go all the way from one side of the opening to the other.
I did a top stitch around the top of my bag to help hold the lining in place. It really helps to keep the zipper from catching the lining. Nothing worse than needing to get into your bag and then having the zipper get caught in the lining!!!  
I really loved the first bag that I put together, but I think I like this one even more. I think these things are addictive! 
You can find the new post HERE.
Studio Kat has a new bag up on her website that I am eyeing, super cute.
If you are making the Cosmo Convertible Bag, I hope you're enjoying the process. Just remember, if you would like to make the bag at a later date, the posts stay up on the Sew News blog, so you can always refer back to them at a later date. You can find the first 3 weeks HERE.
Happy Sewing!
Rhonda


Share this PostPin ThisShare on TumblrShare on Google PlusEmail This

Wednesday, December 9, 2015

The Cosmo Convertible Bag Sew Along/It's All About The Pockets

Whether you are making the Studio Kat Cosmo Convertible Bag, or just taking a look at the posts, I think that the pocket tutorial is one that can be applied to many other projects. You can find this week's post HERE on the Sew News blog.
I decided to give the free downloadable flap pattern a try and I had so much fun with it.The pattern is especially great to use with stripes or vertical patterns. 
I of course had to the match the pattern for the pocket, so if I had once again matched the pattern for the flap, it would have been a bit boring.
The pattern calls for an 8" or longer plastic zipper for the back pocket. I had a 7" metal zipper that I really wanted to use. It was the right color and it has a fabulous zipper pull. As it turns out, a 7" zipper will work perfectly, you just need to be a bit careful when sewing the zipper to the pockets. You can see the step by step process in the Sew News post. 
I'm really happy with how the pockets turned out. They are really quite easy to do, so please don't feel intimidated. Just take it a step at a time and you'll have beautiful pockets.
Next week we will be sewing the bag together and attaching the top zipper. We will also attach the tabs that give the bag the convertible options.
Enjoy!
Rhonda


Share this PostPin ThisShare on TumblrShare on Google PlusEmail This

Tuesday, December 1, 2015

The Studio Kat Cosmo Convertible Bag Sew Along Begins!

The first post for the Studio Kat Cosmo Convertible bag is up on the Sew News blog and you can find it HERE.

I actually made the bag last summer and I wanted to start using it right away, but....I had to send it in to Sew News. Now that I have it back, I am finding all sorts of opportunities to use it. If by chance you, a friend, or a child is pregnant, this would be a great gift as it would work so well as a diaper bag. I especially like the backpack aspect of the bag as it means that arms and hands are free for other things. 
Since it can also be a cross-body bag, it's great for shopping. The bag is large enough for small purchases, but not so large that it is cumbersome. For shopping, I really like the zippered pocket as well as the top zipper, so the bag also offers security.
The bag also makes a great bag for your knitting, as it's the perfect height for knitting needles.  
The front flap pocket offers lots of possibilities for customizing the bag. Check out the post for links to a free pocket pattern that you can download from the Studio Kat website.
As you can see, the bag has quite a bit of hardware. I've provided a list in the blog post. 
If you don't have time during the holidays to make the bag, the posts remain on the Sew News website, so you can always go back and follow along at a later time. 
I'm really looking forward to making my second bag, and I have a feeling there will be more in my future. 


Share this PostPin ThisShare on TumblrShare on Google PlusEmail This

Saturday, November 28, 2015

Fabulous Free Pattern Friday/A Simple Clutch With Major Impact Part 2

Rather than make you wait, I thought I would go ahead and share the second part of Cennetta's clutch tutorial. In today's post, she shows you how to step up the basic clutch by adding a great looking strap and pockets. Before we get to the tutorial, let's take a look at a little more inspiration. 
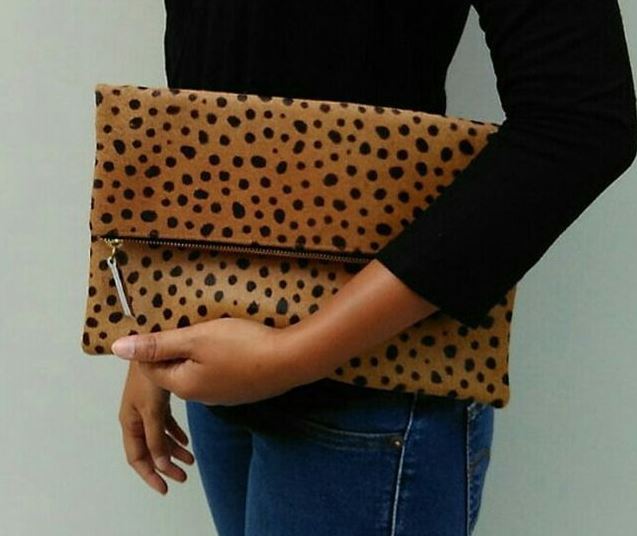
Just a little shaping and the top zipper really gives the bag a very special look. Or add a strap to the back of the clutch and make a wrap around closure. 
When it comes to straps, use a ring or maybe even a special bracelet.   


Add leather accents to the corners of the bag. 
Give an heirloom new life. Use a piece of needlepoint or embroidery rather than fabric.
Now that our creative juices are flowing, let's start sewing!!!

Clutch Bag Tutorial Part 2

For this tutorial, I'd like to show you how to add an inside and outside pocket and a strap to the foldover clutch.


To make you will need the following supplies:

Faux Fur
Faux Leather
Lining
Pellon Fusible Felt
Lightweight Interfacing
12" Zipper
1 Clasp and 1 Rivet
Leather Sewing Machine Needle (90/14)
Binder and paper clips
Teflon Foot or Wax Paper
Pattern Tracing Paper and Pencil
Thread and other basic sewing tools

Step 1 - Drafting the Pattern:

Base of the Purse : 14 1/2" X 12 1/2"
Side Strap 18" X  2"
Tab 1 3/4" X 1"
Inside Pocket 10" X 6 1/2"
Outside Pocket 12 1/2" X 6 1/2"


 Step 2 -Cut
  • 2 Purse Linings
  • 1 Faux Fur Purse
  • 1 Faux Leather Purse
  • 1 Faux Leather 
  • 1 Lining Outside Pocket 
  • 1 Lining 
  • 1 Interfacing Inside Pocket
  • 1 Faux Leather Tab
  • 1 Faux Leather Strap

Step 2 - Fuse felt to wrong side of the faux fur to add body to it.  Fuse Interfacing to inside lining.  The faux leather used in the illustration already has a felt backing.

Step 3 - For outside pocket, with right side together and raw edges even, stitch one of the long sides together.  Press seam allowance toward the lining.  Understitch. Finger press the edge along the faux leather and lining.  Use clips or binders to attach to outside pocket to lower edge of the faux fur.  baste in place.

Step 4 - For inside pocket, with right sides together fold pocket in half having raw edges even.  Stitch side and lower edges together leaving a opening for turning.  Trim seams and corners.  Turn pocket right side out; press.

On outside, center pocket at lower section of the lining and pin having the opening at the bottom.  Stitch the sides and lower edges of the pocket.

Step 5 - Fold strap in half lengthwise having wrong sides together.  Turn in raw edges.  Attach clips to hold in place.


Step 5b - Use a teflon foot to stitch along the opened edge of the strap.  If you do not have one, like me, use wax paper to cover the strap to achieve good stitching results.  Follow the same instructions for the tab.


Step 6 - Add tab 7" from the top of the purse on the left side of the faux leather purse.  The edges should be 1/2 cm from the raw edge of the purse.  Stitch in place.  The tab should create a small loop where you can attach a clasp.

Step 7 -  On the outside, place closed zipper to the either side of the bag having zipper faced down.  Make sure you leave seam allowance on both sides of the bag.  The seam allowances are about 1/4" for the entire bag.  To avoid bumpy stitching around the tab/slider, stop sewing before reaching the tab/slider.  Leave the needle in the fabric, raise the presser foot and pull the slider down below the needle.  Lower the foot and continue sewing.  Repeat for the other side of the purse.

Step 8 - Attaching the lining.  With right sides together, pin lining to one edge of the bag, having the raw edges even.  Stitch 1/4" from upper edge through all layers.  Repeat for the other side of the bag making sure you do not stitching through the other side of the bag.

 Step 9 -  To keep the lining away from the path of the zipper, understitch the lining to the zipper tape to hold it in place.


Step 10 - Press zipper teeth toward bag front and back lining sections.  The bag section should be facing each other as well as the lining.  Open zipper.


Step 11 - Push lining into bag and close zipper. Mold into place with fingers.


Step 12 -  Fold the strap in half leaving one end 1 1/2" longer to fold over the raw edge.  To secure, stitch through all layers of the strap or insert a rivet(the best choice for a polished look).  I took my strap to a local shoe repair shop, where they stitched the strap together and inserted a rivet.  

In the picture below, you can see the outside pocket.
Take note of how nice the rivet looks in the picture below.

That's it!

Happy Sewing!
Cennetta

Thanks so much Cennetta for a very inspiring tutorial!
If by chance you missed Part 1, you can find it HERE. 
Have fun making clutches!!!
Be sure to check out Cennetta's blog, http://themahoganystylist.blogspot.com/ She's just full of inspiring ideas :)


Share this PostPin ThisShare on TumblrShare on Google PlusEmail This

Friday, November 27, 2015

Fabulous Free Pattern Friday/A Simple Clutch With Major Impact

Every year, it's the same, crowds of people waiting in line, pushing others aside, all for a possible bargain. I would much rather get up, make a cup of tea, head to my studio and and make a fabulous gift. And a fabulous gift can be so easy to make!  
I have a lovely vintage bag that is not only a clutch, but a muff. A super cute idea. I had the bag with me last year for the Haute Couture Holiday Luncheon. Cennetta of The Mahogany Stylist saw my bag and was inspired! She took the idea, put her own touch on it, and made some of the most beautiful clutches. I loved the idea so much, and I thought that you would as well, so I asked Cennetta to be a guest for Fabulous Free Pattern Friday. The clutch is nothing more than 2 rectangles for the clutch and 2 rectangles for the lining. You can zip up a pile of these, one for everyone on your gift list. Just a word of caution, the recipients will probably come back asking for another! 
And now, here's Cennetta....  

I'm delighted to be a guest blogger  on Rhonda's Creative Life.  Rhonda, thank you very much for inviting me.  It is a pleasure to share my foldover clutch purse tutorial with your readers.  Earlier this year I posted a similar tutorial on my blog.  This was my first tutorial on how to make this simple hand bag.  Today's post will provide more details on the step by step process along with a few style options.

To make you will need the following supplies:

Faux Fur
Faux Leather
Lining
Pellon Fusible Felt
12" Zipper
Leather Sewing Machine Needle (90/14)

Binder Clips
Pattern Tracing Paper and Pencil
Thread and other basic sewing tools

Step 1 - Drafting the Pattern:


Body of the Purse, 2, 14 1/2" X 12 1/2" rectangles

The basic pattern is simply one pattern piece that you will use to cut the purse, lining, and fusible felt.
  • 2 lining
  • 1 Pellon Fusible Felt
  • 1 Faux Fur
  • 1 Faux Leather

Step 2 - Fuse felt to wrong side of the faux fur to add body. Be careful when fusing the felt to the faux fur so as not to melt the fur!!!  The faux leather used in the illustration already has a felt backing.


Both sides of the purse are ready to sew.


Step 3 -  This next step is to determine the finished look of the purse.  First photo illustrates the 14 inch long purse.  The second shows a 12 inch long purse with a longer fold over flap.  I chose to make the shorter purse.


Step 3a -  To add a little more interest to the finished flap.  I decided reduce the width of the lower flap by 3/4".
  • Mark the sides of one end of the purse 6" from the edge of the flap.
  • On the lower edge mark 3/4" on each side.
  • Connect the dot with a line; then cut off the access.
  • Examine the look of the newly shaped flap.  If it is not the desired width, trim until it is.  Caution - use small increments.


Step 4 -  Adjust the length of the zipper as needed.   Because I changed the width of the bag, I need a shorter zipper.  Using a 12" zipper and an extra zipper stop, I shorten the zipper to fit the top of the purse/bottom edge of the flap.


Step 5 - On the outside, place closed zipper to the either side of the bag having zipper facing down.  Make sure you leave seam allowance on both sides of the bag.  The seam allowances are about 1/4" for the entire bag.  To avoid bumpy stitching around the tab/slider, stop sewing before reaching the tab/slider.  Leave the needle in the fabric, raise the presser foot and pull the slider down below the needle.  Lower the foot and continue sewing.  Repeat for the other side of the purse.

Step 6 - Attach the lining.  With right sides together, pin lining to one edge of the bag, having the raw edges even.  Stitch 1/4" from upper edge through all layers.  Repeat for the other side of the bag making sure you do not stitching through the other side of the bag.


Step 7 -  To keep the lining away from the path of the zipper, understitch the lining to the zipper tape to hold it in place.


Step 8 - Press zipper teeth toward bag front and back lining sections.  The bag section should be facing each other as well as the lining.  Open zipper.


Step 9 - With right sides together, matching zipper tape, and having raw edges even.  Now stitch leaving a four to six inch opening in the lower edge of the lining for turning.  For the corners of the bag, stitch as illustrated below and trim corners and faux leather to reduced the thickness.

Corners and faux leather are not trimmed in the picture above.  Please do so for the best results.


Step 10 -  Turn bag to the right side. Press lining turning in raw edges of opening.  Stitch remaining opening closed.


Step 11 - Push lining into bag and close zipper. Mold into place with fingers.


That's it!  You're done.

You might ask:  Are these bags on trend?  Yes they are.  Here are a few you could easily copy with just a few modifications.


Happy Sewing!
C

I hope you enjoyed the tutorial, I know I'm inspired! The bags are so easy to make, they make a wonderful gift, and if you need to send a gift, the shipping will be minimal. This is a win, win situation all the way around! 
This is actually Part 1 of a 2-part tutorial, so be sure to come back next Friday and see what you can add to your bag.
Rhonda   


Share this PostPin ThisShare on TumblrShare on Google PlusEmail This

Tuesday, November 17, 2015

Your Chance To Make a Cosmo Convertible Bag Just Like Mine!

Have you seen the new issue of Sew News?
The last sew along for this year will be a great bag from Studio Kat Designs. It's called The Cosmo Convertible Bag and it can be worn as a back pack, a shoulder bag, or a cross body bag.
One side features a pocket with a flap,
and the other side features a zippered pocket.
The pocket has magnetic snaps.
The inside is quite roomy and will easily carry lots of stuff and your I-Pad!

The sew along will begin on December 1, 2015, so right on the heels of the Sewn Square One Upline Jacket. The timing is actually perfect as I can imagine that most anyone would love to find this bag under the tree!

So to kick off the sew along, I am giving away enough of the dragon fabric and the red suede so that you can make a bag just like mine! You will need to purchase the zippers, hardware and pattern. The giveaway also includes the new issue of Sew News magazine. 

If you would like a chance to win the fabric and the magazine, just leave a message on this post. I will draw the winning name on Tuesday November 24th.  
In the meantime, you can check out the pattern HERE in the Sew News shop. 
I had a lot of fun making the bag, so I am really looking forward to the sew along.

In case you are wondering, the last post for the Sewn Square One Upline Jacket will be out tomorrow, Wednesday, November 18th. There was a little mix up with my zipper, so I was late getting it. But my jacket is finished and I love it! As soon as the post is up, I will let you know.  


Share this PostPin ThisShare on TumblrShare on Google PlusEmail This