What will remain the same are the dimensions of the cut pieces.
For ONE regular size pillowcase you need:
1 - 25"x 40" piece of fabric ("main")
1 - 1O"x 40" piece ,of fabric ("trim")
1 - 2" X 40" piece of fabric ("accent")
Note: all seam allowances are 1/4"
Begin by folding the 2" accent piece in half lengthwise.
And press.
Fold the 10" trim piece in half lengthwise and press.
Lay the 2" (which is now 1" wide since it has been folded in half) accent piece on the main pillowcase fabric,
and lay the 10" trim piece(which is now 5" wide since it has been folded in half) on top of the accent piece.
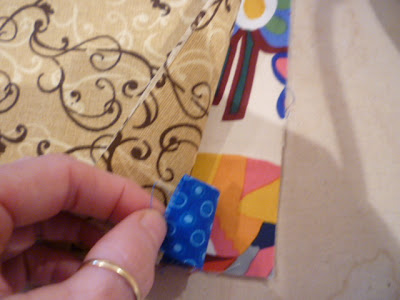
In the picture below you can see that the main fabric is on the bottom. Next is the accent piece and finally the trim piece is on top.
Sew or serge all 3 pieces together.
In the picture below I am showing that the 3 pieces are now together.
I like to edge stitch the seam. This is not necessary, I just think it gives a clean finish and helps to hold down the seam allowance.
My edge stitch is completed and now I am ready to fold the entire piece in half lengthwise.
I then sew a seam across the top of the case, and then a seam down the side. I like to sew the seams rather than just serge them as I like to do a good back stitch at the end of the side seam. Once I have stitched the 2 seams, I then do a serged edge. If you do not have a serger, you can pink the edges are do a zigzag stitch just to keep the fabric from fraying too much.

The inside of my finished pillowcase.
At the end of the side seam, I like to put just a touch of fray check on the serged stitches.The finished pillowcase. The pillowcases really take no time at all if you do them this way, 5 to 10 minutes max of sewing time.
All folded and ready to go.
I hope this simplifies the process. If you are planning to join in on the pillowcase drive for the Mary Bridge Children's Hospital, let me know, sewbussted@yahoo.com. You can see all the posts about this project here, http://www.rhondabuss.blogspot.com/search/label/Mary%20Bridge


Brilliant, just like you! This does make the process faster and easier, thanks for posting.
ReplyDeleteThanks Andrea. It really does make it a LOT easier, I think so anyway:)
DeleteI think this is such a great project - wish I wasn't so far away.
ReplyDeleteLooks a lot quicker than the "wrap around method" out there. Thanks so much, Rhonda.
ReplyDeleteI'm doing a pillowcase marathon--26 finished, 13 partially sewn, about 12 to cut out. Destashification is so much fun, for such a good cause!
ReplyDeleteWendy....you are A-mazing!!!! This is just the best news. Thank you do much :)
DeleteHi Rhonda, When does this finish. I would love to have a go but can't start it until October and then will need to get them to the other side of the world. Do you have a cut off time or just when you reach the 900? Also, does the above method allow for the pillows to be tucked under a flap if you know what I mean? Doesn't look like but I am not sure.
ReplyDeleteHi BeaJay, It would be wonderful to have you join in! The cases are going to Washington about the middle of February, so there is time. I am hoping to get the picture of the 900 by Christmas and I'm keeping my fingers crossed that I'm not hanging them in the snow :)
DeleteWonderful - that gives me plenty of time.
DeleteThanks again BeaJay. So happy to have you! Once you've finished, email me at sewbussted@yahoo.com
DeleteGreat instructions. I will be honored to help.
ReplyDelete