f
Showing posts with label fun to make. Show all posts

Thursday, February 27, 2020

A Wrap For Every Season

Back at the beginning of the year, Style Arc Patterns made their Salma Wrap pattern available as an incentive to raise money for the devastation that was caused by the bush fires. All proceeds from the sale of the pattern, for a 2 week period were donated to the Red Cross Bush Fire Appeal. What a wonderful way to do something worthwhile, and gain a little reward as well. So I jumped on the opportunity. The wrap is a great throw it on garment for whenever you need a little something to keep you warm, add a little spark to an outfit, or a cover-up for the pool.


I've made 2...so far :)
The first was made from a piece of lightweight wool tweed that I've had forever. A great way to use up some fabric! I like it. Great for cool days.


Because it's a woven fabric, it doesn't have a lot of drape.


The second was made from a fun knit fabric.


As you can see from the pictures, it has a lot of drape. It's great over jeans, a dress, and this one can actually go to the pool!


The placement of the arm opening is quite nice, and adds to the drama of the garment. 


What I also like is how packable the garment is. It literally folds away to nothing.


Thankfully, the fires are over. At least I hope they are. Sadly, with all we have going on in the United States, the news from Australia gets put on the back burner. 

Although the proceeds of the pattern no longer go to the Red Cross, it's still a wonderful, easy to make pattern. And too, it's one that you can make as gifts and not worry about fit! This is one pattern that you can get a LOT of mileage out of! 

Happy Sewing!
 Rhonda



Share this PostPin ThisShare on TumblrShare on Google PlusEmail This

Thursday, October 19, 2017

Make a Sewing Caddy

Finding a fun little project that will also enhance your life is just the best! I made up my little sewing caddy and was immediately so happy that I did. Such a wonderful place to store everything you may need while sitting at the machine. My husband even thought it was a great little item.


You will need to cut;
1 rectangle 6 1/2" x 15"
3 rectangles 6 1/2" x 6"
1 rectangle 6 1/2" x 11"

If you would like to quilt your large rectangle, you will also need a piece of batting (I like wool batting the best) 6 1/2" x 15". Quilting the backing for the pockets really makes for a much nicer caddy, so please don't skip this step.

Check out the video below for my how to. Once again, I apologize for my weak voice. I feel a sore throat coming on, so it's a little quivery. 


For those of you who enjoy written instructions;

You will need a 5" x 7" acrylic document frame. I found mine HERE. 


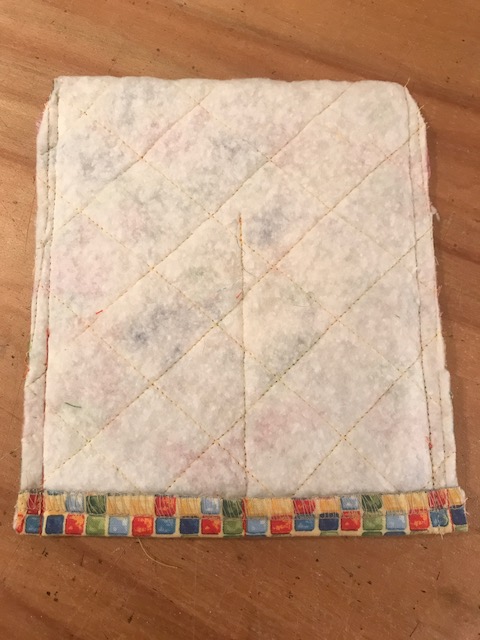
Cut 1 rectangle 6 1/2" x 15". Back it with a piece of wool batting and quilt it.


Cut 3 rectangles 6 1/2" x 6". Press in half. 


Stack on top of each other leaving 1 1/4" at the top between each layer. To reduce bulk, the top 2 rectangles do not extend to the bottom. 


For the opposite side, cut 1 rectangle 6 1/2" x 11". Fold in half and press. Line up with the edge on the opposite end of the long rectangle. 


Baste the pockets to the large rectangle. Find the center and stitch from bottom to top on the 3 stacked pockets. 
Serge the lower edge to to give it a nice finish. 


Fold the large rectangle in half, fold up the bottom edge and stitch the sides with a 1/4" seam allowance.
Clip the corners and turn. 


And voila, you have a fabulous little caddy!


This little caddy can be made for a multitude of things, a desk organizer, maybe a place to keep paint brushes easily at hand. So get those creative juices going and sew up a storm!

Enjoy!
Rhonda


Share this PostPin ThisShare on TumblrShare on Google PlusEmail This