f

Thursday, February 18, 2016

The Pepernoot Coat from Waffle Patterns/Downloading The Layered Pattern

As I'm sure you all know, the Pepernoot Coat Sew Along will begin March 7, 2016. I think you are going to be amazed at how easy the coat is to make, and how well it goes together. The zippers may seem a little intimidating, but we'll take them step by step, and if need be, I'll do a video tutorial to walk you through the process. I absolutely love my coat, and every time I wear it. I get so many compliments. So of course, I want the same for you :)
I wanted to show you this picture from the Waffle Patterns blog. We'll talk more about fabric choices, but I thought this was so cute. Take note that the zippers are red and the yokes are piped in red. The yokes are also quilted in a contrasting, but coordinating fabric. Just something to think about as you start planning your coat. 

To help get you started, I did a little video on how to use the layered aspect of the pattern. This is such a great option. I opted to download the copy shop version of the pattern, but even if you decide to print at home, you can still use the layered option. With the layered option, you are able to get just the size you want, so no going blind trying to cut on the correct size line. 
   
Once again,my apologies for the shaky video and poor quality, but hopefully it will help.
If you haven't purchased your pattern, you can find it HERE at Shop Sew It All.
Let me know if you have any questions about using the layered aspect of the pattern.
Rhonda


Share this PostPin ThisShare on TumblrShare on Google PlusEmail This

Wednesday, February 17, 2016

The Wednesday Showcase

I just listened to a TedTalk given by Robert Waldinger. The title of the talk is what caught my attention. But then, I'm a real sucker for Ted Talks, absolutely love them. Quite often, if you come into my studio, you'll hear one in the background. The title of this talk was, "Happiness Comes From One Thing..." Not to spoil the talk in case you might like to listen, but as it turns out, what's most important is our relationships and a feeling of being needed and wanted. Not really a surprise. The talk is short and something you can listen to while you do other things. You can find it HERE, if you would like, it's only a little over 12 minutes long. He also talks about the benefit of relationships on our health as we grow older. I found it fascinating. 
The Wednesday Showcase is all about building connections and sharing what we do, so it really coincides with the talk I just heard. 

First up is a very delightful lady from Sydney, Australia. She has quite the sense of humor as on her about page, she said that her husband enjoys foot acupuncture. I thought she was serious until I read that he walks around her studio in his bare feet. Too funny!!! Her name is Lesley and you can find here blog here, http://sewniptuck.com/ 
Now check out what this amazing woman can do.
Her daughter found this top...super cute, and wanted one for herself.
 Isn't this amazing?!!!
The jacket that Lesley is wearing is a self drafted piece. Be sure to pop over to her blog and check out the post. This picture really doesn't do the jacket justice.
She is also a knitter. 
Another adorable piece. She actually took the Anna dress pattern from By Hand London and made a top and skirt. Check out the frayed hems. She said they actually took more time than had she just hemmed the whole thing.
Be sure to check out her blog. There's a lot more inspiration to be had.

Now I thought we would make a stop in Chicago. I've known Wendy for a number of years. She is an energetic sewist, and always in pursuit of a great fit. A lawyer by day and a sewist by night, always ready to take on a challenge. You can find her blog here, https://couturecounsellor.com/
Wendy had always felt that she couldn't wear a shift dress. She took a class with Sarah Veblen and she suggested adding the belt at the waist that goes from the front princess line to the back. Wendy was ecstatic! Finally, a shift dress that she loves. I've seen this dress in person, and it really does look so lovely on her. 
I loved the matching on this top. Only us sewists notice things like this :) 
Wendy decided to put a few patterns together to create a design idea.
And made this lovely ensemble. Notice the scallop detail at the hem. Great use of both patterns.
And finally, I thought I would share this with you. She said that this was the first time she ever had a piece fit her right out of the pattern. In the picture below, she is pointing to the seaming detail. It's a little lost with the pattern of the fabric.
The line drawings show the details. Wendy feels that it's the seaming that gives the excellent fit. If you would like to check the pattern out for yourself, you can find it HERE.

Not to disagree with Mr. Waldinger, but I think that sewing and having good sewing friends is the secret to happiness :)  
Thank you for the richness that so many of you add to my life.
Happy Wednesday!
Rhonda  


Share this PostPin ThisShare on TumblrShare on Google PlusEmail This

Monday, February 15, 2016

Monday Morning Inspiration/Free Museum Books!

This is just too good to be kept a secret! 
We all love inspiration, and I think that most of us enjoy seeing the beautiful clothes that have been created by some of the most amazing designers. Well, how about being able to get the books for free???
I'm fortunate to have been invited to be on a Facebook page where lots of sewing inspiration is shared. One of the ladies is an avid reader, so she has a great thirst for knowledge. A few years ago I was so impressed when she decided to take a very analytical course at one of the major universities here in Chicago...just for the fun of learning, amazing. She recently shared the site I'm sharing with you, and I think you are going to love it just as much as I have. 
As it turns out, The Metropolitan Museum of Art has made a number of books available as a free download. FREE!!!! It's true, I've downloaded a number of the books.

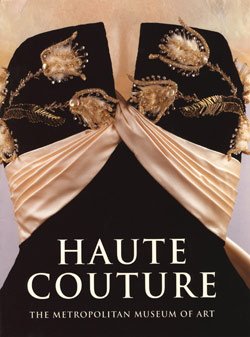
This was one of my favorites. Glorious pictures and great text.


I had the opportunity to see this exhibit and of course I purchased the book. This book is a must see. You'll love the exhibit pieces that were chosen.


I also downloaded the Madame Gres book. Beautiful.

There are so many more. Here's just a sampling,
You can find all that I have listed and more HERE.

I think that's enough to inspire you on a Monday morning!!!
Have fun :)
Rhonda
P.S. Thanks Miss P! 


Share this PostPin ThisShare on TumblrShare on Google PlusEmail This

Sunday, February 14, 2016

Sunday Night Reflections


A Spiritual Samaritan lives knowing that if we were to leave this world tomorrow, 
we were the best humans we could be
 and we touched the lives of as many souls as possible. 
We are not asked to be perfect.
 We are asked to make a difference.
                                                                                                                               Molly Friedenfeld


Share this PostPin ThisShare on TumblrShare on Google PlusEmail This

Thursday, February 11, 2016

Inspired LED Sewing Machine Light Kit/And The Winner Is....

Wow, the response to the Inspired LED Sewing Machine Lighting Kit was impressive!!! I wish I had 1 for all , but sadly, there's only 1 :(
Since what you are all waiting for is the announcement of who won...
The winner of the Inspired LED Sewing Machine Lighting Kit is...

Congratulations Kathryn Hoyman!!!!
Please email me at sewbussted@yahoo.com with your mailing information so I can pass it on to Inspired Lighting. 

For those of you who did not win, I wanted to give you a few links.
The Sewing Machine Lighting Kit sells for $30.00 on the Inspired Lighting site and you can find it HERE

I also found the kit on Amazon for $28.99 and you can find it HERE

If you do purchase the kit, I wanted to go over a few aspects of the kit.
The light strip is quite long and comes with an extra connector on the opposite end. Since there is an extra connector, and the leftover strip is quite long, you will be able to use it on a second machine. But you will need the spare parts. 
On THIS page, scroll down to where you see the Sewing Machine Expansion Kit. The expansion kit is $15.00. So it's like getting 2 kits for $45.00 vs. $60.00.
I hope this helps and I also hope that if you do purchase the light kit that you will find it as helpful as I have.

Before I go, I thought I would add a couple of unsolicited comments that were left on the original blog post that I did.

I have these lights on my sewing machine and love them. You might mention that the strip of lights you get is long enough for two machines. You can buy another kit so you can install the rest of the strip on your serger, too. (I'm not entering the giveaway, just wanted to comment.)

Just a quick note to tell everyone that I bought this light kit from Amazon last summer and I *love* it! I don't have good ambient light in my sewing area, but these LEDs light up the sewing field beautifully.

Thanks Ladies!   
One last thing and then I really will go. So many commented about the need for extra light. I found this so inspiring. Rather than quit, we just keep finding a better way to see.
Keep Sewing Everyone!!!


Share this PostPin ThisShare on TumblrShare on Google PlusEmail This

Wednesday, February 10, 2016

The Wednesday Showcase

It's always a great day when you have the opportunity to make a few new friends and walk away inspired by the work that others are doing. As long as I have been doing the Wednesday Showcase, you would think that somehow, the talent would begin to wane, but that just doesn't seem to be the case. I'm continually amazed by the work that so many of you are doing, and the mark that you are making on the sewing world. It's not only inspiring, it's exciting to see :)
So, let's get started... 
First up is Joyce from Edinburgh, Scotland. She started her blog just a couple of years ago as she was so inspired the fantastic sewing blogs she was reading. Joyce loves to sew, but she also enjoys haberdashery shops as well as rummaging around in charity stores. You can find her blog here, http://thestorysewfar.blogspot.com/ 
Joyce loves making tops and she does such a beautiful job. The above top was one of her favorite makes of 2015. She said that the print is just so her. Below you can see a number of more recent makes.
Loved this coat. Joyce said that it is such a pleasure to be able to make a coat that she not only loves, but fits! 
She decided to give jeans a try. Well, I don't think she will ever purchase another pair of jeans as these are perfect! 
Not only does she love to sew, she knits too!
Joyce has taken on the Vintage Pledge for 2016. I'm really looking forward to seeing what she creates.

Next up is Mary who is not afraid to take on a challenge. You can find her blog here, http://stylememary.blogspot.com/
A simple shirt dress becomes incredible with handmade buttons and beautiful embroidered touches.
 Love the pop of plaid lining.
Not only does she sew beautifully, check out this crocheted work of art.
She also quilts. Check out the precious label in the lower right hand corner.
In 2013, Mary won the Sewing For Children contest on Pattern Review. This is one lucky little girl!

Be sure to check out Mary's blog as I only scratched the surface. 

I don't know what I want to do first, get out my sewing machine, or grab a crochet hook!!! Sadly, my crochet skills are quite lacking. 
BTW, the jeans that Joyce made are the Jamie Jeans from Named Patterns. You can read her review HERE, and find the pattern HERE

Wishing you a wonderfully inspired day!
Rhonda


Share this PostPin ThisShare on TumblrShare on Google PlusEmail This

Tuesday, February 9, 2016

Master Sewing And Design Certification/Building A Better Waistband

When I have the opportunity to visit Houston, I love to hit the The Guild Shop. What a fabulous place to shop. I always find a treasure...well, to be honest, quite a few treasures. In fact, the last time I was in Houston, I ended up with an extra bag to carry home. Next week I'll share a glorious bias number that I can't wait to remake. But today, I wanted to share a beautifully finished waistband on a Louis Feraud pencil skirt. 
What initially grabbed my interest was the fabric of this skirt. It's a lovely silk, woven into a basket weave pattern. The skirt is a little too big, but a quick alteration will fix that. 

 The darts were not stitched down, but just pressed in place.
Rather than a hook closure, this skirt is fastened with a button. It's obviously cheaper and quicker to do. I prefer the stitched hook method that I shared with you a few weeks ago. 
The lining is not stitched to the zipper, just turned back and stitched. Again, not my preferred method.
So here's how the waistband, lining and skirt were stitched together. The waistband was made and laid against the skirt, then the lining was laid on top. All were stitched at the same time and then the seam was serged. Not couture, but clean and easy. 
Once the waistband and lining have been attached to the body of the skirt, the waistband is held in place by stitching in the ditch, which is the seam between the waistband and the skirt.
On the opposite side, the lining was extended to match the waistband extension. The lining was actually extended further, look closely and you'll see that the extended area is folded back and stitched. All in all, it was extended approximately 1 1/2" past the waistband extension.   
The lining is not stitched to the zipper, with this application, it would be impossible. The center back seam is shaped, similar to the shaping that would be done for a back pleat. 
This waistband was not cut in 1 continuous piece, but in 3 pieces. This makes alterations a quite a bit easier, but takes a little more time in construction.
I like how the waistband and lining were attached to the skirt. I'm not a big fan of how the lining was treated, but it's an option that you might want to experiment with. 

For the Master Sewing and Design Certification Program, you will need to demonstrate 3  types of waistbands,
1. On-grain waistband
2. Elastic casing waistband
3. Contoured/Faced waistband
The above waistband would be considered an on-grain waistband. The positive side of this waistband is that it holds it's shape. The down side is that since it is cut on the straight of grain, it is not the most comfortable waistband to wear. The most comfortable waistband would be probably be the elastic waistband, but typically not the most attractive. The contoured waistband sits beautifully on the waist and is quite comfortable. 
I'll talk more about waistbands in the coming weeks. 

In the meantime, if you live in Houston, or take a trip to Houston, by all means, stop by The Guild Shop. I know you'll find a few treasures :) 


Share this PostPin ThisShare on TumblrShare on Google PlusEmail This