For the sew along, I chose to make my cape out of denim. A few of you have asked about wearing a denim cape in Chicago during the winter. It won't happen!!! I would freeze to death! The first cape I made for the magazine is really an evening cape. Although it is made out of faux fur and velvet, it is still rather light weight. But, when going out for the evening, I basically go from the house to the car, and the car to wherever I happen to be going, so I am not walking around in the cold. The denim cape will be worn in the spring and fall months when I need something, but nothing too heavy. So, I am all set for once the weather changes. But, if you are anything like me, the bad thing about making a garment that can't be worn now is the fact that I have to wait. I don't like to wait ;) I'm one of those make it and wear it kinda gals!
The Sew News Islander Sewing Systems
Cape Super Express Sew Along
Week 3/Finishing

This will be the final post for the Islander Super Express Cape sew along. The name says it all, super express, and yes, it's a fast piece to make! So no reason to stretch the sew along out to 4 weeks.
One detail that I failed to mention in the last post is the shaped seams at the hem of the cape. This has been done on purpose and is a wonderful aide in hemming the garment as it reduces bulk in the hem. So when sewing the lower portion of the seam, be sure to clip the seam and continue sewing to the end of the seam with a 5/8" seam allowance. You will love how easy the garment is to hem with the reduced bulk.

Now that the outer shell of the cape is together, it's time to finish the arm slots. If you look at the instruction booklet, there are a number of steps to finish off the arm slot on the cape and then on the lining. It's a wonderful method, but I like to simplify things if I can, so I will show you my method for finishing the arm slots. With both methods available, you can then you can choose which method you would like to use.

Begin by interfacing the arm slot opening on the cape with a 1" wide piece of fusible interfacing.

Sew only the front lining pieces together. Lay the front lining on top of the cape with wrong sides facing.

Fold back the top of the lining as you see above.

Stitch the lining to the cape along from notch to notch of the arm slot opening. Be very precise in your stitching and only stitch from notch to notch. Be sure to back stitch at each end.

Repeat with the lower portion of the front lining.

Press the arm slot opening.

The arm slots are beautifully finished on the outside and the inside of the garment. If you are a little concerned about ripping the seam, you may do a bar tack at either end of the arm slot opening. You may also top stitch around the opening.

Now sew the back of the lining to the front along the side seams with a 5/8" seam allowance. Press seams open.
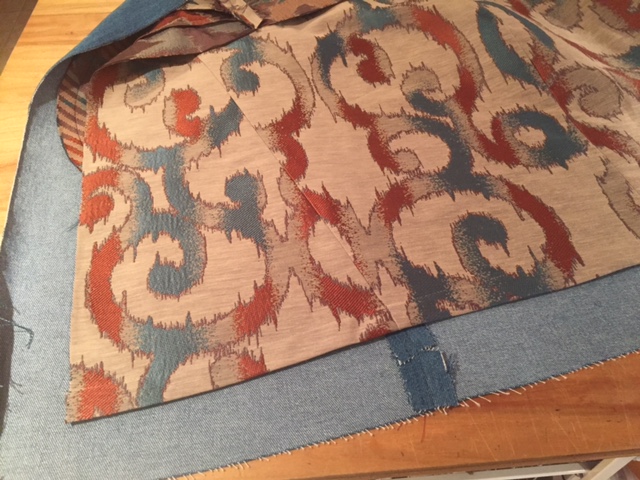

Simply turn up the hem allowance and stitch in place on the machine.

Now attach the facings to the lining. I like to edge stitch my facing to the lining once the seam has been sewn. It helps to hold the seam allowance in place and looks lovely. The facing is stitched to the lining with a 1/4" seam allowance.

Attach the hood to the neckline. Sew the facing to the cape at the neckline. The seam allowance is 1/4".

Due to the method I used to attach the lining to the cape at the arm slot openings, you will need to sew the facing to the front of the cape along one side, and then sew the opposite side. You will not be able to sew the facing around the cape in 1 continuous seam.

Once the facing has been attached to the cape, we can hem the cape. Fold back the facing as you see below. Fold back the seam edge and stitch across the facing at the hemline.

Clip the corner of the facing, and then trim down the facing, leaving the hem of the cape intact.

Press the hem of the cape. If you would like, the cape can be top stitched along the front edge and along the hem.

To attach the lining to the hem of the cape, sew thread chains at the seams and then 3 more along the back between side seams.

The final step in finishing the cape will be the front closure. There are so many options. If you would rather not sew in buttonholes, you can sew on snaps as I did with the faux fur/velvet cape. On the outside I added buttons which gives the appearance of a buttonhole without the worry.

For my denim cape, I decide to use some vintage purse claps. Sadly, these are no longer available, but I hope that this will encourage you to think outside the box. Due to the heavy nature of outerwear garments, there are so many possible options for closures, including purse hardware.


And has a corresponding piece for the opposite side. Consider using a magnetic closure. If you do, then any button can be sewn to the front of the garment, and once again, you have not had to worry about buttonholes not turning out as you had hoped.
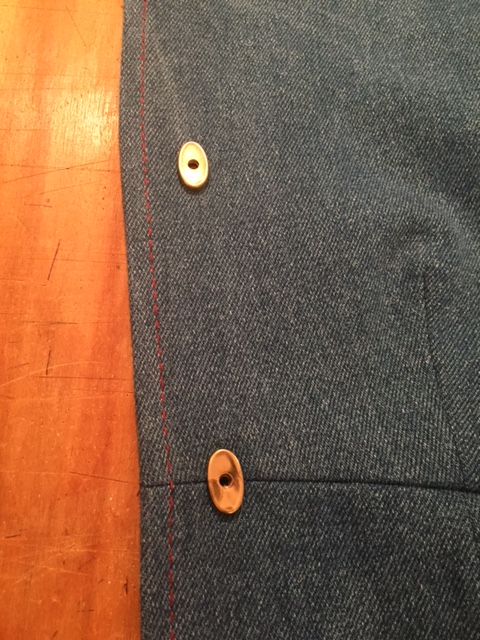

Due to the closure that I decided to use, I did not top stitch the front waist seam.

But the side seams have been top stitched as well as the hood.

Although the hood was a 'make it work" situation due to my lack of fabric, I was pleased with how it turned out.

The back of the cape.

And finally, the fun interior lining.

Now you can see how very versatile the Cape Super Express pattern is. It's a great cape for throwing on to run errands, and it makes for a lovely evening piece to add to your wardrobe.

If you have not purchased a pattern, but would like to, you can find it HERE at Shop Sew It All.
It has truly been an honor and a pleasure to sew along with you on the Sew News blog for the past 3 years. Along the way, I hope that I have been an inspiration. Remember, all of the sew alongs are always available on the Sew News blog. You can easily find links to all of them HERE.
Remember to always,
Sew On!!!
Rhonda Buss



