f

Sunday, June 15, 2014

Sunday Night Reflections


It's not who you are that holds you back, 
it's who you think you're not. 
                                                                                             Hanoch McCarty


Share this PostPin ThisShare on TumblrShare on Google PlusEmail This

Sunday Brunch

So sorry about missing in action the last few days.One of our former exchange students arrived yesterday from Italy. What a joy it is to have him with us for a few days. Needless to say, I had a lot to do to prepare for his visit, like clean my house!!! So something had to give and sadly, it was the blog.
Like any good mom, when you have a returning child, the kitchen is a busy place, preparing foods that you know they will enjoy. I actually made this recipe for the first time on Mother's Day. I found it in the March issue of Country Living magazine.
They had an article devoted to a Mother's Day brunch. Everything looked wonderful, especially this picture of  Almond Cinnamon Buns.
 Even better, the ingredients were easy, like store bought crescent rolls,
 almonds, almond paste, cinnamon, brown sugar, butter, yum!
Here's the recipe;
Almond Cinnamon Buns
1 cup slivered almonds, finely chopped
4 ounces almond paste finely mashed
6 tablespoons light-brown sugar
2 teaspoons ground cinnamon
2 (8-ounce) packages unbaked crescent rolls
1 stick butter, at room temperature
Cooking spray
1 cup confectioners' sugar
1 tablespoon whole milk

1. Preheat oven to 375 degrees. In  a medium bowl, stir almonds, almond paste, brown sugar, and cinnamon to combine. Set aside.
2. Working on a sheet of parchment paper(I used waxed paper), unroll 1 package of crescent roll dough to a rectangle and smooth seams. Evenly spread half the butter over dough and then sprinkle half the almond mixture. Beginning on one long side, tightly roll up dough. Slice into 6 pieces. Repeat with remaining dough, butter and almond mixture.
3. Spray 2, 6-cavity muffin tins with cooking spray. Place buns in each cavity and bake until golden brown, about 15 minutes.
4. Remove pans from oven and allow to cool for 20 minutes. Meanwhile, in a small bowl, whisk together confectioners' sugar and milk until smooth. Transfer buns to a wire rack, drizzle with icing, and serve immediately.  

**I made a few changes to the recipe.
1.I did not use anywhere near the amount of butter that the recipe calls for. I just spread enough butter over the dough to cover it.
2. I cut each crescent roll into 12 pieces rather than 6.
3. I did not add the icing and I did not miss it.
4. I did not use the cooking spray. I put a muffin wrappers in each cavity. I'm lazy and would rather not spend a ton of time scrubbing out each cavity!!!
 My buns ;) YUM!!!
I only made up one package of crescent rolls and I froze the remainder of the almond mixture for another time. The buns are obviously great for brunch, but they make a nice afternoon treat and will accompany a summer lunch time salad beautifully as well.
I found the almond paste in the baking aisle of my grocery store. If I remember correctly, it was a little less than $5.00 for the can. The can will make enough for 4 packages of crescent rolls, so less than $2.00 per can of crescent rolls.
If you like the taste of almonds, I think you'll love these buns. I know I do!  


Share this PostPin ThisShare on TumblrShare on Google PlusEmail This

Thursday, June 12, 2014

Thrifty Thursday

Before I share this week's thrifty pattern, I thought I would share the outfit of the day. I made the skirt last summer. The top is another gathered front top that I originally made here, http://rhondabuss.blogspot.com/2014/05/thrifty-thursday.html With this one, I concentrated all the gathers below the bust and I really like how it looks. You may notice that my hair is very curly. It's actually in it's natural state. My hairdresser really wanted me to just let it be natural over the summer, so I decided to give it a try and not straighten it out. Oh well, it's big hair 1980's!!!!! 
Now for this week's pattern. it's the Sammy Cami from Iconic Patterns.
                                         1102_main copy
I love camis!
And here's my wild little version. 
I especially like tops like this for my morning walks during the summer, and I love wearing them under a long sleeved top in the winter. My only issue is that I would rather not wear a bra, but I am not about to go without one either. I remembered this tutorial that I saw some time ago, http://daughterfish.com/?p=3228, and thought, what do I have to loose, so I gave it a try and it worked!
I went a little crazy with the trim. 
It's a 1" wide fold over elastic. I think it's rather fun. For those of you here in America, I found the elastic at Joann's Fabrics. If you decide to do this, be sure to get 2 packages as there is only 1 yard in a package. I ended up having to go back and get another.
Once I got the top together, I realized just how versatile the pattern is. The top could actually be the top of a tankini. For the bottoms you could use the panty pattern I posted here, http://rhondabuss.blogspot.com/2014/03/thrifty-thursday_25.html, in fact, that's exactly what I plan to do. I have just enough of the print fabric to make the bottoms. I'll let you know how they turn out.
Not a great shot of me in the top, but at least you can see how nice the bra cups look on the outside of the top. 
So the top is a winner in my book. I'm super happy with it and I'll be making a whole bunch more. You can see all the patterns that Iconic has here, http://iconicpatterns.com/.


Share this PostPin ThisShare on TumblrShare on Google PlusEmail This

Tuesday, June 10, 2014

Master Sewing And Design Professional Certification Program

Today's blog post title is one that you haven't seen for a while, sadly.
For those of you who are new to the blog, a quick explanation of what the Master Sewing and Design Professional Certification Program is all about.

The Master Certification Program is a performance based program 
that was developed by the Association of Sewing and Design 
Professionals (ASDP). It is based on ASDP’s Standards of Quality 
and is open to anyone. 
This evaluation of professional custom sewing and design work accomplishes five 
important goals.
• It upholds high standards of workmanship.
• It validates the sewing and design professional's skills.
• It educates the sewing professional in the evaluation of her/his work, aiding in the 
development of skills.
• It provides a benchmark of superior quality for the consumer.
• It encourages and attracts new and talented people to be certified.
To qualify for certification an applicant must:
. 
• Submit an application and pay the required module fees.
• Complete all requirements as stated in the Certification Packet. 
Upon Completion of the program
• One will receive a certificate and be able to use the Master Sewing and Design 
Professional designation on all their business materials. 
• Will be required to complete continuing education units
This program consists of seven modules, each with its specific requirements and methods 
of evaluation. Upon successful completion of all seven modules, a certificate will be 
awarded and the participant will be allowed to use that designation in his/her business.
All evaluators will be carefully screened and approved by the MSDP Board of Directors. 
Blind evaluation will be conducted on all modules except Fit, which will be juried in person 
by a three member evaluation team, and Business Practices which will be evaluated by a 
Small Business Administration Center Director. Applicants will be assigned an 
identification number to be used on all submissions. Blind evaluation will be conducted so 
evaluators will not know whose work they are evaluating and the applicants will not be 
aware of who is evaluating their work. 
You can read more about the program and the 7 Modules here, http://www.paccprofessionals.org/assets/documents/asdp_summary_of_master_certification_program.pdf

I was asked to work through the program and give feedback. You may remember that I do have a degree in Fashion Design. Since I began working on the program, a few things have pulled me off course and taken precedence in my life, i.e. a number of unexpected surgeries last year as well as a very large family issue that I needed to deal with this year. But, I'm ready to get back to work, in fact, I will finally take the test for the Textile module next week.
So, a request....
Tuesday blog posts will be devoted to the MSDP Program until I finish the program. My request of you is to help keep me on track. If by chance I do miss a Tuesday, send me a message and ask me why. Actually, now that I've made the commitment, I don't think it will be too, too difficult as I feel very obligated to carry through on what I've agreed to do. Although, support is always a good thing and so many of you have been a great source of support, and I am so very grateful.  
You may remember the drafting series I started in January. You can find the posts here, http://www.rhondabuss.blogspot.com/search/label/Drafting%20Basic%20Bodice Next
Tuesday I will pick up where we left off with fitting the bodice and I will also post instructions for drafting a sleeve. 
Thanks so much for following along. Hopefully we'll all learn a lot as I work through the process. 


Share this PostPin ThisShare on TumblrShare on Google PlusEmail This

Monday, June 9, 2014

Time To Vote!!

What a great month it was!!! So many wonderful hackers with so many wonderful ideas. Because of the large number of entries, there was a preliminary vote taken. The participating indie companies and the blog hosts voted, creating the short list that you see below.
Before you vote, be sure to click through and take a look at the finalists entries.

The Pattern Hacker Finalists are.....

3. Fa Sew La // Flouncy Mathilde Hack  
4. Gillian's "Go Anywhere" tank top 
5. Changing Your Stripes, Coco edition
7. Barbarajanemade's lace Anna top 
10. Fabric Tragic's Von Trapp Jedediah Lederhosen 
12. Zoe's Breastfeeding/Nursing Coco Hack 
14. Siobhan
17. Emily Hundt  
22. Elisalex hack- peplum top in pink!
23. Nettie dress maxi-dress by Dibulous

And now cast your vote!


Good luck everyone and thanks again for participating!!
Attention!!!!! 
*****It was brought to my attention that I made a mistake on the voting list. I added Zoe's Breast feeding Top twice. Please not that this should have been Siobhan's Peplum Top. Any votes that are placed for the second entry of Zoe's top will go to Siobhan. I am unable to edit the polling list and since a number of votes have already been cast, I would rather not delete the polling and start over. So once again, the second entry for Zoe's Top will be a vote for Siobhan's Peplum Top. So sorry for the mix up.  


Share this PostPin ThisShare on TumblrShare on Google PlusEmail This

Sunday, June 8, 2014

Sunday Night Reflections

cascada
The real voyage of discovery consists not in seeking new landscapes, but in having new eyes.
                                         Marcel Proust


Share this PostPin ThisShare on TumblrShare on Google PlusEmail This

Friday, June 6, 2014

Thrifty Thursday

Yep, it's Friday. We'll just leave it at that.
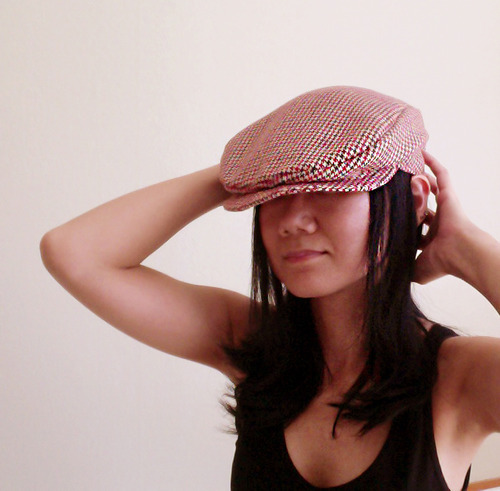
A while back, I saw this hat on Pinterest and immediately loved it.
                          Free pattern - newsboy hat
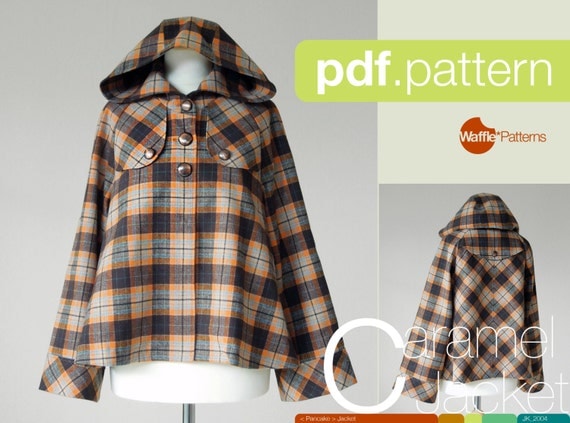
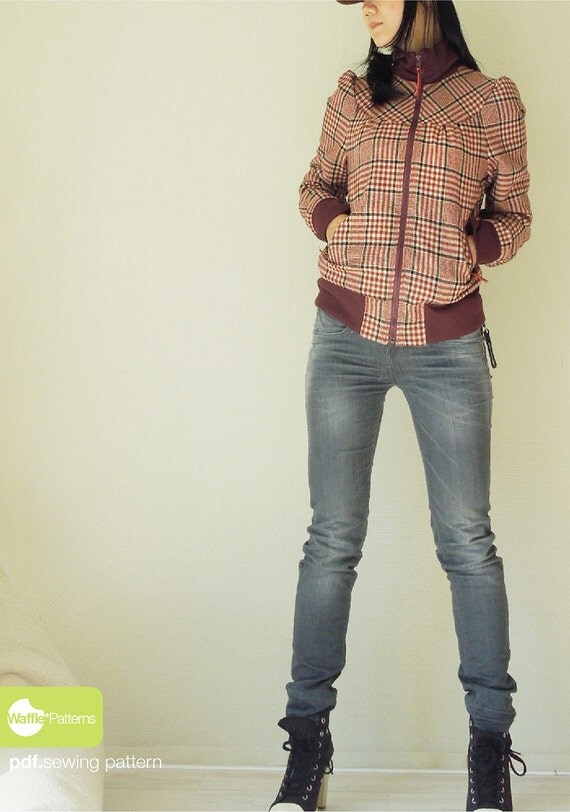
Even better, it's a free pattern!! The designer behind the pattern is Yuki who lives in the Netherlands. She has a number of patterns that she sells on Etsy. A couple of my favorites are;
This great jacket and....
          PDF sewing pattern. Women Short Duffle Jacket -Caramel- (size 34-42)
this super cute and feminine baseball jacket.
                  
I downloaded the Newsboy cap and here's my version.
I decided to have some fun with my fabric choice. After all, it is a Newsboy cap :) I found the fabric on Etsy here. 
Since I made the cap out of a quilting type cotton, I interfaced the entire cap. The brim needs to be a little stiffer, so I interfaced both sides of the brim and I interfaced one side with 2 layers of interfacing.
 The snap is not in the instructions, but I added the snap to help hold the brim and cap in place.
The cap is lined with another piece of cotton and I piped the brim and the back of the cap with a piece of striped fabric.
I really love my new hat!
The pattern comes in 2 sizes and I found the sizing to be very accurate, so be sure to measure your head prior to printing. I have a rather large head, so I printed out the larger size. The cap also fits my husband, so I plan to make a wool version for him. So you see, this pattern gives you the ability to even make a gift for your husband or son or whoever the guy might be ;) Yuki's instructions are very easy to follow and the graphics are great too.
You can find the free Newsboy Cap pattern here, http://wafflepatterns.tumblr.com/post/59417992932/free-sewing-pattern-newsboy-cap
Be sure to check out Yuki's Etsy shop! You can find it here,  https://www.etsy.com/shop/WafflePatterns


Share this PostPin ThisShare on TumblrShare on Google PlusEmail This