I love to wear capes, shawls, I'm not actually sure what to call them. As you can see, I have a number of them in my wardrobe. They are super simple to make, and make great gifts as well. I throw them on when I have quick errands to run, especially when I'll be in and out of the car. They are great when the weather is cold enough for something, but not a heavy coat, and they even work over a lighter coat when it is cold out.
The first one is reversible. On one side I did a cream wool and on the other side is a deep heathered green.
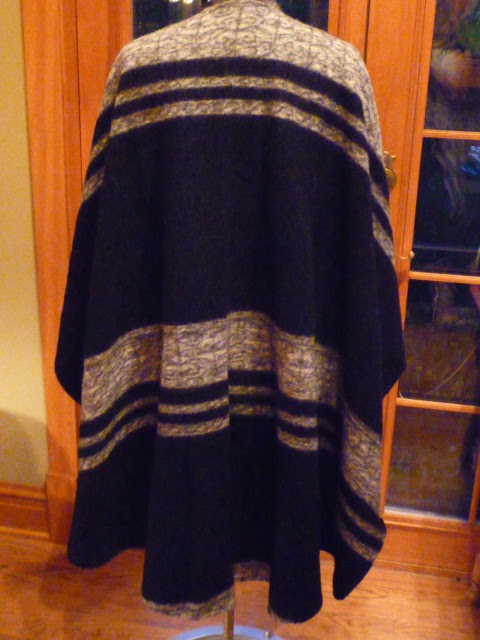
The second is a felted wool. This took absolutely no time. What took the most time was deciding where I wanted the stripes to fall. After I cut it, I turned the raw edge back and did a small zigzag stitch along the edge. The stitches melt into the fabric. I would try to show you, but you really can't see them.
The third piece is a double faced wool knit. To finish the edges I first of all rounded them and then cut a piece of boucle knit to bind the edges.
This pattern is really just a rectangle. Very simple. I am going to give you the measurements that I used as the piece is fairly one size fits all. If you are shorter, you will want to shorten this a bit. I am 5'6" tall. The piece falls just about at the back of my knee, a good length for me. So if you are taller, you may want to add a little to my measurement. First you will need 2 1/8 yards of fabric (a little more if you are taller or if you have a stripe that you want to fall a certain way). The fabric needs to be at least 54" wide. In the drawing below I show 27" wide. Remember, the fabric is folded in half.
On the folded edge, measure up 36" and measure in 3". The dotted line I have drawn in will be the front opening.You will want to cut on this line. For the black stripe and the reversible cream pieces, I wanted the side edges to not look so square, so I measured up 6" on both ends and did a slight curve that starts about midpoint of the ends and curves up to the selvage edge. If your fabric is exactly 54" wide and you don't like the selvage edge, just cut it off. A half inch won't make that much of a difference. At this point, cut out your fabric and finish the edges however you like. It's just that simple. In fact, you can draw this on your fabric with a chalk pencil. No need to make an actual pattern. If you would like a rounded edge like I did on the double faced wool, just draw it in. For that piece I rounded all four corners.
Enjoy your new shawl/cape/ruan, or whatever you want to call it :)
Rhonda


Thank you! I too love a cape/shawl, sometimes in a lightweight fabric to cut the AC chill indoors and sometimes to add another layer of warmth when it does start to get cold. You definitely made each one unique.
ReplyDeleteI cannot wait to go pick out fabric.. I am thinking to try a fleece that compliments my sons football team..Thank you for the inspiration.
ReplyDeleteI cannot wait to go pick out fabric.. I am thinking to try a fleece that compliments my sons football team..Thank you for the inspiration.
ReplyDeleteThese directions were much clearer than any I found elsewhere. A picture really is worth a thousand words. I will be making a short version of this in fleece for my stepmother to take with her when she goes into the hospital for her next round of chemotherapy. I ran across a suggestion that it keeps the patient warm without interfering with medical devices.
ReplyDeleteHi Mandy, I am so happy that I have been able to help in some small way. How wonderful of you to care so much to do this for her. It will be like a constant hug. Sending all my best wishes your way.
DeleteThis turned out well but here is what I learned for next time, when I make one for myself for outdoor wear. I didn't realize until halfway through that because of the way these fall when worn the inside is highly visible. I would have saved myself a lot of work if I had made it from two lightweight fabrics, using one as a lining, instead of fumbling about trying to make the hem neat and tidy. If I was a more accomplished seamstress the hem would probably have been neat and tidy to start with, but alas ....
DeleteHi Mindy, we are always our own worst critics :), at least I know I am mine. I'm sure that your piece is lovely. So glad you gave it a try.
DeleteThis is one of the easiest set of instructions I have seen. I wanted something pretty and different from the usual winter coat look for our annual holiday gathering that takes place in our Market Square. Outside. In the cold. Brrrr. Thanks Rhonda ��
ReplyDeleteThe nice thing about these is that you can wear multiple layers underneath and still look quite fabulous when you throw the wrap around your shoulders. Enjoy 😊
DeleteThank you. Going to try it soon. Bought a jersey knit fabric and hope to make one for a friend.
ReplyDelete