f

Sunday, June 30, 2013

Sunday Night Reflections


The Beauty Within

The Eternal, Eye that sees the whole
May better read the darkened soul,
And find, to outward sense denied,
The flower upon its inmost side.

                                                      John Greenleaf Whittier


Share this PostPin ThisShare on TumblrShare on Google PlusEmail This

Sleeves On Saturdays

Last week I posted the instructions on how to turn Butterick 5678 into a double-breasted jacket. You may have noticed that I left out the sleeve.
The sleeve is very basic, just a straight sleeve right off of the pattern, but with one difference, the cuff. This is actually a fold up cuff. The trim is just on the edge of the seam.
In the picture below I have unfolded the cuff. If you look at the picture above, the cuff sits smoothly against the sleeve. Have you ever hemmed up a skirt, a pair of pants, or a sleeve and the hem does not fit smoothly against the garment? What I would like to show you is how to make the fold up cuff and also how to never a problem with the hem being too tight against the garment.
 I am showing you the sleeve with a cuff, but this translates to a tapered skirt or a tapered pant leg.
 Begin with the tapered sleeve.
 Add the amount that you would like for the cuff.
 Extend the sleeve.
 Fold up the cuff.
 The extended cuff is folded against the sleeve.
The picture below is the back of the sleeve pattern. There is a little extension and that is for the hem. The hem is folded up against the sleeve.
With everything folded, cut on the seam lines of the sleeve.
Unfold and you will see a zigzag pattern to the cuff and hem area. If you take notice of the extended lines that I drew in, the difference is very obvious.
Now the cuff will fit smoothly around the sleeve and the hem will not pucker on the inside of the sleeve.
Hope this helps with future projects.
Rhonda


Share this PostPin ThisShare on TumblrShare on Google PlusEmail This

Saturday, June 29, 2013

Fabulous Free Pattern Friday

Once again, I have not completely lost my marbles!! I know what day it is, but I just have to post this skirt. If  a garment could have feelings, this one would most definitely feel like the unwanted child. I actually did something with this fabric last summer for a FFPF post. I liked the design, but not in this fabric, so it was put aside. A few weeks ago, I took the project out because I really like the fabric and I had a new idea. I finished the skirt and it has been sitting, waiting for me to post it for at least the last three weeks. So rather than leave it sitting for another week, I'm posting it today.
A few years ago I gave a presentation on working with border prints. I absolutely love border prints because there are so many things that can be done with them. Maybe I should repeat that presentation here on the blog. 
As you can see, the fabric is a border print. The skirt only has 1 seam and that is in the box pleat that is on the left side of the skirt. Below you can see the box pleat. 
On the right side is a dart which gives a smooth finish to that side.
To hold the skirt in place around the waist, I simply tore 2 strips of denim, stitched them and then stitched them in place. Their placement also helps to hold the box pleat in place.
 In the picture below you have a better view of the inside of the box pleat.
The skirt laying flat. Now you can see how the one side has been pinched in as a dart and gives shape while the other side is straight.
To develop this skirt, you will need your hip measurement and the length that you would like your skirt to be.   Add 22" to your hip measurement for the box pleat. As for the length measurement, add 3" for the waist of the skirt. So, as an example, if you hips are 40" wide, add 22" and this will be 62" that you will need for the width of your skirt. Add another 1/2" for the seam allowance. For the length, if you would like a 26" finished length, add 3". Now, I was super lazy and did not hem my skirt. The selvedge edge was so nice that I just left it as it was. But if you would like to hem your skirt, be sure to add to your length measurement for the hem allowance.
Once you have the piece cut, sew the 1 seam. Fold in the box pleats. Now try on the skirt and pinch in the right side do that it will form a long dart. Once you have sewn in the dart, fold down the 3" that were added for the waist and press. Unfold the the 3" fold and then match the edge of your fabric to the pressed fold line. Press and then fold over and stitch in place. This will give you a 1 1/2" finished edge at the top of your skirt. You can see my finished waist in the picture below.
Cut 2 ties out of whatever fabric or trim that you wish. Make sure that they are long enough to wrap around you waist and tie in a bow. Sew the ties to either side of the fold of the box pleat. As you can see, I did a little top stitching to my denim. I thought it would add a nice touch.
The skirt is finished.
This is a great way to use a border print, especially one that you would rather not do a lot of cutting into the design. 
I'm curious to see if anyone will recognize the denim and fabric combination in something else that I have posted this past month. There will be a small little prize if anyone can guess, just a little notion that I love to use. So guess away!!!! 
Enjoy your Saturday everyone!
Rhonda


Share this PostPin ThisShare on TumblrShare on Google PlusEmail This

Friday, June 28, 2013

The Simplified Pillowcase Instructions

As I mentioned a few days ago, I wanted to do an update to the pillowcase instructions as the instructions that I've posted make the process much more complicated than it needs to be. So here we go.
What will remain the same are the dimensions of the cut pieces.
 For ONE regular size pillowcase you need:
1 - 25"x 40" piece of fabric ("main")
1 - 1O"x 40" piece ,of fabric ("trim")
1 - 2" X 40" piece of fabric ("accent")
Note: all seam allowances are 1/4"
Begin by folding the 2" accent piece in half lengthwise.
 And press.
 Fold the 10" trim piece in half lengthwise and press.
 Lay the 2" (which is now 1" wide since it has been folded in half) accent piece on the main pillowcase fabric,
 and lay the 10" trim piece(which is now 5" wide since it has been folded in half) on top of the accent piece.  
In the picture below you can see that the main fabric is on the bottom. Next is the accent piece and finally the trim piece is on top.
Sew or serge all 3 pieces together.
 In the picture below I am showing that the 3 pieces are now together.
I like to edge stitch the seam. This is not necessary, I just think it gives a clean finish and helps to hold down the seam allowance.
 My edge stitch is completed and now I am ready to fold the entire piece in half lengthwise.
I then sew a seam across the top of the case, and then a seam down the side. I like to sew the seams rather than just serge them as I like to do a good back stitch at the end of the side seam. Once I have stitched the 2 seams, I then do a serged edge. If you do not have a serger, you can pink the edges are do a zigzag stitch just to keep the fabric from fraying too much.
The inside of my finished pillowcase.
At the end of the side seam, I like to put just a touch of fray check on the serged stitches.
The finished pillowcase. The pillowcases really take no time at all if you do them this way, 5 to 10 minutes max of sewing time.
 All folded and ready to go.
If you are planning to make quite a few, what I like to do is stack my fabric and cut 3 or 4 at one time.
I hope this simplifies the process. If you are planning to join in on the pillowcase drive for the Mary Bridge Children's Hospital, let me know, sewbussted@yahoo.com. You can see all the posts about this project here, http://www.rhondabuss.blogspot.com/search/label/Mary%20Bridge


Share this PostPin ThisShare on TumblrShare on Google PlusEmail This

Thursday, June 27, 2013

Butterick 5678 Made Into a Jacket with a Sailor Collar

At this point you may think I've done just about all I can do with Butterick 5678. If you are new to the blog or would just like to refresh your memory, you can see all the collars and garments that I have done using just this pattern and a little bit of drafting here, http://www.rhondabuss.blogspot.com/2013/06/the-many-faces-of-butterick-5678.html .
This week I decided to do the shirt as a jacket. If you look closely, you can see that there is a little shape on the side seams, but over all the jacket is rather boxy. I also added pockets. As for the collar, that post should be up on the Sew News blog soon. We've had a few technical problems this week so it's a little late. As soon as the post is up though, I will let you know.
 There is a princess line seam on the front of the jacket, but the back has no seams.
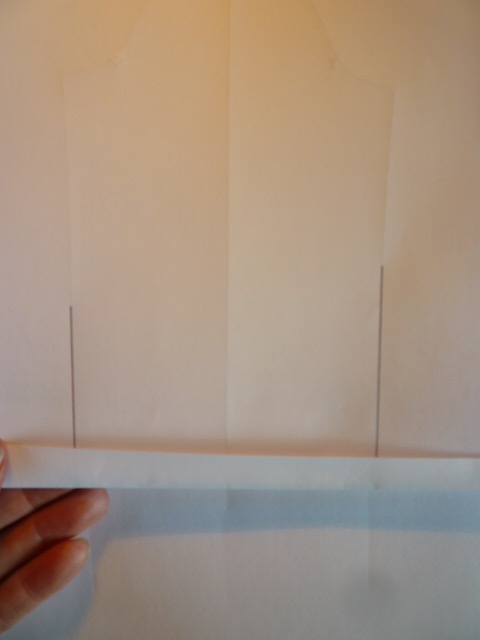
To create the boxy back, the process is quite simple. In the picture below you can see where I overlapped the seam allowances and this created the new back pattern piece. In order for the jacket to have a little shape, I left the curve on the side seam.
 To create the front, once again, overlap the seam allowances. Rather than overlapping them at the shoulder and the hem as we did for the back, the seam allowances are overlapped at the bust point and the hem. This will leave a dart at the shoulder.
I wanted to have side panel pockets so I needed to split my pattern. Look at the picture below and you will see my ruler sitting on what would have been the seam line. Because I wanted a boxy fit to the jacket, I eliminated the shaping that the waist dart would have given.
The pattern pieces once they have been split apart. You can see that the shoulder dart is still in the pattern, but there is no shaping at the waist. I also decided to make my jacket double breasted. In the picture below you can see that my grainline is at center front. The extension for the double breast will measure the same amount as from center front to the seam line. The center front pattern piece will also be the facing so you will cut 4, 2 fronts and 2 facings.
Now, to create the pocket. Look closely at the picture below and you will see that the pocket bows out a bit from the garment. This makes it easy to put your hand in the pocket without pulling on the main body of the garment.
To develop the pocket pattern, measure down approximately 2 1/2" from the waistline on the side seam and place a mark. The pocket can be any shape you wish, I just chose to have a curve to my pocket, so if this is what you would like, simply curve the line up to the princess line seam.
 Now, measure out 1/2" on the side seam,
 and blend this line back down to where the pocket will end. In this case the bottom of the pattern.
Remove the pocket pattern from the drafting. You can see that the pocket matches the side front panel everywhere expect for the side seam.
 When the pocket is sewn to the garment it will bow out at the opening.
The final patterns. You will need to add the hem allowance to the pocket, but do not add the hem allowance to the side front panel. This will cut down on bulk at the hem. You will need to cut 4 pockets, 2 for each side. Remember that the pocket needs to have a backing. I also placed notches on the side front pattern piece so that I would know where to match my pocket.
In my quest to use what I have, I went through all of my buttons and believe me that is a lot! I had nothing that was just the right button until I had the idea to layer my buttons. If you look closely you'll see that there is a large black button. On top of that button is a red button and then finally, the small white button that fit perfectly into the well of the red button. I was so happy!
I did line my jacket. There's nothing better than an unexpected lining!! 
One pattern can go a long way in creating an entire wardrobe. 
Hope you'll give it a try!
Rhonda


Share this PostPin ThisShare on TumblrShare on Google PlusEmail This